DOOR / HATCH POWER BACK DOOR DRIVE UNIT REMOVAL
CAUTION / NOTICE / HINT
- HINT:
- ·
Use the same procedure for the RH and LH sides.
·The procedure below is for the LH side.
PROCEDURE

 67939B
1.REMOVE BACK DOOR CENTER GARNISH
67938A
2.REMOVE BACK DOOR SIDE GARNISH LH
67937B
3.REMOVE BACK DOOR SIDE GARNISH RH
- HINT:
-
Use the same procedure described for the LH side.
69196
4.REMOVE BACK DOOR GRIP BASE
69195A
5.REMOVE BACK DOOR GRIP
- HINT:
-
Use the same procedure described for the back door grip base.
67750
6.REMOVE BACK DOOR TRIM BOARD ASSEMBLY
7.REMOVE POWER BACK DOOR UNIT ASSEMBLY LH
- CAUTION:
-
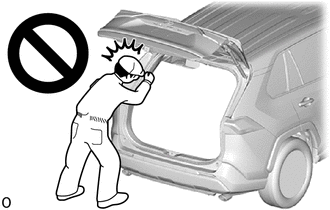
- ·
Do not perform work if the back door is not securely supported.
·The back door could fall, resulting in injury.
- NOTICE:
- ·
Avoid touching the piston rod as much as possible to prevent foreign matter from attaching to it. Be sure to hold the cylinder while servicing.
·Do not wear cotton gloves or other similar materials when handling the piston rod. Fibers may attach to the rod and result in gas leaks.
·Do not apply any horizontal load to the door stay in order to prevent the piston rod from deforming.
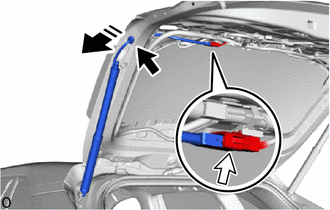

|
Grommet |

|
Connector |

|
Remove in this Direction |
Disconnect the connector.
Disconnect the grommet and pull out the power back door unit assembly LH harness as shown in the illustration.
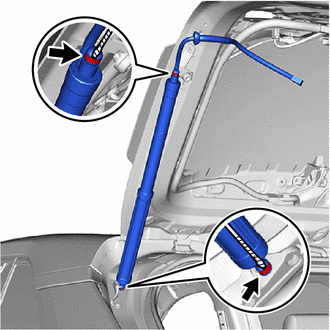

|
Protective Tape |
Using a screwdriver with its tip wrapped with protective tape, slightly raise the 2 stop rings as shown in the illustration.
Detach the 2 ball joints to remove the power back door unit assembly LH.
- NOTICE:
- ·
Remove the power back door unit assembly LH while supporting the back door by hand.
·Remove the back door stay assembly while supporting the back door stay assembly by hand.
68946
8.REMOVE BACK DOOR UPPER DAMPER STAY BRACKET LH
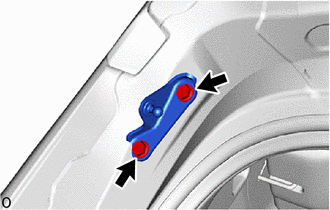
Remove the 2 bolts and back door upper damper stay bracket LH.
68948
9.REMOVE BACK DOOR LOWER DAMPER STAY BRACKET LH
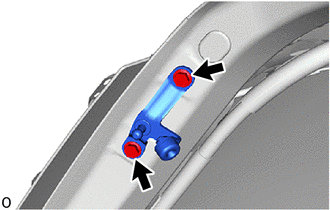
Remove the 2 bolts and back door lower damper stay bracket LH with back door stay stopper.
68984
10.REMOVE BACK DOOR STAY STOPPER
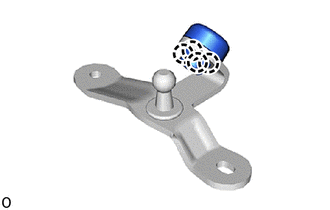
Detach the claw and remove the back door stay stopper from the back door lower damper stay bracket LH.