HEATING / AIR CONDITIONING AIR CONDITIONING UNIT(for A25B-FXS) REASSEMBLY
PROCEDURE

 87114B
1.INSTALL HEATER COVER
88625
2.INSTALL NO. 1 COOLER THERMISTOR
88501
3.INSTALL NO. 1 COOLER EVAPORATOR SUB-ASSEMBLY
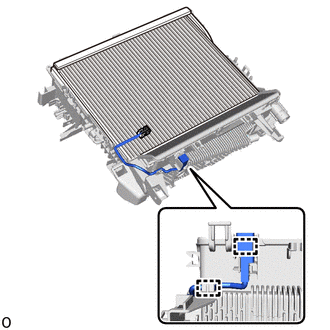
Install the No. 1 cooler evaporator sub-assembly with No. 1 cooler thermistor to the upper heater case.
Attach the guide.
While inserting the No. 1 cooler thermistor into the guide, attach the guide and claw as shown in the illustration.
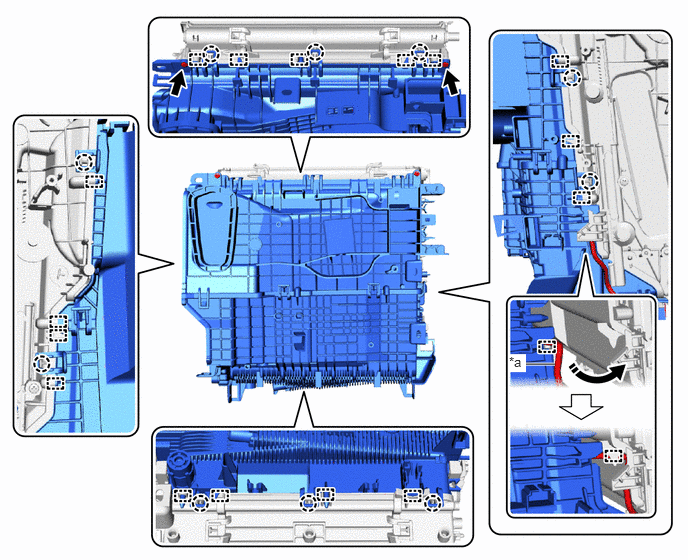
| *a | No. 1 Cooler Thermistor Lead Wire | - | - |

|
Secure the lead wire between the guide | - | - |
Install the upper heater case with No. 1 cooler evaporator sub-assembly to the lower heater case with the 2 screws.
88515
4.INSTALL COOLER EXPANSION VALVE
Remove the vinyl tape from the No. 1 cooler evaporator sub-assembly and cooler expansion valve.
Sufficiently apply compressor oil to 2 new O-rings and the fitting surfaces of the No. 1 cooler evaporator sub-assembly.
- Compressor Oil:
ND-OIL 11 or equivalent
- NOTICE:
-
Do not use any compressor oil other than ND-OIL 11 or equivalent. If any compressor oil other than ND-OIL 11 or equivalent is used, compressor motor insulation performance may decrease, resulting in leakage of electric power.
Install the 2 O-rings to the No. 1 cooler evaporator sub-assembly.
- NOTICE:
-
Keep the O-rings and O-ring fitting surfaces free of foreign matter.
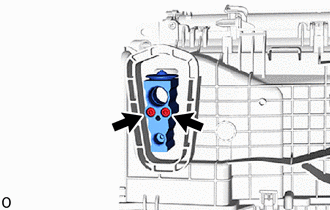
Using a 4 mm hexagon socket wrench, install the cooler expansion valve with the 2 hexagon bolts.
- Torque:
- 3.5 N*m (36 kgf*cm, 31 in.*lbf)
- NOTICE:
-
Make sure not to cut the O-ring while installing it. (Cut O-rings cannot be installed)
88899L
5.INSTALL COOLING UNIT PARTS
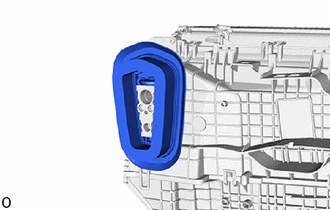
Install the cooling unit parts.
87107A
6.INSTALL HEATER RADIATOR UNIT SUB-ASSEMBLY
87124B
7.INSTALL HEATER CLAMP
88897M
8.INSTALL HEATER PIPE GROMMET
87050D
9.INSTALL NO. 2 AIR CONDITIONING RADIATOR DAMPER SERVO SUB-ASSEMBLY
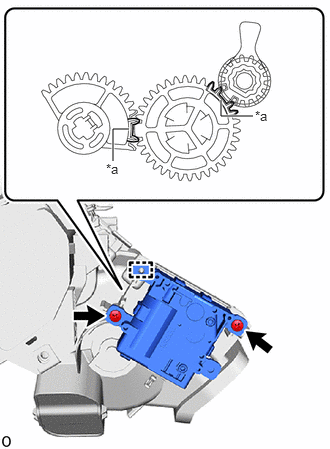
| *a | Gear Alignment Part |
Align the gear alignment part of the heater case with the gear alignment part of the No. 2 air conditioning radiator damper servo sub-assembly as shown in the illustration.
Attach the guide.
Install the No. 2 air conditioning radiator damper servo sub-assembly with the 2 screws.
87050C
10.INSTALL NO. 1 AIR CONDITIONING RADIATOR DAMPER SERVO SUB-ASSEMBLY
82210K
11.INSTALL AIR CONDITIONING HARNESS ASSEMBLY
Attach the clamp and guide.
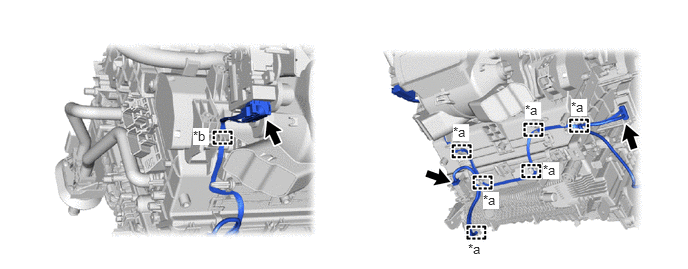
| *a | Clamp | *b | Guide |
Connect each connector to install the air conditioning harness assembly.
88539J
12.INSTALL DRAIN COOLER HOSE
88625Q
13.INSTALL COOLER THERMISTOR (ROOM TEMPERATURE SENSOR)
88897P
14.INSTALL ASPIRATOR
87201B
15.INSTALL NO. 2 AIR DUCT SUB-ASSEMBLY
87130D
16.INSTALL BLOWER ASSEMBLY