 |
Apply protective tape, as shown in the illustration.
BRAKE BOOSTER > REMOVAL |
| 1. DRAIN BRAKE FLUID |
| 2. REMOVE BRAKE MASTER CYLINDER SUB-ASSEMBLY |
| 3. DISCONNECT VACUUM HOSE ASSEMBLY |
Slide the clip and disconnect the vacuum hose from the check valve.
| 4. DISCONNECT BRAKE BOOSTER CONNECTOR |
Disconnect the 2 brake booster connectors from the brake booster.
| 5. REMOVE FRONT DOOR SCUFF PLATE LH |
| 6. REMOVE COWL SIDE TRIM BOARD LH |
| 7. REMOVE INSTRUMENT SIDE PANEL LH |
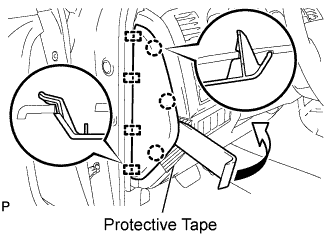
|
Apply protective tape, as shown in the illustration.
Using a moulding remover, disengage the 3 claws and 4 guides and remove the side panel.
| 8. REMOVE HOOD LOCK CONTROL LEVER SUB-ASSEMBLY |
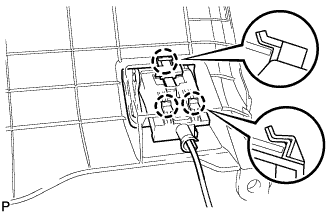 |
Disengage the 3 claws.
Disconnect the hood lock control cable and remove the hood lock control lever sub-assembly.
| 9. REMOVE LOWER INSTRUMENT PANEL FINISH PANEL SUB-ASSEMBLY LH |
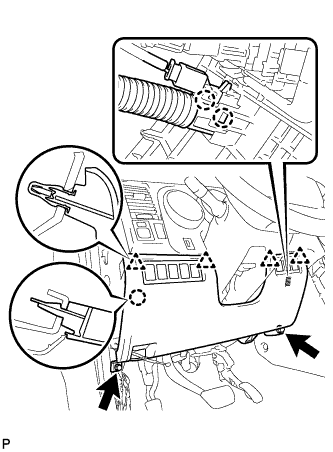 |
Remove the 2 <A> bolts.
Disengage the 4 clips and claw.
Disengage the 2 claws and separate the sensor.
Disconnect the connectors and remove the finish panel.
| 10. REMOVE NO. 1 INSTRUMENT PANEL SAFETY PAD INSERT |
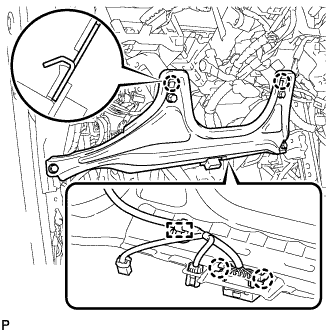 |
Remove the 4 <A> bolts.
Disengage the 2 claws.
Disconnect the connector and clamp and remove the safety pad insert.
| 11. REMOVE PUSH ROD PIN |
Remove the clip and push rod pin.
| 12. REMOVE BRAKE BOOSTER ASSEMBLY |
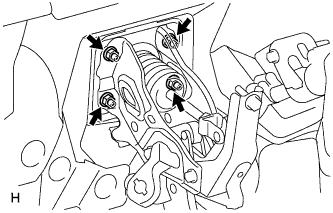 |
Remove the 4 nuts, and then pull out the brake booster.
Remove the gasket from the brake booster.
Loosen the lock nut and then remove the clevis.
| 13. REMOVE BRAKE VACUUM CHECK VALVE ASSEMBLY |