 |
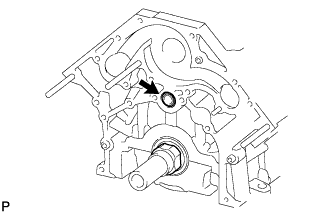
Apply a light coat of engine oil to a new O-ring and install it to the cylinder block.
OIL PUMP > INSTALLATION |
| 1. INSTALL OIL PUMP ASSEMBLY |
|
Apply a light coat of engine oil to a new O-ring and install it to the cylinder block.
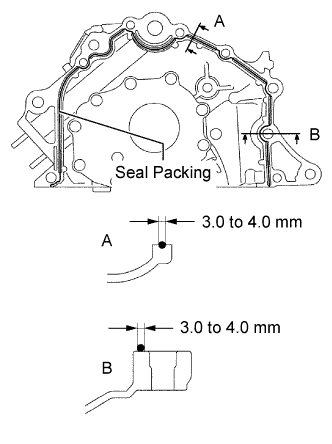 |
Apply seal packing to the oil pump as shown in the illustration.
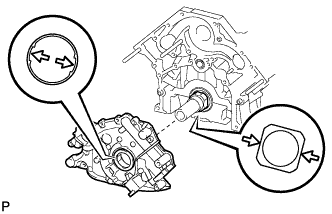 |
Align the oil pump's drive rotor spline and the crankshaft as shown in the illustration. Install the spline and oil pump to the crankshaft.
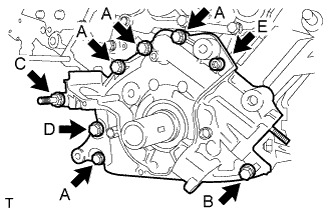 |
Install the oil pump with the 7 standard bolts and 6 mm hexagon wrench bolt. Uniformly tighten the bolts in several steps.
| Item | Bolt Head Size | Length |
| Bolt A | 12 mm | 35 mm (1.38 in.) |
| Bolt B | 12 mm | 50 mm (1.97 in.) |
| Bolt C | 14 mm | 103 mm (4.06 in.) |
| Bolt D | 14 mm | 44 mm (1.73 in.) |
| Bolt E | 6 mm hexagon | 28 mm (1.10 in.) |
| 2. INSTALL OIL STRAINER SUB-ASSEMBLY |
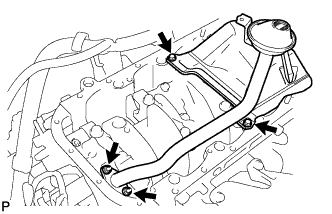 |
Install a new gasket and the oil strainer with the 2 bolts and 2 nuts.
| 3. INSTALL OIL PAN SUB-ASSEMBLY |
Remove any old packing (FIPG).
Using a gasket scraper, remove all the old packing (FIPG) from the gasket surfaces and sealing groove. Thoroughly clean all components.
Using a non-residue solvent, clean both sealing surfaces.
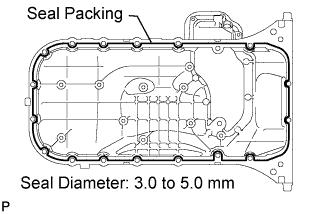 |
Apply seal packing to the No. 1 oil pan as shown in the illustration.
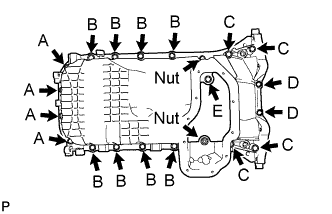 |
Temporarily install the No. 1 oil pan with the 18 bolts, 2 nuts.
| Item | Bolt Head Size | Length |
| Bolt A | 10 mm | 22 mm (0.866 in.) |
| Bolt B | 12 mm | 25 mm (0.984 in.) |
| Bolt C | 12 mm | 60 mm (2.36 in.) |
| Bolt D | 10 mm | 35 mm (1.38 in.) |
Uniformly tighten the bolts and nuts in several passes.
| 4. INSTALL NO. 2 OIL PAN SUB-ASSEMBLY |
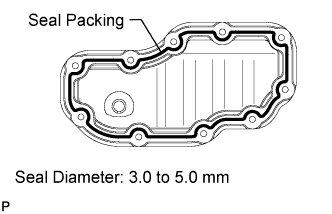 |
Apply seal packing to the No. 2 oil pan as shown in the illustration.
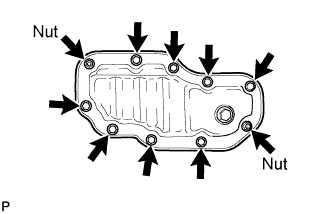 |
Install the No. 2 oil pan with the 8 bolts and 2 nuts. Uniformly tighten the bolts and nuts in several passes.
| 5. INSTALL CRANKSHAFT POSITION SENSOR |
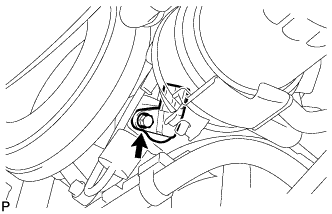 |
Install the crankshaft position sensor with the bolt.
Connect the crankshaft position sensor connector.
| 6. INSTALL OIL FILTER BRACKET SUB-ASSEMBLY |
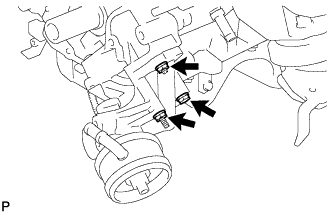 |
Install a new gasket to the oil filter bracket.
Install the oil filter bracket with the 2 bolts and nut.
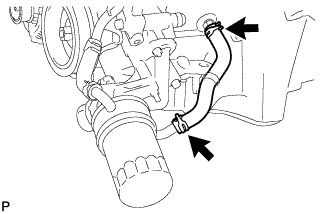 |
Connect the oil cooler hoses to the oil cooler.
Connect the oil pressure sender gauge connector.
| 7. INSTALL OIL FILTER ASSEMBLY |
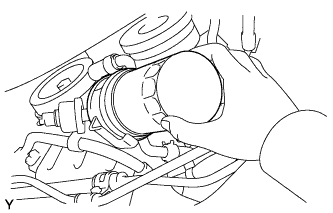 |
Clean and check the oil filter installation surface.
Apply clean engine oil to the gasket of a new oil filter.
Lightly screw the oil filter into place by hand. Tighten it until the gasket contacts the seat.
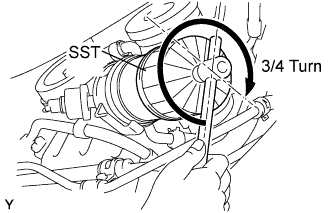 |
Using SST, tighten the oil filter. Depending on the work space available, choose from the following.
If enough space is available, use a torque wrench to tighten the oil filter.
If enough space is not available to use a torque wrench, tighten the oil filter a 3/4 turn by hand or with a common wrench.
| 8. INSTALL ENGINE OIL LEVEL DIPSTICK GUIDE |
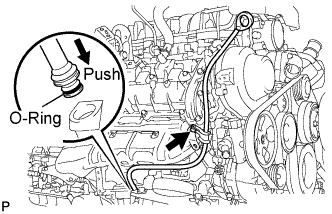 |
Apply a light coat of engine oil to a new O-ring.
Install a new O-ring to the guide.
Install the dipstick guide with the bolt.
Install the dipstick.
| 9. INSTALL CRANKSHAFT TIMING PULLEY |
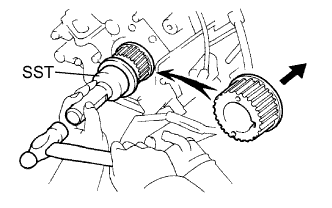 |
Align the timing pulley set key with the key groove of the pulley.
Using SST and a hammer, tap in the timing pulley with the flange side facing inward.
| 10. INSTALL TIMING BELT |
Install the timing belt (Click here).
| 11. INSTALL ENGINE ASSEMBLY |
Install the engine assembly (Click here).
| 12. CONNECT CABLE TO NEGATIVE BATTERY TERMINAL |