 |
Remove the 4 bolts.
FRONT DIFFERENTIAL CARRIER OIL SEAL (for 4WD) > REPLACEMENT |
| 1. DRAIN DIFFERENTIAL OIL |
Stop the vehicle on a level place.
for Front Differential:
Using a 10 mm hexagon wrench, remove the filler plug and gasket.
Using a 10 mm hexagon wrench, remove the drain plug and gasket, and drain the oil.
Using a 10 mm hexagon wrench, install a new gasket and the drain plug.
for Rear Differential:
Using a 10 mm hexagon wrench, remove the filler plug and gasket.
Using a 10 mm hexagon wrench, remove the drain plug and gasket, and drain the oil.
Using a 10 mm hexagon wrench, install a new gasket and the drain plug.
| 2. REMOVE FRONT DIFFERENTIAL CARRIER ASSEMBLY |
Remove the differential carrier (Click here).
| 3. REMOVE FRONT DIFFERENTIAL TUBE ASSEMBLY |
|
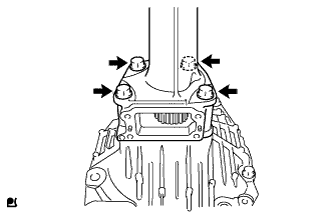
Remove the 4 bolts.
Using a plastic-faced hammer, remove the differential tube.
| 4. REMOVE FRONT DRIVE PINION COMPANION FLANGE FRONT NUT |
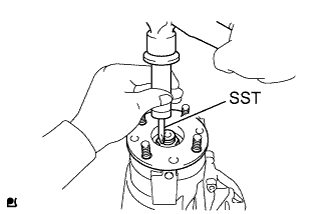 |
Using SST and a hammer, unstake the nut.
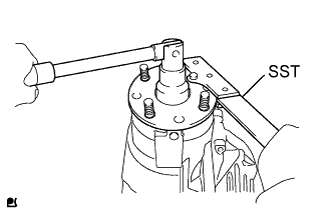 |
Using SST to hold the companion, remove the nut.
| 5. REMOVE FRONT DRIVE PINION COMPANION FLANGE FRONT SUB-ASSEMBLY |
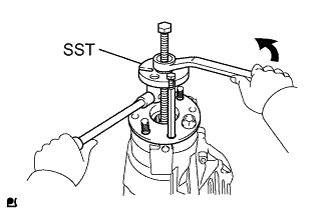 |
Using SST, remove the companion flange from the differential carrier.
| 6. REMOVE FRONT DIFFERENTIAL CARRIER OIL SEAL |
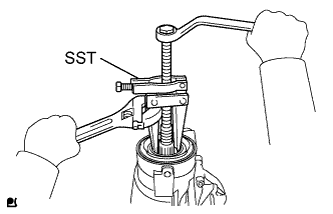 |
Using SST, remove the oil seal.
| 7. REMOVE FRONT DIFFERENTIAL DRIVE PINION OIL SLINGER |
| 8. REMOVE FRONT DIFFERENTIAL CROSS SHAFT BEARING RETAINER |
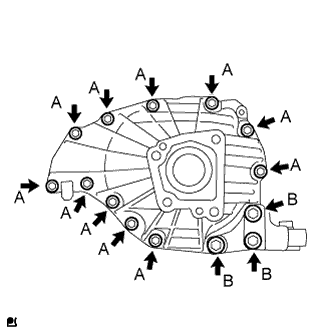 |
Remove the bolts B and front differential front support assembly LH.
Remove the bolts A.
Using a plastic-faced hammer, tap out the bearing retainer.
| 9. REMOVE FRONT DIFFERENTIAL CASE |
Remove the differential case from the differential carrier.
| 10. REMOVE DIFFERENTIAL DRIVE PINION |
Set the differential carrier to an overhaul stand as shown in the illustration.
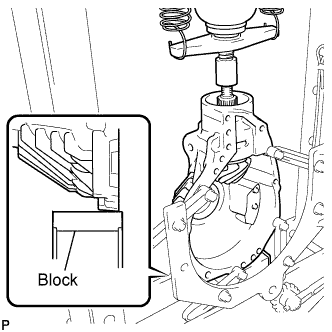 |
Using a press, press out the drive pinion.
| 11. REMOVE FRONT DRIVE PINION FRONT RADIAL BALL BEARING |
Remove the bearing (inner race) from the differential carrier.
| 12. REMOVE FRONT DIFFERENTIAL DRIVE PINION BEARING SPACER |
| 13. INSTALL FRONT DIFFERENTIAL DRIVE PINION BEARING SPACER |
Install a new bearing spacer.
| 14. TEMPORARILY INSTALL DIFFERENTIAL DRIVE PINION |
| 15. INSTALL FRONT DIFFERENTIAL CASE |
| 16. INSTALL FRONT DIFFERENTIAL CROSS SHAFT BEARING RETAINER |
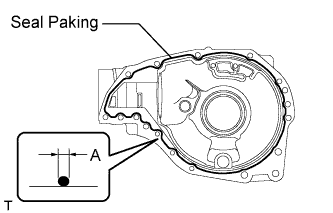 |
Remove any old FIPG material and be careful not to drop oil on the contact surfaces of the differential carrier and side bearing retainer.
Clean the contact surfaces with any residual FIPG material using gasoline or alcohol.
Apply seal packing to the differential carrier as shown in the illustration.
|
Install the front differential cross shaft bearing retainer and front differential front support assembly LH with the 11 bolts (A), and 3 bolts (B).
| 17. INSTALL FRONT DRIVE PINION FRONT RADIAL BALL BEARING |
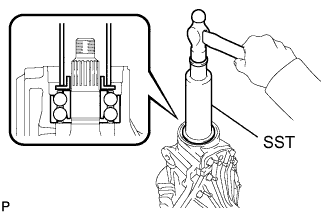 |
Using SST and a hammer, lightly tap in the bearing (inner race) to install it.
| 18. INSTALL FRONT DIFFERENTIAL DRIVE PINION OIL SLINGER |
| 19. INSTALL FRONT DIFFERENTIAL CARRIER OIL SEAL |
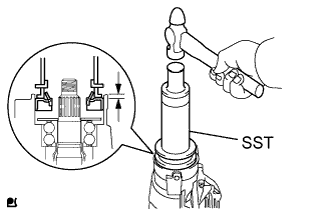 |
Using SST and a hammer, tap in a new oil seal.
Coat the lip of the oil seal with MP grease.
| 20. INSTALL FRONT DRIVE PINION COMPANION FLANGE FRONT SUB-ASSEMBLY |
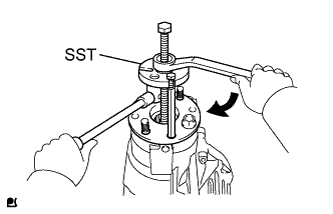 |
Using SST, install the companion flange.
| 21. INSPECT DIFFERENTIAL DRIVE PINION PRELOAD |
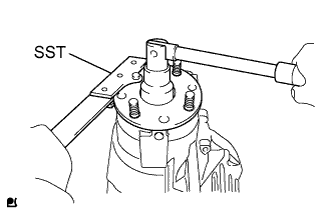 |
Using SST to hold the companion flange.
Coat the threads of a new nut with hypoid gear oil.
Install the nut by tightening it until the standard preload is reached.
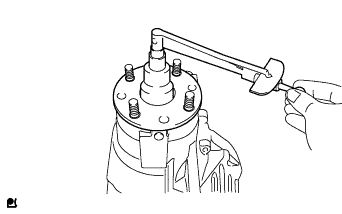 |
Using a torque wrench, measure the preload of the backlash between the drive pinion and ring gear.
| Bearing | Specified Condition |
| New | 3.11 to 3.61 N*m (32 to 36 kgf*cm, 28 to 31 in.*lbf) |
| Reused | 2.14 to 2.45 N*m (22 to 24 kgf*cm, 19 to 21 in.*lbf) |
| 22. INSPECT TOTAL PRELOAD |
|
With the drive pinion contacting the tooth side of the ring gear, use a torque wrench to measure the total preload.
| 23. STAKE FRONT DRIVE PINION COMPANION FLANGE FRONT NUT |
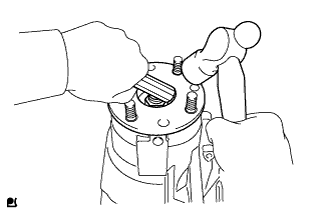 |
Using a chisel and hammer, stake the nut.
| 24. INSTALL DIFFERENTIAL SIDE GEAR INTER SHAFT SUB-ASSEMBLY |
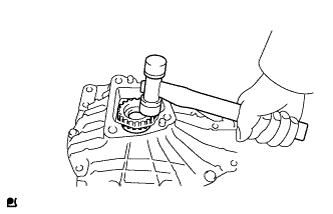 |
Install a new snap ring onto the side gear inter shaft.
Using a plastic-faced hammer, install the side gear inter shaft onto the differential case.
Check that there is 2 to 3 mm (0.0788 to 0.118 in.) of play in the axial direction.
Check that the side gear inter shaft does not come out when trying to pull it out by hand.
| 25. INSTALL FRONT DIFFERENTIAL TUBE ASSEMBLY |
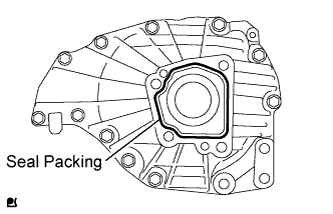 |
Remove any old FIPG material and be careful not to drop oil on the contact surfaces of the differential tube and bearing retainer.
Clean the contact surfaces with any residual FIPG material using gasoline or alcohol.
Apply seal packing to the bearing retainer as shown in the illustration.
Install the differential tube onto the bearing retainer.
|
Clean the threads of 4 new bolts and the retainer bolt holes with toluene or trichloroethylene.
Apply adhesive to 2 to 3 threads of each bolt end.
Install the 4 bolts.
| 26. INSTALL FRONT DIFFERENTIAL CARRIER ASSEMBLY |
Install the front differential carrier (Click here).
| 27. ADD DIFFERENTIAL OIL |
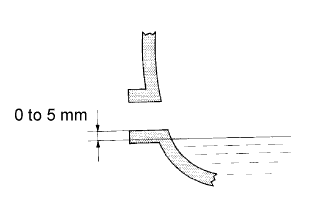 |
Add differential oil so that the oil level is between 0 to 5 mm (0 to 0.197 in.) from the bottom lip of the differential filler plug hole.
| Item | Oil Type and Viscosity |
| Front differential | Toyota Genuine Differential gear oil LT 75W-85 GL-5 or equivalent. |
| Rear differential |
| Specified Condition | |
| 2.05 to 2.15 liters (2.2 to 2.3 US qts., 1.8 to 1.9 Imp. qts.) |
| Specified Condition | |
| 1.50 to 1.60 liters (1.6 to 1.7 US qts., 1.3 to 1.4 Imp. qts.) |
for Rear Differential:
Using a 10 mm hexagon wrench, install a new gasket and the filler plug.
for Front Differential:
Using a 10 mm hexagon wrench, install a new gasket and the filler plug.
| 28. INSPECT FOR OIL LEAK |