 |
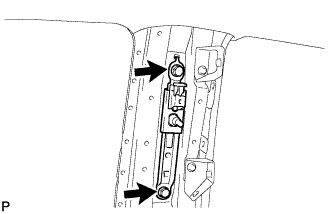
Align the front shoulder belt anchor adjuster positioning claw with the hole, and install the front shoulder belt anchor adjuster with the 2 bolts.
- Torque:
- 42 N*m{ 428 kgf*cm , 31 ft.*lbf }
FRONT SEAT OUTER BELT ASSEMBLY > INSTALLATION |
| 1. INSTALL FRONT SHOULDER BELT ANCHOR ADJUSTER ASSEMBLY |
|
Align the front shoulder belt anchor adjuster positioning claw with the hole, and install the front shoulder belt anchor adjuster with the 2 bolts.
| 2. INSTALL FRONT SEAT OUTER BELT ASSEMBLY |
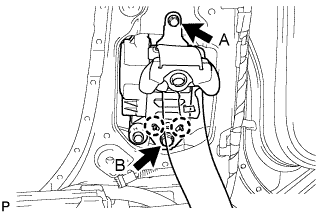 |
Align the claws on the body with the front seat outer belt retractor positioning holes.
Install the front seat outer belt with the 2 bolts.
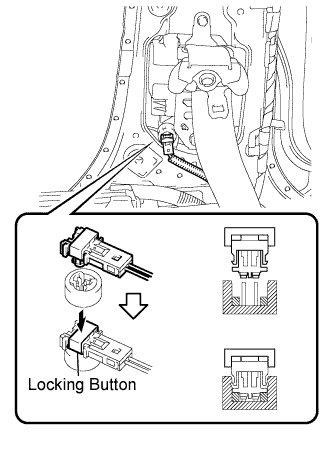 |
Connect the pretensioner connector as shown in the illustration.
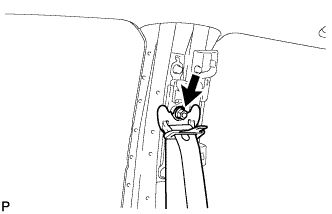 |
Install the shoulder anchor to the shoulder belt anchor adjuster with the nut.
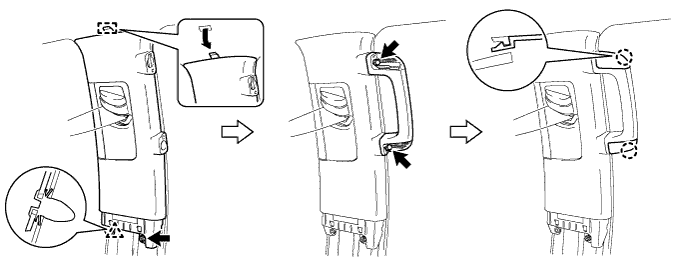
| 3. INSTALL CENTER PILLAR GARNISH RH |
Pass the front seat outer belt floor anchor through the center pillar garnish.
Engage the clip and the guide to install the center pillar garnish.
Install the bolt.
Install the assist grip with the 2 bolts.
Engage the 2 claws to install the 2 assist grip plugs.
| 4. INSTALL LOWER CENTER PILLAR GARNISH RH |
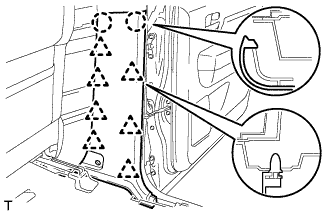 |
Engage the 7 clips and 2 claws to install the center pillar garnish.
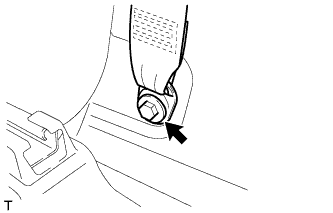 |
Install the front seat outer belt assembly RH with the bolt.
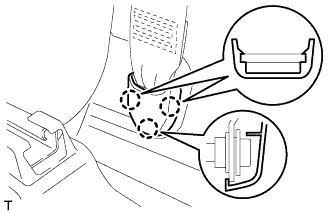 |
Engage the 3 claws to install the cover.
| 5. INSTALL REAR DOOR OPENING TRIM WEATHERSTRIP RH |
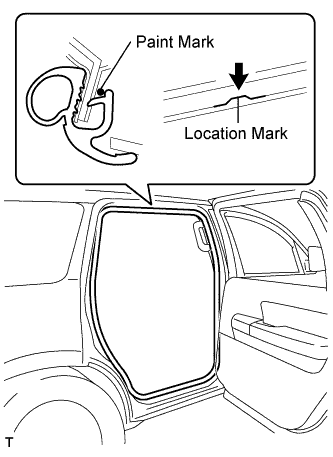 |
Align the location mark with the paint mark first, and install the rear door opening trim weatherstrip, as shown in the illustration.
| Area | Color |
| RH side | Pink |
| LH side | Purple |
| 6. INSTALL REAR DOOR SCUFF PLATE RH |
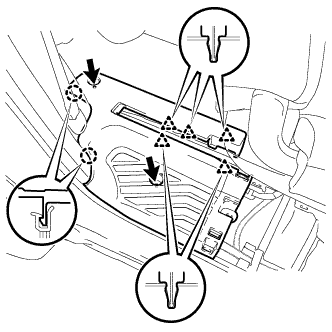 |
Engage the 2 claws and 5 clips to install the rear door scuff plate.
Install the 2 bolts.
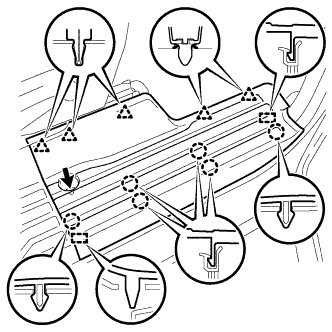 |
Engage the 6 claws, 5 clips and 2 guides to install the rear door scuff plate.
Install the screw.
| 7. INSTALL REAR FLOOR STEP NO. 1 COVER |
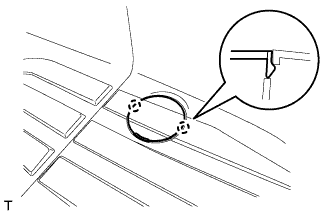 |
Engage the 2 claws to install the rear floor step No. 1 cover.
| 8. INSTALL FRONT DOOR OPENING TRIM WEATHERSTRIP RH |
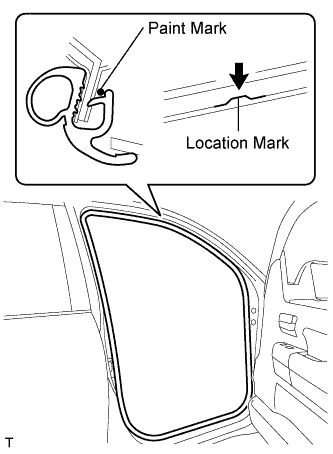 |
Align the location mark with the paint mark first, and install the front door opening trim weatherstrip, as shown in the illustration.
| Area | Color |
| RH side | White |
| LH side | Yellow |
| 9. INSTALL FRONT DOOR SCUFF PLATE RH |
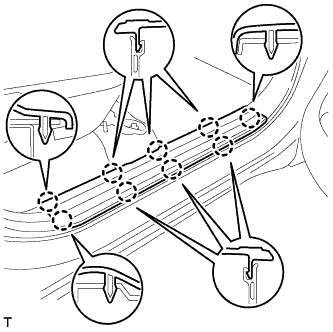 |
Engage the 9 claws to install the scuff plate.
| 10. INSTALL FRONT SEAT ASSEMBLY LH (for Manual Seat) |
Install the front seat assembly (Click here).
| 11. INSTALL FRONT SEAT ASSEMBLY LH (for Power Seat) |
Install the front seat assembly (Click here).
| 12. CONNECT CABLE TO NEGATIVE BATTERY TERMINAL |