 |
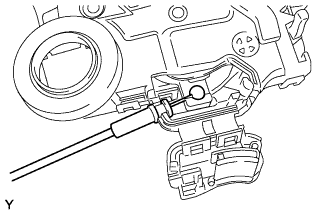
Install the rear door inside locking cable.
REAR DOOR LOCK > INSTALLATION |
| 1. INSTALL REAR DOOR LOCK |
Apply MP grease to the sliding and rotating areas of the front door lock.
|
Install the rear door inside locking cable.
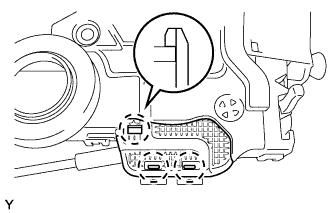 |
Engage the 3 claws and close the cover.
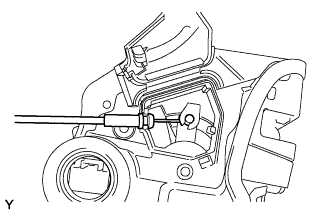 |
Install the rear door lock remote control cable.
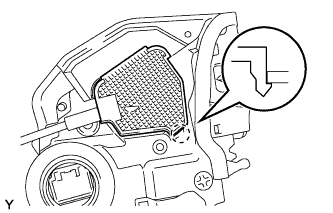 |
Engage the claw and close the cover.
Install a new door lock wire harness seal on to the rear door lock.
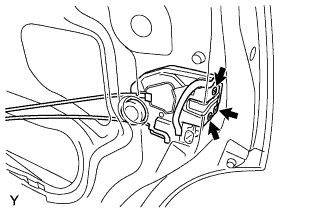 |
Insert the rear door lock into the rear door outside handle release plate, and set it to the rear door panel.
Make sure that the rear door outside handle frame lock.
Apply adhesive to the threads of the screws.
Using a "TORX" socket wrench T30, install the rear door lock with the 3 screws.
| 2. INSTALL REAR DOOR GLASS SUB-ASSEMBLY |
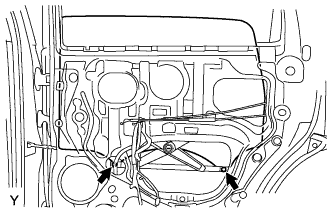 |
Install the rear door glass sub-assembly onto the rear door window regulator with the 2 bolts.
| 3. INSTALL REAR DOOR WINDOW FRAME REAR LOWER SUB-ASSEMBLY |
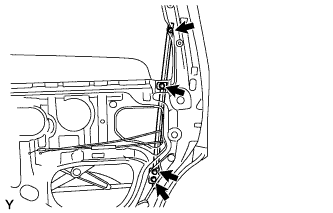 |
Install the rear door window frame rear lower sub-assembly with the nut and 3 bolts.
| 4. INSTALL REAR DOOR GLASS RUN |
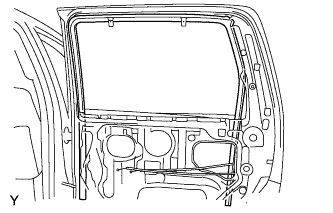 |
Install the rear door glass run.
| 5. INSTALL REAR DOOR SERVICE HOLE COVER |
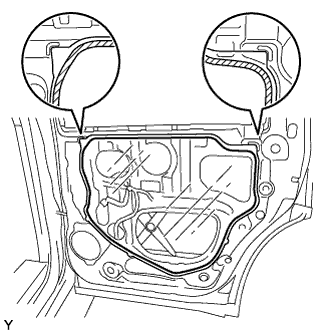 |
Apply butyl tape to the door panel, then install a new rear door service hole cover as shown in the illustration.
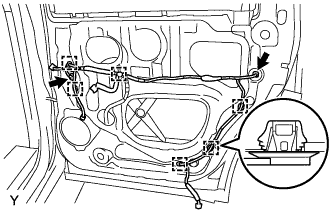 |
Engage the clamps and connect the connectors.
| 6. INSTALL REAR DOOR TRIM NO. 2 BRACKET |
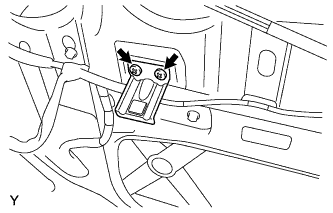 |
Install the rear door trim No. 2 bracket with the 2 screws.
| 7. INSTALL REAR DOOR TRIM BOARD SUB-ASSEMBLY |
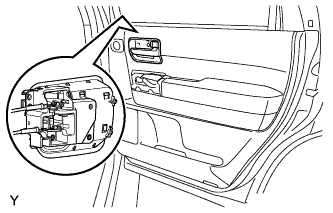 |
Connect the rear door lock remote control cable and the rear door inside locking cable.
Connect the connector.
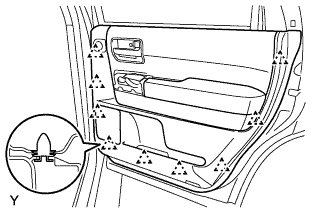 |
Engage the 9 clips and install the rear door trim board sub-assembly.
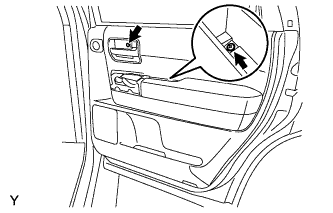 |
Tighten the 2 screws.
Install the rear door armrest cover.
| 8. INSTALL REAR DOOR INSIDE HANDLE BEZEL PLUG |
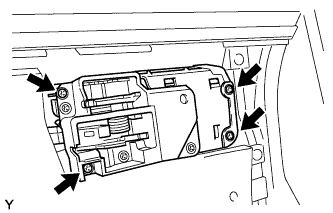 |
Install the rear door inside handle bezel with the 4 screws.
| 9. INSTALL REAR DOOR ARMREST BASE UPPER PANEL |
Connect the connector.
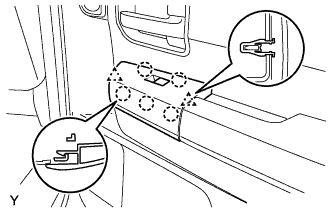 |
Engage the 2 clips and 5 claws and install the rear door armrest base upper panel.
| 10. INSTALL REAR DOOR FRAME GARNISH |
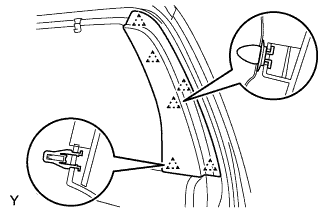 |
Engage the 6 clips and install the rear door frame garnish.
| 11. CONNECT CABLE TO NEGATIVE BATTERY TERMINAL |
| 12. INSPECT SRS WARNING LIGHT |