3UR-FE EMISSION CONTROL CANISTER REMOVAL
PROCEDURE

 77404
1.DISCONNECT FUEL TANK VENT HOSE SUB-ASSEMBLY
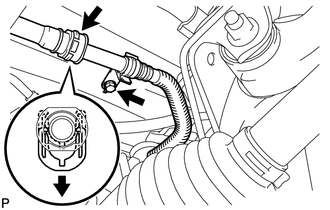
Pull up the retainer and disconnect the fuel tank vent hose sub-assembly.
- NOTICE:
- ·
Do not use any tools in this procedure.
·Check for any dirt and foreign matter contamination in the valve and around the connector. Clean if necessary. Foreign matter may damage the O-rings or cause leaks in the seal between the valve and connector.
Remove the bolt.
77754
2.DISCONNECT NO. 1 CHARCOAL CANISTER OUTLET HOSE
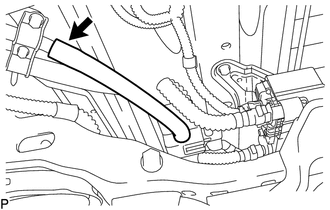
Disconnect the No. 1 charcoal canister outlet hose from the fuel tank filler pipe sub-assembly.
77740
3.REMOVE CHARCOAL CANISTER ASSEMBLY
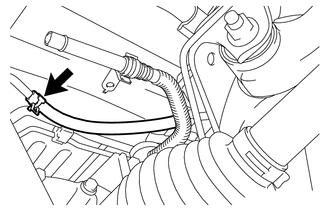
Slide the clamp and disconnect the charcoal canister outlet hose from the No. 3 fuel tank to canister tube.
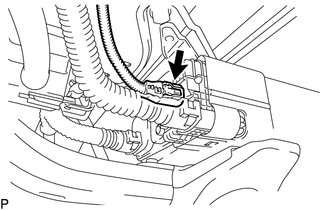
Disconnect the canister pump module connector from the canister pump module.
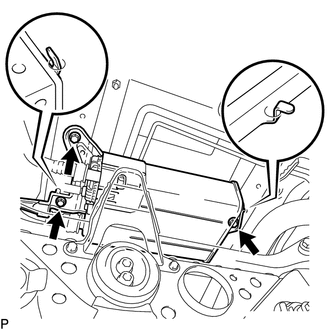
Remove the 3 bolts and charcoal canister assembly.
77404
4.REMOVE FUEL TANK VENT HOSE SUB-ASSEMBLY
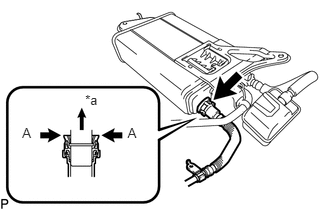
Push the fuel tank vent hose sub-assembly firmly toward the canister side.
| *a | Charcoal Canister Assembly Side |
Pinch the fuel tank vent hose sub-assembly (portion A) as shown in the illustration.
Pull out the fuel tank vent hose sub-assembly.
- NOTICE:
- ·
Do not use any tools in this procedure.
·Check for any dirt and foreign matter contamination in the charcoal canister assembly and around the hose. Clean if necessary. Foreign matter may damage the O-rings or cause leaks in the seal between the charcoal canister assembly and fuel tank vent hose sub-assembly.
5.REMOVE CHARCOAL CANISTER FILTER SUB-ASSEMBLY
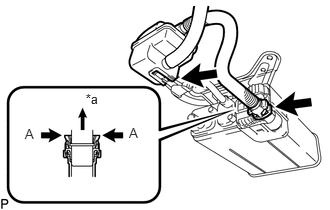
Disconnect the No. 2 canister outlet hose sub-assembly.
| *a | Charcoal Canister Assembly Side |
Push the No. 2 canister outlet hose sub-assembly firmly toward the canister side.
Pinch the No. 2 canister outlet hose sub-assembly (portion A) as shown in the illustration.
Pull out the No. 2 canister outlet hose sub-assembly.
- NOTICE:
- ·
Do not use any tools in this procedure.
·Check for any dirt and foreign matter contamination in the charcoal canister assembly and around the hose. Clean if necessary. Foreign matter may damage the O-rings or cause leaks in the seal between the charcoal canister assembly and No. 2 canister outlet hose sub-assembly.
Detach the claw to remove the charcoal canister filter sub-assembly.
Disconnect the charcoal canister outlet hose from hose clamp.
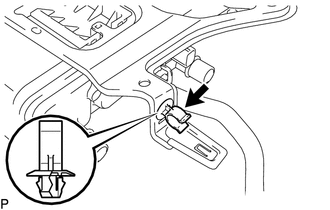
Remove the hose clamp.
77754
6.REMOVE NO. 1 CHARCOAL CANISTER OUTLET HOSE
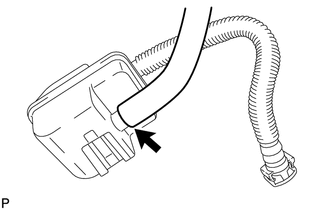
Remove the No. 1 charcoal canister outlet hose.
77754
7.REMOVE CHARCOAL CANISTER OUTLET HOSE
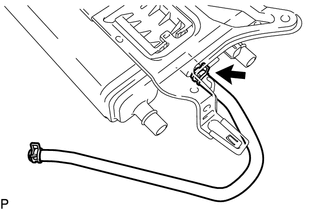
Slide the clamp and remove the charcoal canister outlet hose.
77751
8.REMOVE CHARCOAL CANISTER BASE BRACKET
Detach the claw to remove the charcoal canister base bracket.
77752
9.REMOVE CHARCOAL CANISTER SUPPORT BRACKET
Detach the claw to remove the charcoal canister support bracket.
10.REMOVE CANISTER PUMP MODULE
Before removing the canister pump module, clean the charcoal canister assembly by blowing air into it to ensure that the charcoal canister assembly is free of foreign matter.
- NOTICE:
- ·
Make sure to clean the charcoal canister assembly using only air.
·Do not use gasoline, thinners or solvents.
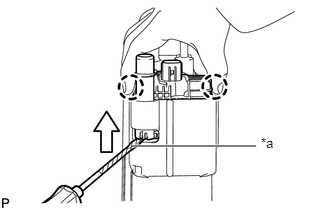
While disengaging the 2 claws as shown in the illustration, push the canister pump module upwards using a screwdriver to remove it.
| *a | Protective Tape |
- HINT:
-
Tape the screwdriver tip before use.
Check if the charcoal canister assembly contains foreign matter such as mud or water.
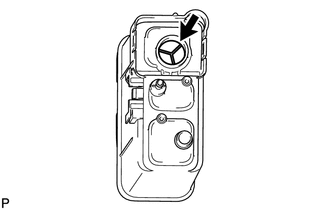
Visually check that the inside of the charcoal canister assembly is free of foreign matter.
Hold the charcoal canister assembly upside down to make sure that the charcoal canister assembly is free of foreign matter.
If the charcoal canister assembly contains foreign matter, replace the charcoal canister assembly.