SEAT REAR NO. 2 SEAT ASSEMBLY(for Power Seat Type RH Side) REASSEMBLY
CAUTION / NOTICE / HINT
- NOTICE:
-
Wear protective gloves. Sharp areas on the parts may injure your hands.
PROCEDURE

 71607
1.INSTALL REAR NO. 2 SEAT ROD SUB-ASSEMBLY
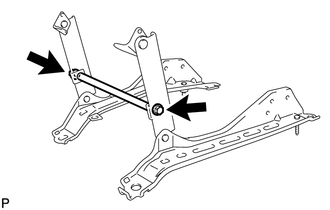
Install the rear No. 2 seat rod sub-assembly with the 2 bolts.
- Torque:
- 18 N*m (184 kgf*cm, 13 ft.*lbf)
85820Y
2.INSTALL POWER SEAT MOTOR ASSEMBLY LH
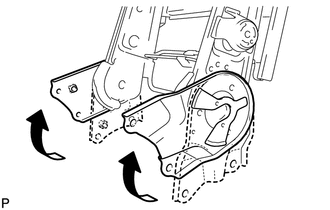
Fully rotate both lower arms in the seat folded direction as shown in the illustration.
- NOTICE:
-
If the motor is installed with the lower arms at an intermediate position, the motor initial position will not match the seat position, so that when the seat is operated the position will be incorrect.
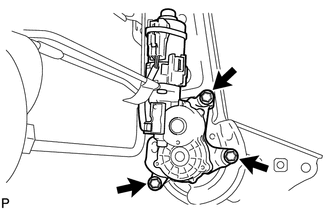
Install the power seat motor assembly LH with the 3 bolts.
- Torque:
- 9.0 N*m (92 kgf*cm, 80 in.*lbf)
85820X
3.INSTALL POWER SEAT MOTOR ASSEMBLY RH
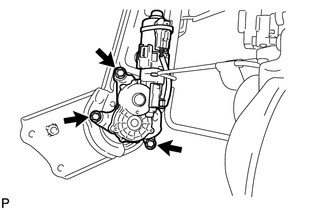
Install the power seat motor assembly RH with the 3 bolts.
- Torque:
- 9.0 N*m (92 kgf*cm, 80 in.*lbf)
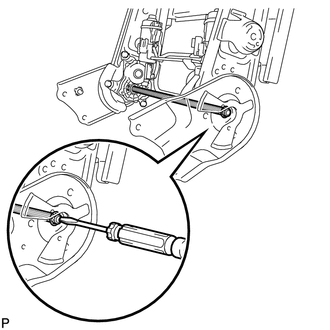
Using a screwdriver and hammer, lightly tap the reclining connecting pipe to install it.
Install the 2 washers.
- NOTICE:
-
When the reclining connecting pipe extends about the same distance left and right, install the 2 washers.
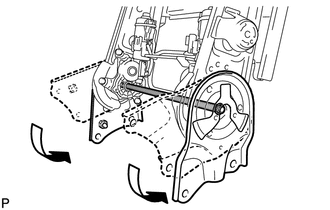
Hold the reclining connecting pipe with pliers or similar tool and rotate the reclining connecting pipe and arms to the position shown in the illustration.
79303A
4.INSTALL NO. 3 SEATBACK FRAME SUB-ASSEMBLY RH
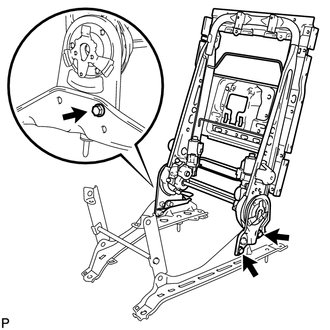
Install the No. 3 seatback frame sub-assembly RH with the 3 bolts.
- Torque:
- 32 N*m (326 kgf*cm, 24 ft.*lbf)
72571A
5.INSTALL RECLINING CONTROL BASE RH
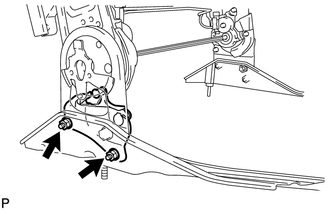
Install the reclining control base RH with the 2 nuts.
- Torque:
- 32 N*m (326 kgf*cm, 24 ft.*lbf)
82195
6.INSTALL REAR NO. 2 SEAT WIRE RH
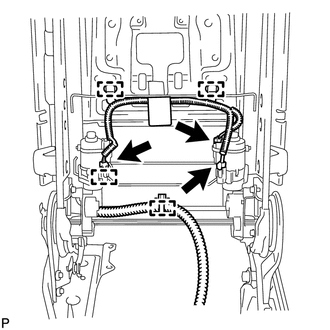
Attach the 4 wire harness clamps.
Connect the 3 connectors to install the rear No. 2 seat wire RH.
79023
7.INSTALL NO. 2 SEATBACK COVER SUB-ASSEMBLY RH
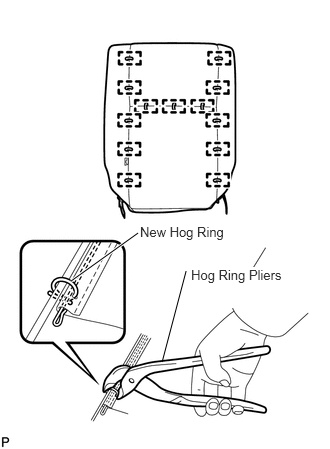
Using hog ring pliers, install the No. 2 seatback cover sub-assembly RH to the No. 2 seatback pad with new hog rings.
- NOTICE:
- ·
Be careful not to damage the cover.
·When installing the hog rings, avoid wrinkling the cover.
8.INSTALL SEATBACK COVER WITH PAD
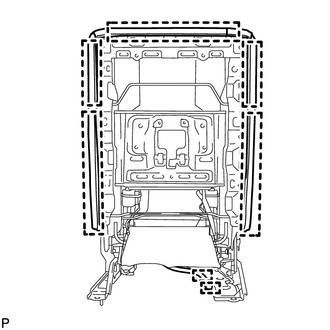
Attach the hooks to install the seatback cover with pad.
Attach the 2 wire harness clamps.
71931C
9.INSTALL REAR NO. 2 SEAT HEADREST SUPPORT ASSEMBLY
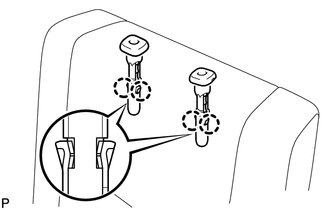
Attach the 4 claws to install the 2 rear No. 2 seat headrest supports.
71970
10.INSTALL REAR SEAT HEADREST ASSEMBLY
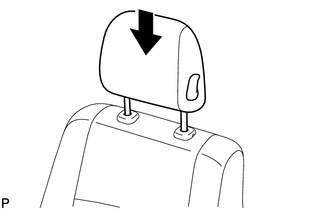
Install the rear seat headrest assembly.
- NOTICE:
- ·
Make sure the rear seat headrest assembly is facing in the correct direction.
·Push in the rear seat headrest assembly until the headrest lock engages.
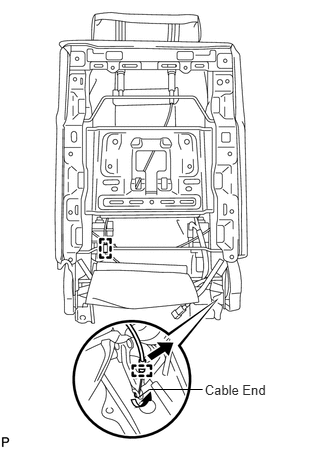
Insert the cable end into the reclining control base RH.
Twist the cable end in the direction indicated by the arrow to connect it and attach the cable clamp.
Connect the headrest cable to the No. 3 seatback frame sub-assembly RH with the cable clamp.
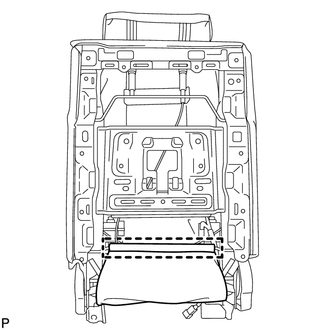
Attach the hook to connect the lower part of the No. 2 seatback cover sub-assembly RH.
71701C
11.INSTALL REAR SEATBACK BOARD SUB-ASSEMBLY RH
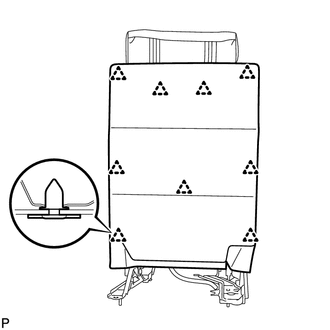
Attach the 9 clips to install the rear seatback board sub-assembly RH.
72998
12.INSTALL REAR SEAT CUSHION COVER LH
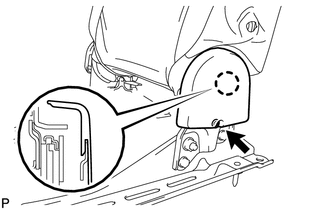
Attach the claw.
Install the rear seat cushion cover LH with the screw.
72995C
13.INSTALL REAR SEAT CUSHION COVER OUTER RH
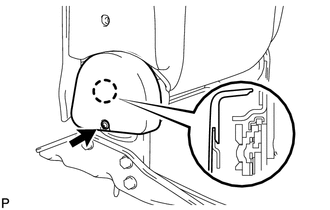
Attach the claw.
Install the rear seat cushion cover outer RH with the screw.
79021
14.INSTALL NO. 2 SEAT CUSHION COVER SUB-ASSEMBLY RH
Using hog ring pliers, install the No. 2 seat cushion cover sub-assembly RH to the No. 2 seat cushion pad with new hog rings
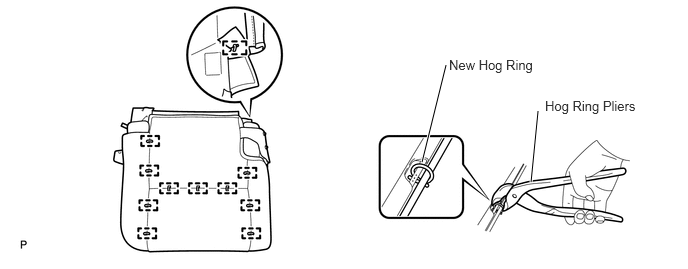
- NOTICE:
- ·
Be careful not to damage the cover.
·When installing the hog rings, avoid wrinkling the cover.
79360A
15.INSTALL NO. 3 SEAT CUSHION SPRING ASSEMBLY RH
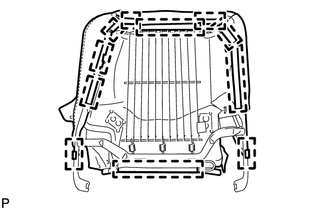
Set the No. 3 seat cushion spring assembly RH in place.
Attach the hooks.
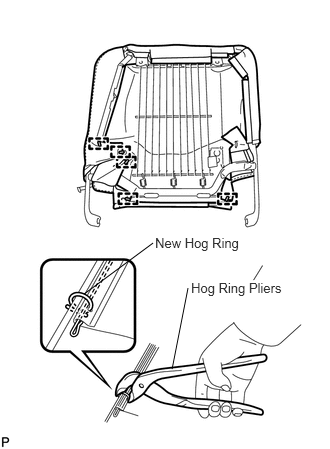
Using hog ring pliers, install the No. 3 seat cushion spring assembly RH with new hog rings.
- NOTICE:
- ·
Be careful not to damage the cover.
·When installing the hog rings, avoid wrinkling the cover.
16.INSTALL REAR NO. 2 SEAT CUSHION ASSEMBLY RH
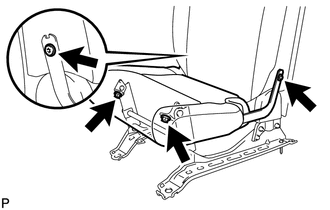
Install the 2 bushes to the cushion spring. Then using a T45 "TORX" socket wrench, install the 2 "TORX" bolts.
- Torque:
- 21 N*m (214 kgf*cm, 15 ft.*lbf)
Install the rear No. 2 seat cushion assembly RH with the 2 bolts.
- Torque:
- 32 N*m (326 kgf*cm, 24 ft.*lbf)
71692C
17.INSTALL REAR SEAT LOCK COVER INNER LH
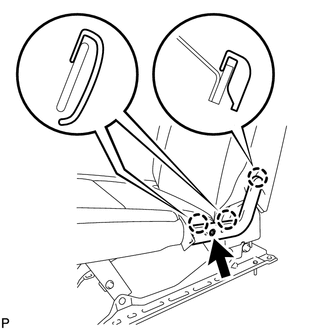
Attach the 3 claws.
Install the rear seat lock cover inner LH with the screw.
71691B
18.INSTALL REAR SEAT LOCK COVER OUTER RH
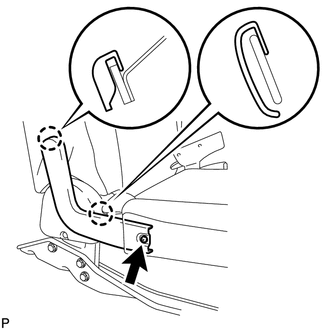
Attach the 2 claws.
Install the rear seat lock cover outer RH with the screw.
73580A
19.INSTALL REAR NO. 2 SEAT INNER BELT SUB-ASSEMBLY