 |
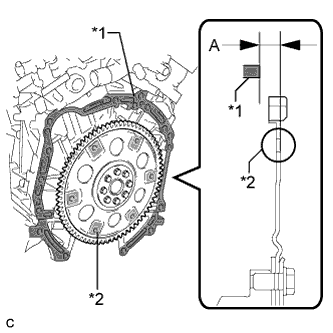
Using a vernier caliper and a straightedge, measure dimension A between the transaxle fitting surface of the engine *1 and the converter fitting surface of the drive plate *2. (#)
AUTOMATIC TRANSAXLE ASSEMBLY > INSTALLATION |
| 1. INSTALL TORQUE CONVERTER CLUTCH ASSEMBLY |
Install the torque converter clutch to the automatic transaxle.
|
Using a vernier caliper and a straightedge, measure dimension A between the transaxle fitting surface of the engine *1 and the converter fitting surface of the drive plate *2. (#)
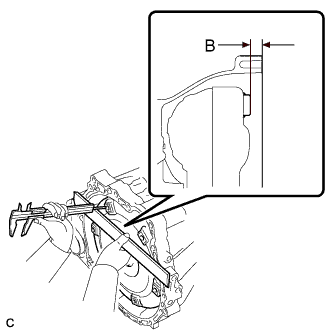 |
Using a vernier caliper and a straight edge, measure dimension B shown in the illustration and check that B is greater than A (measured in step (#)).
| 2. INSTALL TRANSFER ASSEMBLY |
| 3. INSTALL AUTOMATIC TRANSAXLE W/TRANSFER |
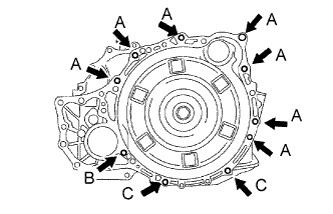 |
Install the automatic transaxle w/transfer with the 10 bolts to the engine.
Apply a few drops of adhesive to each of 2 threads on the tip of the 6 torque converter clutch mounting bolts.
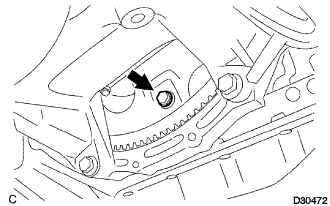 |
Install the 6 torque converter clutch mounting bolts.
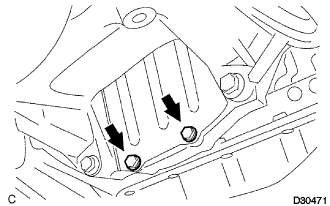 |
Install the flywheel housing under cover to the automatic transaxle with the 2 bolt.
| 4. INSTALL TRANSFER STIFFENER PLATE RH |
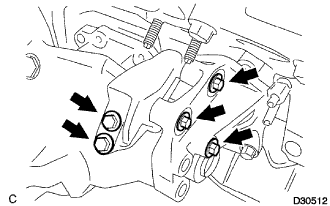 |
Install the transfer stiffener plate RH with 5 bolts to the transfer and engine mounting bracket RR.
| 5. INSTALL ENGINE MOUNTING BRACKET FRONT |
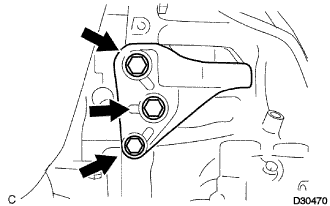 |
Install the engine mounting bracket front to the automatic transaxle with the 3 bolts.
| 6. INSTALL TRANSMISSION OIL FILLER TUBE SUB-ASSEMBLY |
Coat a new O-ring with ATF, and install it to the transmission oil filler tube sub-assembly.
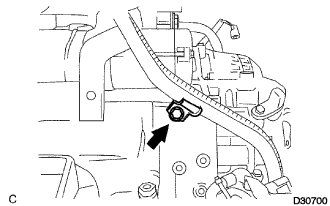 |
Install the transmission oil filler tube sub-assembly and bolt to the automatic transaxle.
Connect the 2 clamps to the oil filler tube.
Install the ATF level gauge.
| 7. INSTALL OIL COOLER INLET TUBE NO.1 |
Temporarily install the oil cooler outlet tube No.1.
Temporarily install the oil cooler inlet tube No.1.
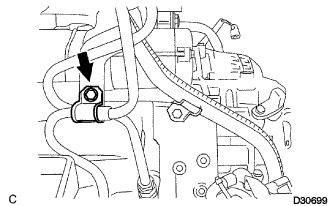 |
Install the oil cooler tube clamp and bolt.
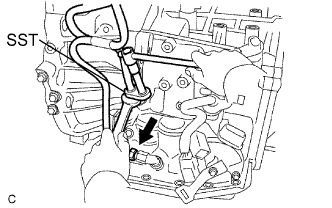 |
Using SST and a wrench, tighten the oil cooler inlet tube No.1.
| 8. INSTALL OIL COOLER OUTLET TUBE NO.1 |
Using SST and a wrench, tighten the oil cooler outlet tube No.1.
| 9. INSTALL TRANSMISSION CONTROL CABLE BRACKET NO.1 |
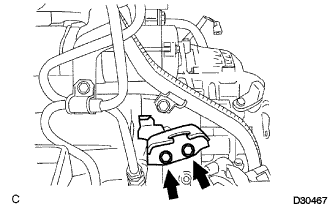 |
Install the control cable bracket No.1 with the 2 bolts.
| 10. CONNECT CONNECTORS |
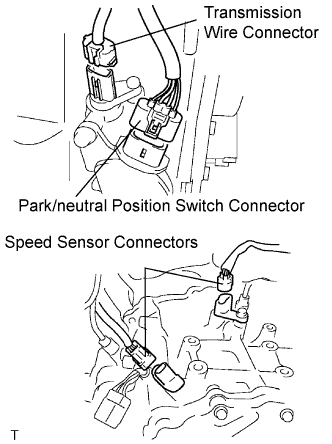 |
Connect the transmission wire connector.
Connect the park/neutral position switch connector.
Connect the 2 speed sensor connectors.
| 11. INSTALL STARTER ASSEMBLY |
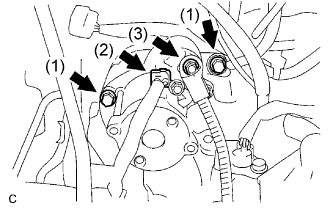 |
Install the starter assembly with the 2 bolts (1).
Connect the connector (2).
Connect the starter wire with the nut (3).
| 12. CONNECT WIRE HARNESS |
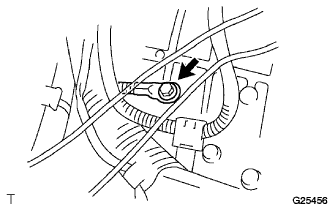 |
Connect the wire harness with the bolt.
| 13. INSTALL WIRE HARNESS CLAMP |
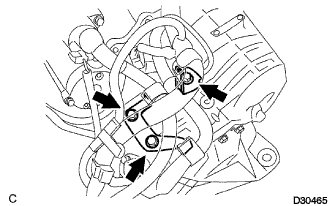 |
Install the 2 clamps and 3 bolts.
Connect the wire harnesses to the clamps.
| 14. INSTALL TRANSMISSION CONTROL CABLE CLAMP |
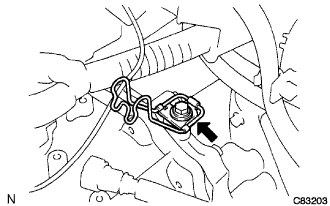 |
Install the transmission control cable clamp with the bolt.
| 15. INSTALL FRONT DRIVE SHAFT ASSEMBLY LH |
| 16. INSTALL FRONT DRIVE SHAFT ASSEMBLY RH |
| 17. INSTALL ENGINE ASSEMBLY WITH TRANSAXLE |
| 18. RESET MEMORY |