 |
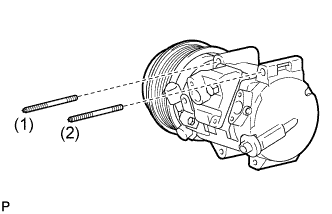
Using a "TORX" socket wrench (E8), install the compressor and magnetic clutch with the 2 stud bolts.
- Torque:
- 10 N*m{ 102 kgf*cm , 7.4 ft.*lbf }
- HINT:
- Tighten the stud bolts in the order shown in the illustration.
COMPRESSOR AND MAGNETIC CLUTCH > INSTALLATION |
| 1. INSTALL COMPRESSOR AND MAGNETIC CLUTCH |
|
Using a "TORX" socket wrench (E8), install the compressor and magnetic clutch with the 2 stud bolts.
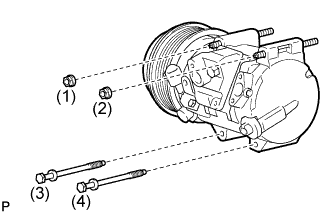 |
Install the compressor and magnetic clutch with the 2 bolts and the 2 nuts.
Connect the 2 clamps and wire harness.
Connect the connector.
| 2. INSTALL SUCTION HOSE SUB-ASSEMBLY |
Remove the attached vinyl tape from the hose.
Apply sufficient compressor oil to a new O-ring and the fitting surface of the compressor and magnetic clutch.
Install the O-ring onto the suction hose sub-assembly.
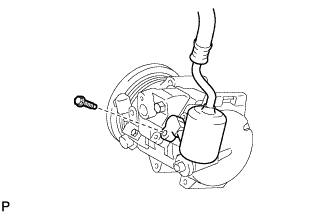 |
Install the suction hose sub-assembly onto the compressor and magnetic clutch with the bolt.
| 3. INSTALL DISCHARGE HOSE SUB-ASSEMBLY |
Remove the attached vinyl tape from the hose.
Apply sufficient compressor oil to a new O-ring and the fitting surface of the compressor and magnetic clutch.
Install the O-ring onto the discharge hose sub-assembly.
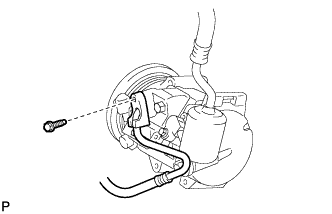 |
Install the discharge hose sub-assembly onto the compressor and magnetic clutch with the bolt.
| 4. INSTALL RADIATOR AND FAN ASSEMBLY |
| 5. INSTALL V-RIBBED BELT |
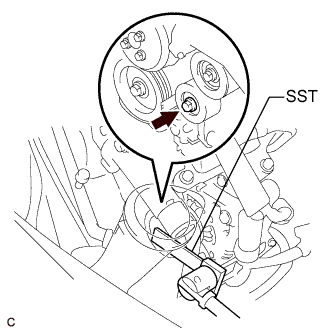 |
Install the V-ribbed belt.
Using SST, turn the belt tensioner counterclockwise and remove the bar.
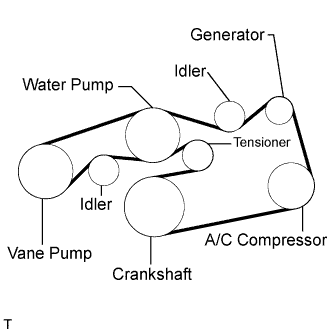 |
If it is difficult to install the V-ribbed belt, perform the following procedure:
Put the V-ribbed belt on every pulley except the tensioner pulley as shown in the illustration.
While releasing the belt tension by turning the belt tensioner counterclockwise, put the V-ribbed belt on the tensioner pulley.
After installing the V-ribbed belt, check that it fits properly in the ribbed grooves. Confirm that the belt has not slipped out of the grooves on the bottom of the crank pulley by hand.
| 6. INSTALL FRONT FENDER APRON SEAL RH |
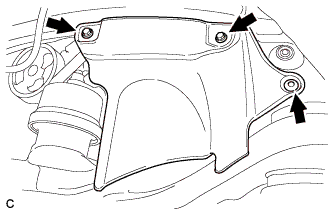 |
Install the front fender apron seal RH with the 2 bolts and clip.
| 7. INSTALL FRONT WHEEL RH |
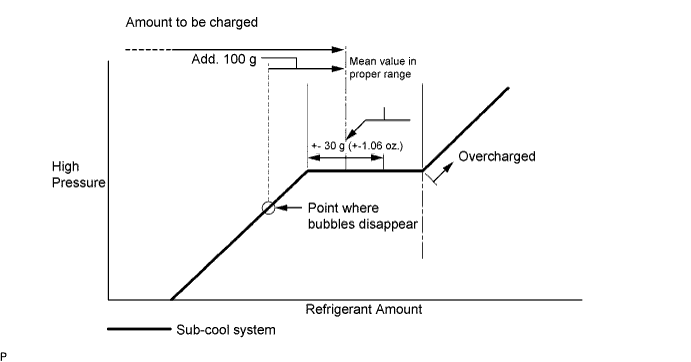
| 8. CHARGE WITH REFRIGERANT |
Using a vacuum pump, perform a vacuum purging.
Charge refrigerant, HFC-134a (R134a).
| 9. WARM UP ENGINE |
| 10. INSPECT FOR REFRIGERANT LEAK |
Using a gas leak detector, check for leakage of the refrigerant.