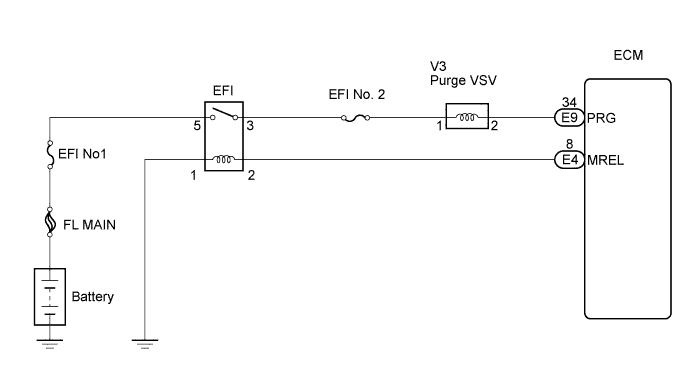
DTC P0443 Evaporative Emission Control System Purge Control Valve Circuit |
| DTC No. | DTC Detection Condition | Trouble Area |
| P0443 | Proper response to ECM command does not occur (1-trip detection logic) |
|
| 1.PERFORM ACTIVE TEST USING TECHSTREAM |
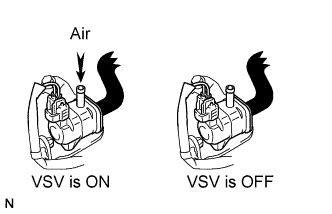 |
Disconnect the vacuum hose from the purge VSV.
Connect the Techstream to the DLC3.
Start the engine and turn the tester ON.
Enter the following menus: Power train / Engine / Active Test / Activate the VSV for EVAP Control. Press the right or left button.
Check if air is sucked into the port when operating the purge VSV using the tester.
| Tester Operation | Specified Condition |
| VSV is OFF | No air sucked |
Reconnect the vacuum hose.
|
| ||||
| NG | |
 |
| 2.INSPECT PURGE VSV (OPERATION) |
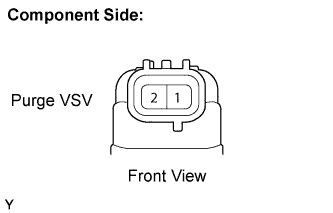 |
Disconnect the V3 purge VSV connector.
Measure the resistance between the terminals of the purge VSV.
Reconnect the purge VSV connector.
|
| ||||
| OK | |
|
| 3.INSPECT PURGE VSV (POWER SOURCE VOLTAGE) |
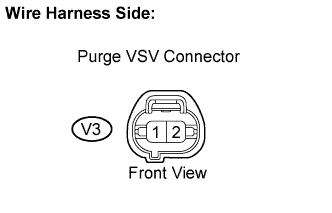 |
Disconnect the V3 purge VSV connector.
Turn the ignition switch to the ON position.
Measure the voltage between the terminal of the wire harness side connector and body ground.
| Tester Connection | Specified Condition |
| Purge VSV (V3-1) - Body ground | 9 to 14 V |
Reconnect the purge VSV connector.
|
| ||||
| OK | |
|
| 4.CHECK HARNESS AND CONNECTOR (ECM - PURGE VSV) |
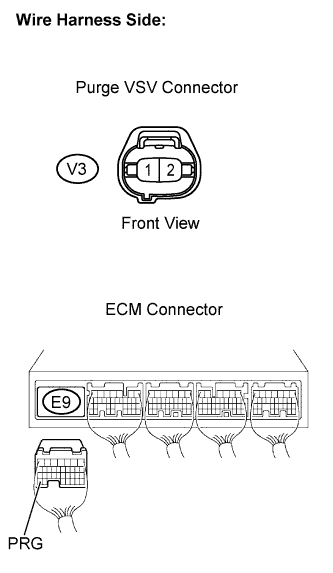 |
Disconnect the V3 purge VSV connector.
Disconnect the E9 ECM connector.
Measure the resistance between the terminals.
| Tester Connection | Specified Condition |
| Purge VSV (V3-2) - PRG (E9-34) | Below 1 Ω |
| Tester Connection | Specified Condition |
| Purge VSV (V3-2) or PRG (E9-34) - Body ground | 10 kΩ or higher |
Reconnect the ECM connector.
Reconnect the purge VSV connector.
|
| ||||
| OK | ||
 | ||
| ||
| 5.CHECK HARNESS AND CONNECTOR (EFI NO. 2 FUSE - ENGINE ROOM J/B (EFI RELAY)) |
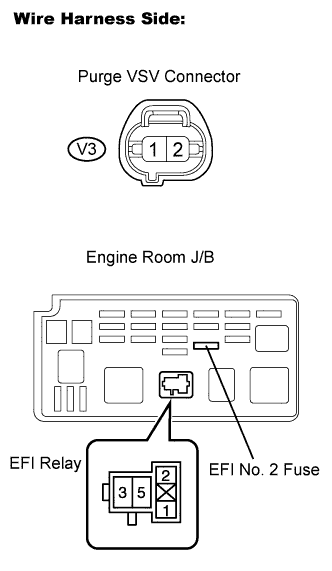 |
Inspect the EFI No. 2 fuse.
Remove the EFI No. 2 fuse from the engine room J/B.
Measure the EFI No. 2 fuse resistance.
Reinstall the EFI No. 2 fuse.
Remove the EFI relay from the engine room J/B.
Disconnect the V3 purge VSV connector.
Measure the resistance between the terminals.
| Tester Connection | Specified Condition |
| Purge VSV (V3-1) - EFI relay terminal 3 | Below 1 Ω |
Reinstall the EFI relay.
Reconnect the purge VSV connector.
|
| ||||
| OK | ||
| ||
| ||

