DOOR / HATCH HOOD ADJUSTMENT
CAUTION / NOTICE / HINT
- HINT:
-
Perform the operations on the left and right side.
PROCEDURE

 53301
1.ADJUST HOOD SUB-ASSEMBLY
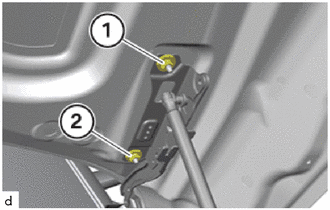
Loosen nut (1) and (2) until the hood sub-assembly can be pushed.
- HINT:
- ·
The gap dimensions form the basis for these repair instructions and must be observed without fail.
·For more information see:
Click hereVehicle Exterior>DOOR / HATCH>HOOD>ON-VEHICLE INSPECTION
Adjust gap dimensions.
- HINT:
- ·
Gap dimensions do not correspond to the specifications.
·Adjust the front compartment lid correctly.
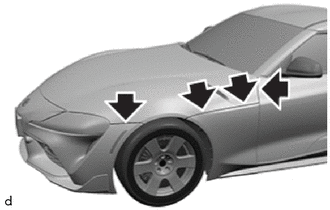
Check the gap dimensions (arrow) between the hood sub-assembly and the front doors.
Check the gap dimensions (arrows) between the hood sub-assembly and the front side panels.
Check the gap dimensions (arrow) between the hood sub-assembly and the front bumper assembly.
Tighten the nut (1) and (2).
- Torque:
- 19.0 N*m (194 kgf*cm, 14 ft.*lbf)
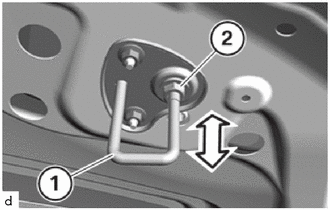
Adjust hood lock striker (1) by turning nut (2).
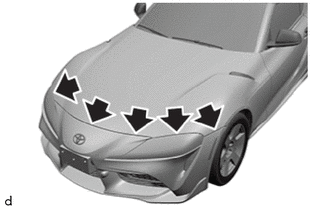
Check the gap dimensions (arrows) between the hood sub-assembly and the front bumper assembly.
Check the gap dimensions (arrows) between the hood sub-assembly and the headlight assemblies.
- HINT:
- ·
Gap dimensions do not correspond to the specifications.
·Adjust the hood sub-assembly catch correctly.
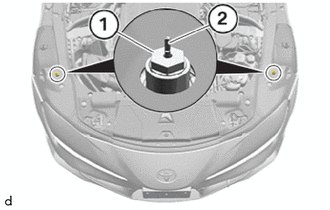
Screw in fender to hood bumpers (1) fully until the pin (2) can be pulled out.
Pull the pin (2) out approx. 15 mm (0.591 in.).
Slowly close hood sub-assembly.
- HINT:
-
Pin (2) will be pressed into fender to hood bumper (1) while doing so.
Raise hood sub-assembly.
Unscrew fender to hood bumpers (1) until the fender to hood bumper (1) is flush with the upper edge of pin (2).