B48 INTAKE / EXHAUST TURBO CHARGER ACTUATOR AND LINK REMOVAL
CAUTION / NOTICE / HINT
- CAUTION:
- ·
Hot surfaces.
Risk of burning!
-Perform all work only on components that have cooled down.
PROCEDURE

 17880
1.REMOVE AIR CLEANER HOSE ASSEMBLY
17240
2.REMOVE TURBOCHARGER ACTUATOR AND LINK ASSEMBLY
- CAUTION:
- ·
Hot surfaces.
Risk of burning!
-Perform all work only on components that have cooled down.
- NOTICE:
- ·
Damage to the electrical controller drive and the mechanical connection.
Improper handling of the electrical controller drive can lead to malfunctions or failure of the electrical controller drive.
-Avoid exposure of lateral forces to the control rod of the electrical controller drive.
·Electrostatic discharge.
Damage to or destruction of electrical components.
-Only touch the housings of electrical components. Do not touch pins or multi-pin connectors directly.
-For additional information see:
Click hereGeneral>INTRODUCTION>REPAIR INSTRUCTION>PRECAUTION
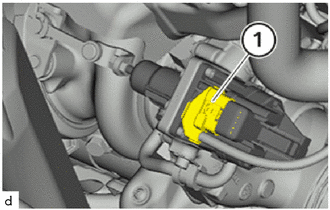
Unlock plug connection (1) and disconnect.
- HINT:
-
The adjusting nuts must be locked using two open-end spanners. If only one open-end spanner is used, there is a risk of the electrical controller drive being damaged.
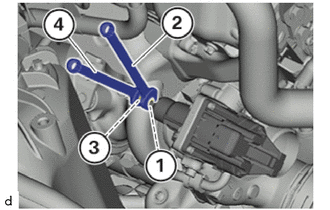
Counter-support the nut (1) with an open-end spanner (2).
Unscrew the nut (3) with an open-end spanner (4).
Thread out and remove the nut (3).
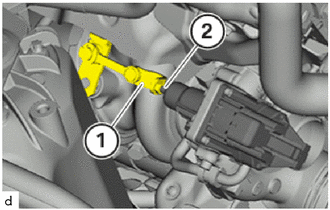
Thread out lever (1) of wastegate valve carefully from control rod (2) of turbocharger actuator and link assembly and place to one side.
- NOTICE:
-
Any application of lateral force to the control rod (2) of the turbocharger actuator and link assembly must be avoided.
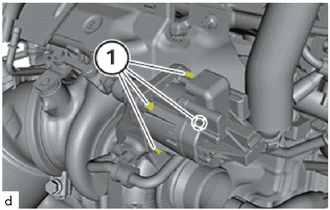
Loosen T25 bolts (1).
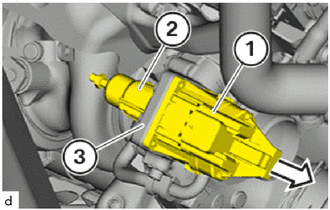
Thread out the turbocharger actuator and link assembly (1) with the heat shield (2) carefully in the direction of the arrow from the bore hole of the compressor housing (3) and remove it.
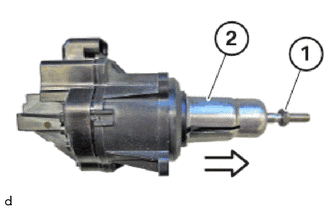
Unfasten nut (1).
Thread out the heat shield (2) in the direction of the arrow and remove.