B48 FUEL FUEL INJECTOR INSTALLATION
PROCEDURE

 1.REPLACE FUEL INJECTOR SEAL
- NOTICE:
- ·
Damage to the injector tips and Teflon ring.
·Improper handling of the injector tips and Teflon ring can lead to malfunctioning of the injector.
-Avoid mechanical contact with injector tip.
-When exchanging Teflon ring, hands and work surface must be clean and free of oil. Do not use any lubricating agents.
-Do not use fingernails to slide Teflon ring on.
- HINT:
- ·
Before re-installing the injector, the Teflon ring must be renewed. Once a Teflon ring has been installed, it may not be re-used. New injectors are supplied with a new Teflon ring.
·After the installation of a new Teflon ring on the injectors, the injector must be installed in the cylinder head within 10 minutes or protected with protective caps; otherwise, the Teflon ring will swell.
- SST
- 09200-WA980
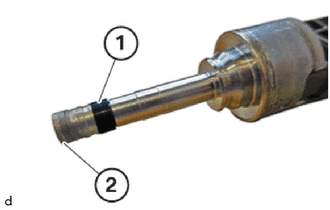
Before installing the injectors: Renew the Teflon rings (1).
Avoid mechanical contact with injector tip (2).
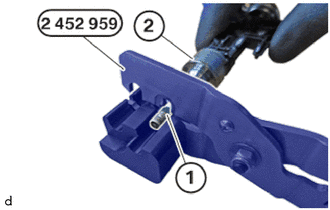
Remove Teflon ring (1) by using special tool 2 452 959 from injector (2).
- SST
- 09902-WA020
If necessary, use a lint-free cloth to clean the cylindrical part of the injector tip. Do not use ultrasonic sound or other auxiliary materials.
- NOTICE:
-
The injector tip must not be cleaned.
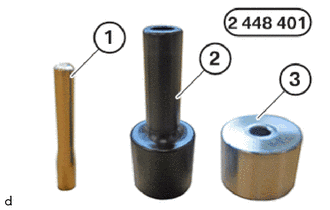
For the installation of the new Teflon rings: Use the set of special tools 2 448 401 :
- SST
- 09902-WA010
(1)Mounting cone
(2) Sliding sleeve
(3)Assembly sleeve
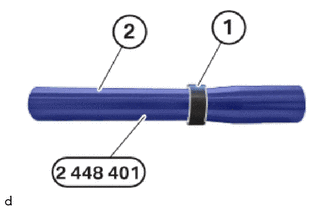
Slide the new Teflon ring (1) onto the installation cone (2) from the set of special tools 2 448 401 .
- SST
- 09902-WA010
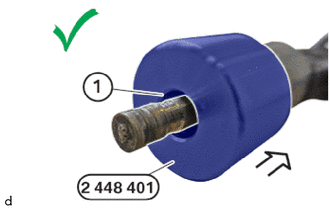
Make sure that the installation position of the assembly sleeve (1) from the set of special tools 2 448 401 is correct.
- HINT:
-
The larger diameter of the assembly sleeve (1) must point to the injector tip.
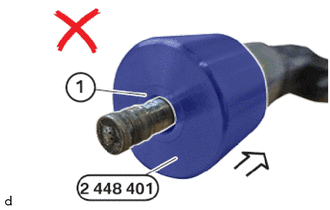
Make sure that the installation position of the assembly sleeve (1) from the set of special tools 2 448 401 is correct.
- SST
- 09902-WA010
The assembly sleeve (1) is not mounted correctly when the smaller diameter points to the injector tip.
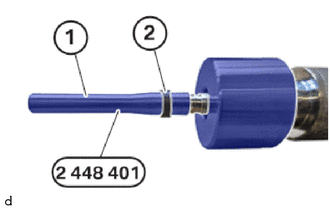
Mount the Teflon ring (2) with the installation cone (1) from the set of special tools 2 448 401 on the injector tip.
- SST
- 09902-WA010
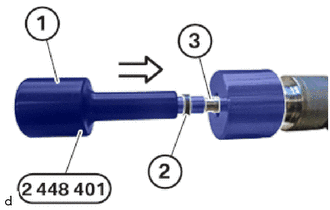
Use the sliding sleeve (1) from the set of special tools 2 448 401 to push the Teflon ring (2) into the groove (3) on the injector in the direction of arrow.
- SST
- 09902-WA010
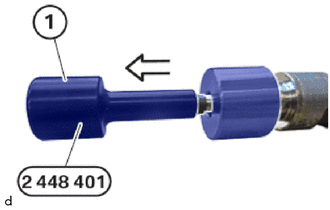
Thread out the sliding sleeve (1) from the set of special tools 2 448 401 in the direction of the arrow and remove.
- SST
- 09902-WA010
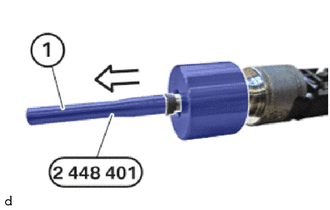
Thread out the installation cone (1) from the set of special tools 2 448 401 in the direction of the arrow and remove.
- SST
- 09902-WA010
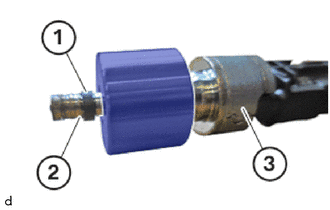
Make sure that the expanded Teflon ring (1) is properly inserted in the groove (2) of the injector (3) and can be moved easily with your fingers.
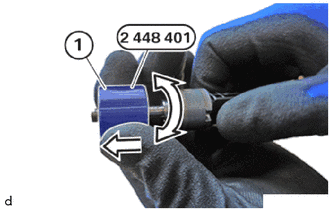
Calibrate the expanded Teflon ring with the assembly sleeve (1) from the set of special tools 2 448 401 to the installation dimension in the direction of the arrow.
- SST
- 09902-WA010
Perform rotational movements in increments of 180° in sync with the pull-off movement. Perform the movements slowly and not jerky.
- HINT:
-
This calibrates the Teflon ring (1) to the installation dimension.
Thread out and remove the assembly sleeve (1).
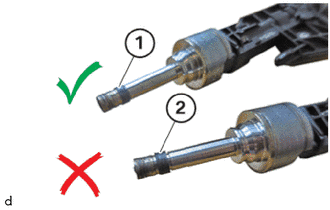
Check for correct installation dimension of the Teflon ring (1).
- HINT:
- ·
(1) indicates a correct installation dimension of the Teflon ring.
·(2) indicates an incorrect installation dimension of the Teflon ring.
23250
2.INSTALL FUEL INJECTOR ASSEMBLY
- HINT:
-
When assembling, it is essential to observe screwing sequences and tightening torques.
-
Non-observance of these requirements may result in leaks and damage.
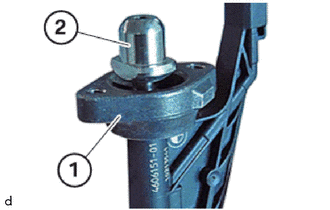
Mount the holder (1) above the bayonet fitting (2) on the injector.
If the holder (1) has a cast lug: Make sure that the holder is installed in the correct position.
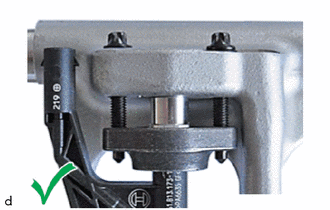
If applicable, note the position of the cast lug:
- HINT:
-
The holder is mounted correctly when the cast lug is located at the rear.
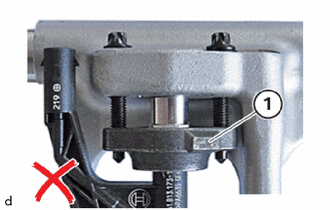
If applicable, note the position of the cast lug:
- NOTICE:
- ·
Damage to injectors.
·Weld seams on the injector may tear due to incorrect distances between the rail and injector so that the injector must be renewed.
-Insertion of the distance gauge is compulsory.
-Replace distance gauge, if a thickness of 8.5 mm is no longer given in the distance gauge.
- HINT:
-
The holder is mounted incorrectly when the cast lug (1) is in front.
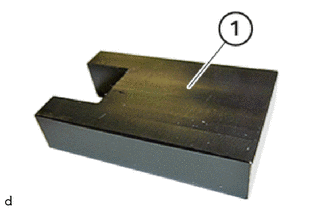
Use the special tool (distance gauge) 2 358 022 (1).
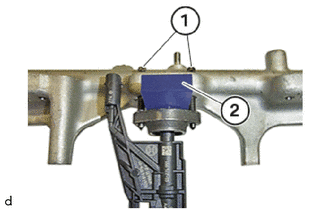
Renew screws (1).
Mount the injectors with the holders and the bolts (M5x30) on the rail.
Keep the rail on a clean table in such a way that the openings on the rail for the injectors point upwards.
The electrical injector connections must point to the fuel pressure sensor.
Slide the special tool (distance gauge) 2 358 022 (2) between the holders and the rail onto the injector head.
Make sure that the special tool (distance gauge) 2 358 022 (2) rests flat on the retaining bridge.
Tighten both screws (M5x30) (1) evenly by hand until the special tool (distance gauge) 2 358 022 (2) rests flat against the rail and the holder.
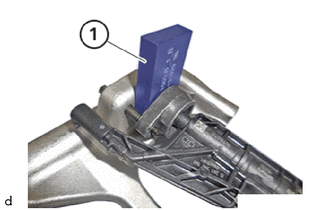
Remove the special tool (distance gauge) 2 358 022 (1).
- SST
- 09200-WA830
Repeat this operation for all injectors.
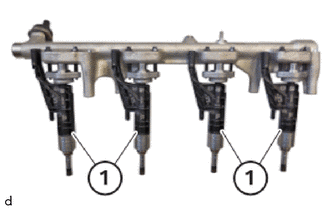
Check injectors (1) for loose fit at the rail.
Align the electrical injector connections parallel to the rail.
The injectors (1) must move freely.
Attach the rail (1) with the injectors to the cylinder head from the top.
Make sure the injector tips catch the corresponding holes for the injectors in the cylinder head.
Ensure that the guides on the injector are slid correctly into the guide bore holes in the cylinder head.
Renew screws (A) to (D).
Press the rail (1) downwards until resistance can be felt; join and hand-tighten the screws (A), (D), (B) and (C) (M6x70).
Set the torque wrench to 2 Nm.
Tighten the screws (A), (D), (B) and (C) in alternating order by 90° each with the torque wrench until the rail is positioned flush on the cylinder head.
If the tightening torque (2 Nm) is reached before the rail rests on the cylinder head: Disassemble the rail and restart the installation procedure.
The figure shows the rail resting flat against the cylinder head.
- HINT:
-
When assembling, it is essential to observe screwing sequences and tightening torques.
-
Non-observance of these requirements may result in leaks and damage.
Tighten bolt (A) to 5 Nm.
Tighten bolt (D) to 5 Nm.
Tighten bolt (B) to 5 Nm.
Tighten bolt (C) to 5 Nm.
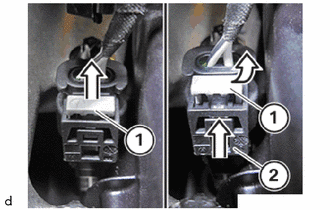
Connect connectors (2) and lock.
The connector (2) must engage audibly.
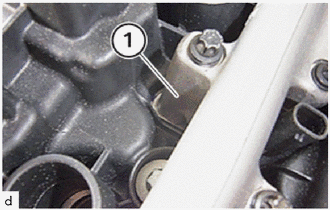
Make sure that the rail (1) rests flat against the cylinder head.
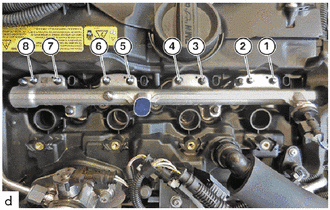
Attach a socket to an extension.
- NOTICE:
-
Do not use a reversible ratchet or torque wrench.
Tighten the E6 bolts in pairs ((1) with (2), (3) with (4), (5) with (6),(7) with (8)) in alternating order to 90° hand-tight.
Set the torque wrench to 5 Nm.
- HINT:
-
When assembling, it is essential to observe screwing sequences and tightening torques.
-
Non-observance of these requirements may result in leaks and damage.
Screw the E6 bolts according to the following plan:
Fuel injector 1:
Tighten the E6 bolt (1) at an angle of rotation of 90° with the torque wrench.
Tighten the E6 bolt (2) at an angle of rotation of 90° with the torque wrench.
Repeat the operations for E6 bolts (1) and (2) until both E6 bolts reach a torque of 5 Nm.
Fuel injector 2:
Tighten the E6 bolt (3) at an angle of rotation of 90° with the torque wrench.
Tighten the E6 bolt (4) at an angle of rotation of 90° with the torque wrench.
Repeat the operations for E6 bolts (3) and (4) until both E6 bolts reach a torque of 5 Nm.
Fuel injector 3:
Tighten the E6 bolt (5) at an angle of rotation of 90° with the torque wrench.
Tighten the E6 bolt (6) at an angle of rotation of 90° with the torque wrench.
Repeat the operations for E6 bolts (5) and (6) until both E6 bolts have reached a torque of 5 Nm.
Fuel injector 4:
Tighten the E6 bolt (7) at an angle of rotation of 90° with the torque wrench.
Tighten the E6 bolt (8) at an angle of rotation of 90° with the torque wrench.
Repeat the operations for E6 bolts (7) and (8) until both E6 bolts reach a torque of 5 Nm.
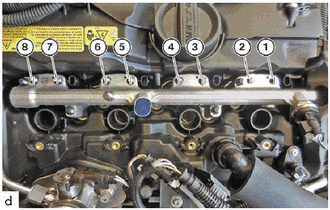
Mark all bolts (1) to (8) with a vertical line (see figure).
Tighten screws using an angle of rotation.
Tighten the E6 bolt (1) with an angle of rotation of 90°.
Tighten the E6 bolt (2) with an angle of rotation of 90°.
Tighten the E6 bolt (3) with an angle of rotation of 90°.
Tighten the E6 bolt (4) with an angle of rotation of 90°.
Tighten the E6 bolt (5) with an angle of rotation of 90°.
Tighten the E6 bolt (6) with an angle of rotation of 90°.
Tighten the E6 bolt (7) with an angle of rotation of 90°.
Tighten the E6 bolt (8) with an angle of rotation of 90°.
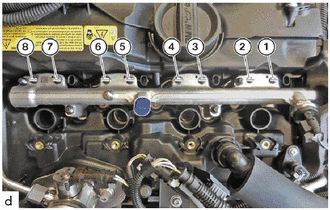
Check if all screws (1) to (8) were tightened with an angle of rotation of 90°.
All marks (lines) must be horizontal (see figure).
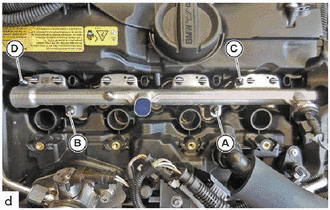
Unscrew the E8 bolts (A) to (D).
It is imperative that the bolts are unscrewed.
- HINT:
-
When assembling, it is essential to observe screwing sequences and tightening torques.
-
Non-observance of these requirements may result in leaks and damage.
Tighten E8 bolt (A) to 5 Nm.
Tighten E8 bolt (D) to 5 Nm.
Tighten E8 bolt (B) to 5 Nm.
Tighten E8 bolt (C) to 5 Nm.
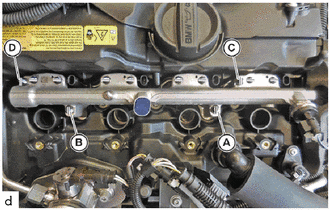
Mark all bolts (A) to (D) with a vertical line (see figure).
Tighten the E8 bolts (A) to (D) to a rotational angle of 90°.
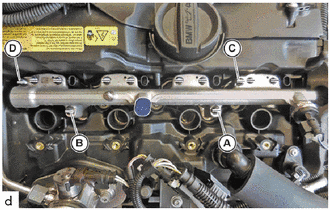
Check if all screws (A) to (D) were tightened with an angle of rotation of 90°.
- NOTICE:
-
All marks (lines) must be horizontal (see figure).
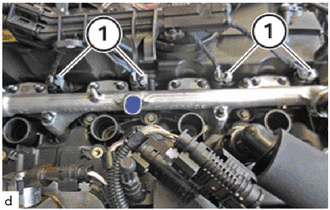
Connect all connectors (1) to the injectors and lock them.
- HINT:
-
All connectors (1) must engage audibly.
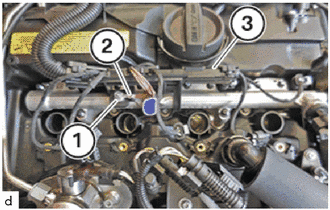
Thread in cable channel (3) and install.
Thread in ground cable (2) and install.
Tighten nut (1).
- Torque:
- 5.0 N*m (51 kgf*cm, 44 in.*lbf)
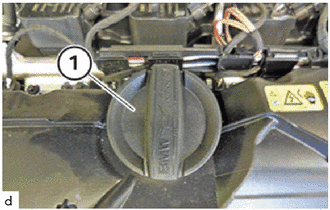
Unscrew the sealing cap (1) from the oil filler neck.
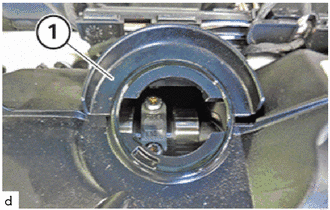
Mount the drip shield (1) on the cylinder head cover.
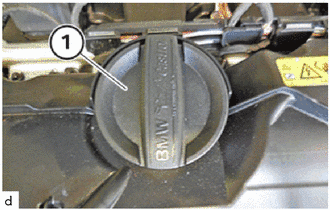
Screw the sealing cap (1) onto the oil filler neck.
23801P
3.INSTALL NO. 1 FUEL PIPE SUB-ASSEMBLY
4.REPLACE RESET ADAPTATIONS
Connect the diagnosis system to the vehicle and enter the following menus:
Vehicle management / Service functions / Drive / Engine electronics / Reset adaptations / ABL Reset adaptation values