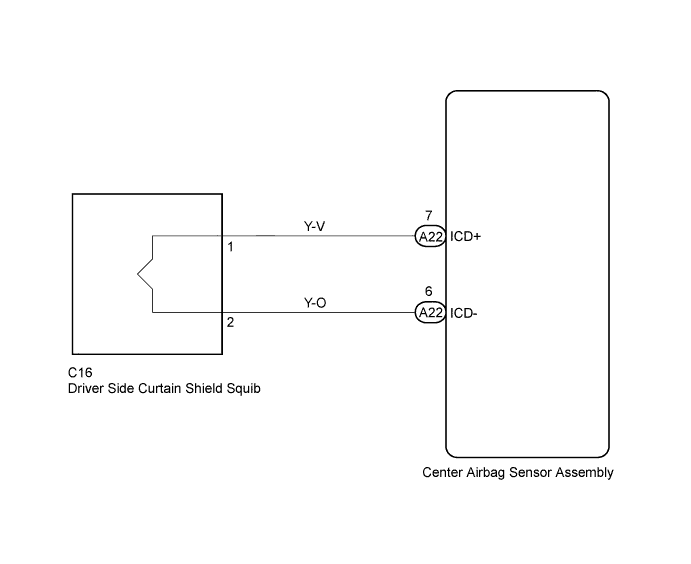
DTC B1830/57 Short in Driver Side Curtain Shield Squib Circuit |
DTC B1831/57 Open in Driver Side Curtain Shield Squib Circuit |
DTC B1832/57 Short to GND in Driver Side Curtain Shield Squib Circuit |
DTC B1833/57 Short to B+ in Driver Side Curtain Shield Squib Circuit |
| DTC No. | DTC Detecting Conditions | Trouble Areas |
| B1830/57 |
|
|
| B1831/57 |
|
|
| B1832/57 |
|
|
| B1833/57 |
|
|
| 1.CHECK DTC |
Proceed to next step according to DTC readings.
If using the intelligent tester (read the 5-digit DTCs):
Using the intelligent tester, check for DTCs (Click here).
| Result | Proceed to |
| DTC B1830 is output. | A |
| DTC B1831 is output. | B |
| DTC B1832 is output. | C |
| DTC B1833 is output. | D |
If not using the intelligent tester (read the 2-digit DTCs):
Check for DTCs (Click here).
| Result | Proceed to |
| DTC 57 is output. | E |
|
| ||||
|
| ||||
|
| ||||
|
| ||||
| A | |
 |
| 2.CHECK CONNECTOR |
Check that the floor wire connector (on the curtain shield airbag assembly LH side) is not damaged.
|
| ||||
| OK | |
|
| 3.CHECK NO. 2 FLOOR WIRE (FOR SHORT) |
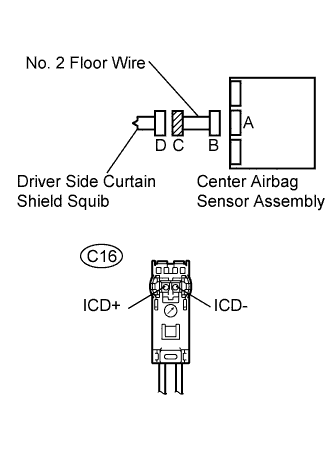 |
Release the activation prevention mechanism built into connector B (Click here).
Measure the resistance.
| Tester Connection | Condition | Specified Condition |
| C16-1 (ICD+) - C16-2 (ICD-) | Always | 1 MΩ or Higher |
|
| ||||
| NG | ||
 | ||
| ||
| 4.CHECK NO. 2 FLOOR WIRE (FOR OPEN) |
|
Measure the resistance.
| Tester Connection | Condition | Specified Condition |
| C16-1 (ICD+) - C16-2 (ICD-) | Always | Below 1 Ω |
|
| ||||
| NG | ||
| ||
| ||
| 5.CHECK NO. 2 FLOOR WIRE (TO GROUND) |
|
Measure the resistance.
| Tester Connection | Condition | Specified Condition |
| C16-1 (ICD+) - Body ground | Always | 1 MΩ or Higher |
| C16-2 (ICD-) - Body ground | Always | 1 MΩ or Higher |
|
| ||||
| NG | ||
| ||
| ||
| 6.CHECK NO. 2 FLOOR WIRE (TO B+) |
|
Connect the negative (-) terminal cable to the battery, and wait for at least 2 seconds.
Turn the ignition switch to the ON position.
Measure the voltage.
| Tester Connection | Condition | Specified Condition |
| C16-1 (ICD+) - Body ground | Ignition switch ON | Below 1 V |
| C16-2 (ICD-) - Body ground | Ignition switch ON | Below 1 V |
|
| ||||
| NG | ||
| ||
| ||
| 7.CHECK CONNECTOR |
Check that the No. 2 floor wire connector (on the curtain shield airbag assembly LH side) is not damaged.
|
| ||||
| OK | |
|
| 8.CHECK NO. 2 FLOOR WIRE (CURTAIN SHIELD AIRBAG (D SEAT SIDE) SQUIB) |
|
Connect the negative (-) terminal cable to the battery, and wait for at least 2 seconds.
Turn the ignition switch to the ON position.
Measure the voltage.
| Tester Connection | Condition | Specified Condition |
| C16-1 (ICD+) - Body ground | Ignition switch ON | Below 1 V |
| C16-2 (ICD-) - Body ground | Ignition switch ON | Below 1 V |
Turn the ignition switch to the LOCK position.
Disconnect the negative (-) terminal cable from the battery, and wait for at least 90 seconds.
Measure the resistance.
| Tester Connection | Condition | Specified Condition |
| C16-1 (ICD+) - C16-2 (ICD-) | Always | Below 1 Ω |
| C16-1 (ICD+) - Body ground | Always | 1 MΩ or Higher |
| C16-2 (ICD-) - Body ground | Always | 1 MΩ or Higher |
Release the activation prevention mechanism built into connector B (Click here).
Measure the resistance.
| Tester Connection | Condition | Specified Condition |
| C16-1 (ICD+) - C16-2 (ICD-) | Always | 1 MΩ or Higher |
|
| ||||
| OK | |
|
| 9.REPLACE CURTAIN SHIELD AIRBAG ASSEMBLY LH (CURTAIN SHIELD AIRBAG (D SEAT SIDE) SQUIB) |
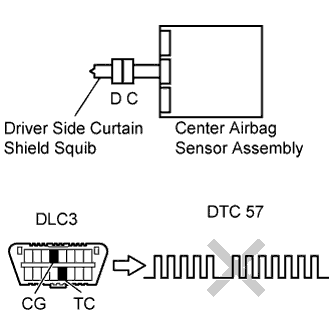 |
Replace the curtain shield airbag assembly LH (Click here).
Connect the connectors to the center airbag sensor assembly.
Connect the negative (-) terminal cable to the battery, and wait for at least 2 seconds.
Turn the ignition switch to the ON position, and wait for at least 60 seconds.
Clear any DTCs stored in the memory (Click here).
Turn the ignition switch to the LOCK position.
Turn the ignition switch to the ON position, and wait for at least 60 seconds.
Check for DTCs (Click here).
|
| ||||
| OK | ||
| ||
| ||
| 10.CHECK CENTER AIRBAG SENSOR ASSEMBLY |
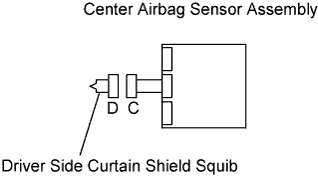 |
Connect the connectors to the center airbag sensor assembly.
Connect the negative (-) terminal cable to the battery, and wait for at least 2 seconds.
Turn the ignition switch to the ON position, and wait for at least 60 seconds.
Clear any DTCs stored in the memory (Click here).
Turn the ignition switch to the LOCK position.
Turn the ignition switch to the ON position, and wait for at least 60 seconds.
Check for DTCs (Click here).
|
| ||||
| NG | ||
| ||
| ||
| 11.CHECK CENTER AIRBAG SENSOR ASSEMBLY |
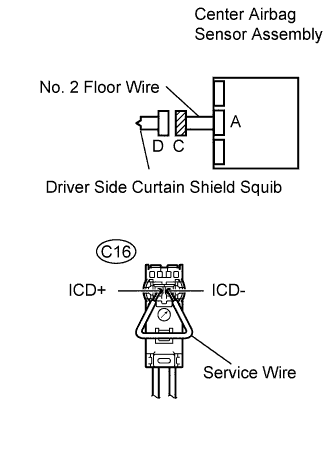 |
Turn the ignition switch to the LOCK position.
Disconnect the negative (-) terminal cable from the battery, and wait for at least 90 seconds.
Connect the connector to the center airbag sensor assembly.
Using a service wire, connect C16-1 (ICD+) and C16-2 (ICD-) of connector C.
Connect the negative (-) terminal cable to the battery, and wait for at least 2 seconds.
Turn the ignition switch to the ON position, and wait for at least 60 seconds.
Clear any DTCs stored in the memory (Click here).
Turn the ignition switch to the LOCK position.
Turn the ignition switch to the ON position, and wait for at least 60 seconds.
Check for DTCs (Click here).
|
| ||||
| OK | |
|
| 12.CHECK CURTAIN SHIELD AIRBAG ASSEMBLY LH (CURTAIN SHIELD AIRBAG (DRIVER SEAT SIDE) SQUIB) |
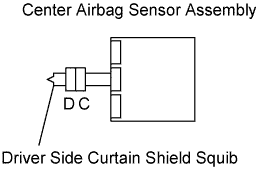 |
Turn the ignition switch to the LOCK position.
Disconnect the negative (-) terminal cable from the battery, and wait for at least 90 seconds.
Disconnect the service wire from connector C.
Connect the connector to the curtain shield airbag assembly LH.
Connect the negative (-) terminal cable to the battery, and wait for at least 2 seconds.
Turn the ignition switch to the ON position, and wait for at least 60 seconds.
Clear any DTCs stored in the memory (Click here).
Turn the ignition switch to the LOCK position.
Turn the ignition switch to the ON position, and wait for at least 60 seconds.
Check for DTCs (Click here).
|
| ||||
| OK | ||
| ||
| ||

