OIL PUMP (for 2WD) > REMOVAL |
| 1. DISCHARGE FUEL SYSTEM PRESSURE |
| 2. REMOVE BATTERY |
| 3. DRAIN ENGINE COOLANT |
|
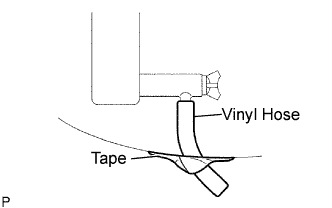
Remove the service hole cover from the engine under cover.
Install a vinyl hose onto the drain on the radiator side.
Fix the vinyl hose with tape.
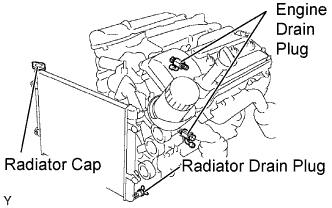 |
Loosen the 3 drain plugs on the engine and radiator, and drain the coolant.
Remove the radiator cap.
Drain the coolant from the reservoir tank.
Tighten the 3 drain plugs.
Remove the vinyl hose from the radiator.
| 4. DRAIN ENGINE OIL |
Remove the engine under cover seal No. 3.
Remove the oil pan drain plug and drain the engine oil.
Clean the oil pan drain plug and install it with a new gasket.
| 5. REMOVE ENGINE ASSEMBLY |
| 6. REMOVE OIL LEVEL GAUGE GUIDE |
| 7. REMOVE WATER INLET |
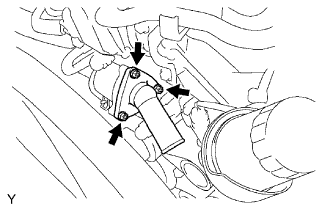 |
Remove the 3 nuts, then remove the water inlet with thermostat and gasket.
| 8. REMOVE V-RIBBED BELT TENSIONER ASSEMBLY |
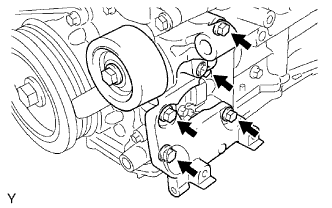 |
Remove the 5 bolts, then remove the V-ribbed belt tensioner.
| 9. REMOVE NO.2 IDLER PULLEY SUB-ASSEMBLY |
Remove the 2 bolts, then remove the idler pulley No. 2.
| 10. REMOVE NO.1 IDLER PULLEY SUB-ASSEMBLY |
Remove the bolt, then remove the idler pulley No. 1.
| 11. REMOVE CRANKSHAFT PULLEY |
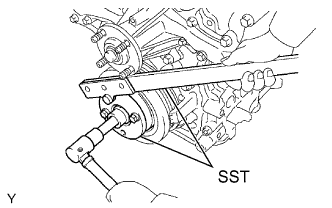 |
Using SST, hold the crankshaft pulley and loosen the pulley set bolt.
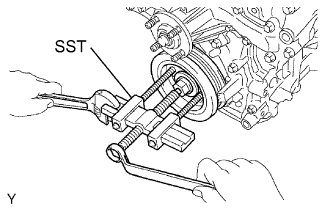 |
Using the pulley set bolt and SST, remove the crankshaft pulley.
| 12. REMOVE NO.2 OIL PAN SUB-ASSEMBLY |
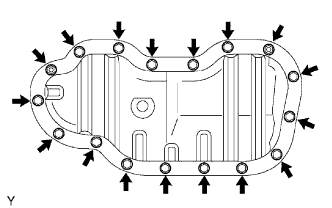 |
Remove the 15 bolts and 2 nuts.
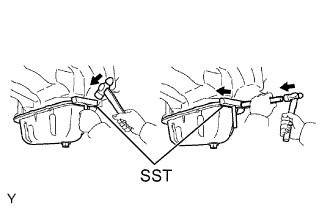 |
Insert the blade of SST between the oil pan and oil pan No. 2, cut off applied sealer and remove the oil pan No. 2.
| 13. REMOVE OIL STRAINER SUB-ASSEMBLY |
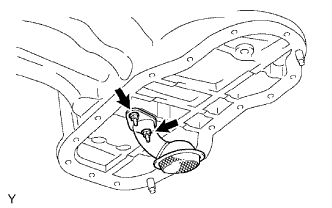 |
Remove the 2 nuts, then remove the oil strainer and gasket.
| 14. REMOVE OIL PAN SUB-ASSEMBLY |
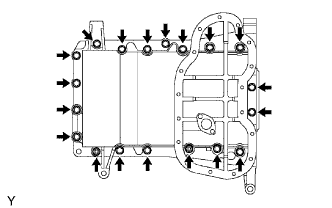 |
Remove the 17 bolts and 2 nuts.
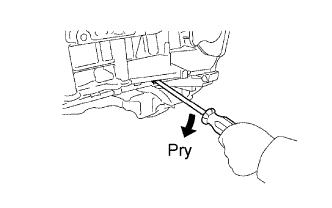 |
Using a screwdriver, remove the oil pan by prying between the oil pan and cylinder block.
| 15. REMOVE IGNITION COIL ASSEMBLY |
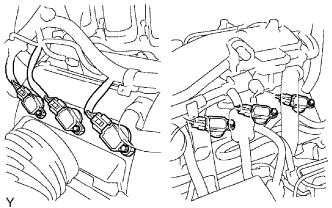 |
Disconnect the 6 connectors.
Remove the 6 bolts, then remove the 6 ignition coils.
| 16. REMOVE CYLINDER HEAD COVER SUB-ASSEMBLY |
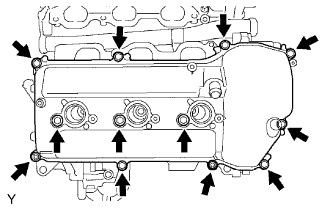 |
Remove the 10 bolts, 3 seal washers, 2 nuts, cylinder head cover and gasket.
| 17. REMOVE CYLINDER HEAD COVER SUB-ASSEMBLY LH |
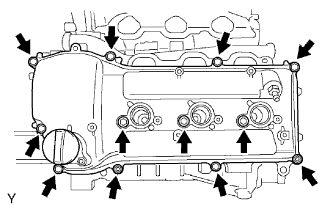 |
Remove the 10 bolts, 3 seal washers, 2 nuts, cylinder head cover and gasket.
| 18. REMOVE CAMSHAFT TIMING OIL CONTROL VALVE ASSEMBLY |
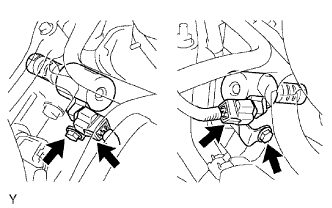 |
Disconnect the 2 connectors.
Remove the 2 bolts, then remove the 2 camshaft timing oil control valves.
| 19. REMOVE VVT SENSOR |
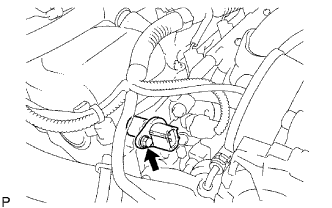 |
RH bank side VVT sensor:
Disconnect the VVT sensor connector.
Remove the bolt and VVT sensor.
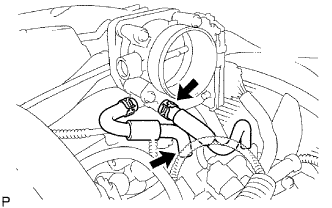 |
LH bank side VVT sensor:
Disconnect the water by-pass hoses No. 4 and No. 5 .
Disconnect the VVT sensor connector.
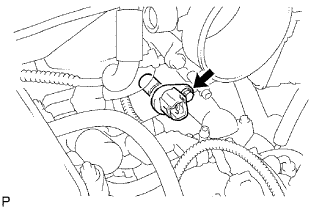 |
Remove the bolt and VVT sensor.
| 20. REMOVE OIL FILTER BRACKET SUB-ASSEMBLY |
Remove the 3 bolts, 2 nuts, oil filter bracket and gasket.
| 21. REMOVE TIMING CHAIN OR BELT COVER SUB-ASSEMBLY |
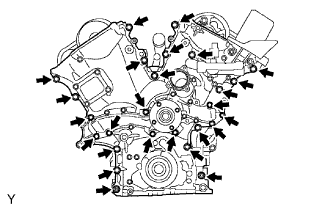 |
Remove the 24 bolts and 2 nuts.
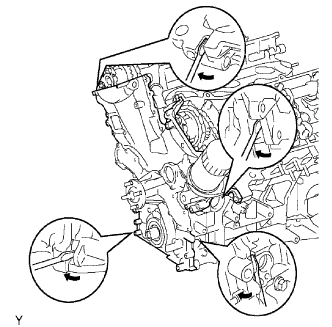 |
Remove the timing chain cover by prying between the timing chain cover and cylinder head or cylinder block with a screwdriver.
Remove the O-ring from the LH cylinder head.
| 22. REMOVE TIMING GEAR CASE OR TIMING CHAIN CASE OIL SEAL |
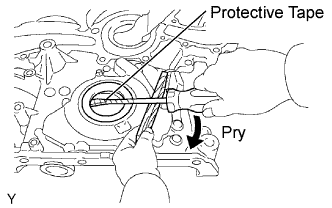 |
Using a screwdriver, pry out the oil seal.