 |
Using "Torx" socket wrench T30, tighten the "Torx" screw to install the seat position sensor.
- Torque:
- 8.0 N*m{ 82 kgf*cm , 71 in.*lbf }
SEAT POSITION SENSOR (for Bench Seat Type) > INSTALLATION |
| 1. INSTALL SEAT POSITION SENSOR (for RHD) |
Check that the ignition switch is OFF.
Check that the cable is disconnected from the negative battery (-) terminal.
|
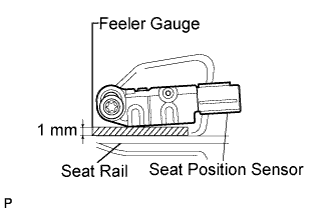
Using "Torx" socket wrench T30, tighten the "Torx" screw to install the seat position sensor.
Make sure that the clearance between the seat position sensor and the seat rail is between 0.6 mm (0.023 in.) and 2 mm (0.079 in.). Check that there is no slack in the installation parts of the seat position sensor.
Connect the connector to the seat position sensor.
| 2. INSTALL SEAT POSITION SENSOR PROTECTOR (for RHD) |
Install a new seat position protector onto the seat position sensor.
| 3. INSTALL SEAT POSITION SENSOR (for LHD) |
Check that the ignition switch is OFF.
Check that the cable is disconnected from the negative battery (-) terminal.
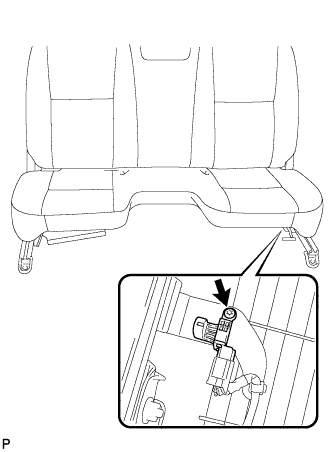 |
Using "Torx" socket wrench T30, tighten the "Torx" screw to install the seat position sensor.
Make sure that the clearance between the seat position sensor and the seat rail is within 0.6 mm (0.023 in.) and 2 mm (0.079 in.).
Check that there is no slack in the installation parts of the seat position sensor.
Connect the connector to the seat position sensor.
| 4. INSTALL FRONT SEAT ASSEMBLY |
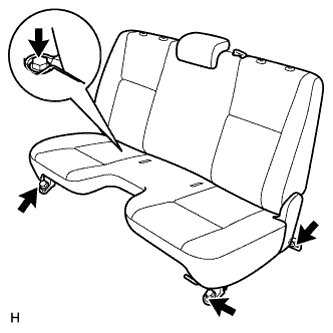 |
Place the front seat in the cabin.
Slide the front seat to the most rearward position.
Tighten the 2 bolts on the front side.
Slide the front seat to the most forward position.
Tighten the 2 bolts on the rear side.
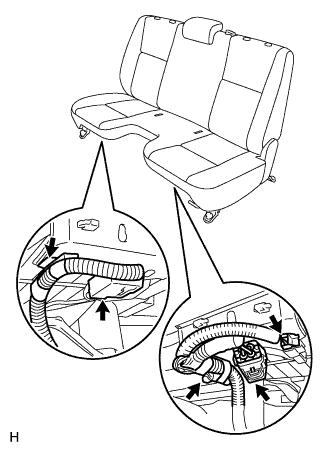 |
Install the 2 wiring harness clamps.
Connect the 3 connectors.
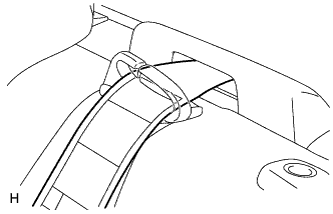 |
Install the belt of the front center seat outer belt into the front center seat outer belt guide.
| 5. INSTALL FRONT SEAT HEADREST ASSEMBLY |
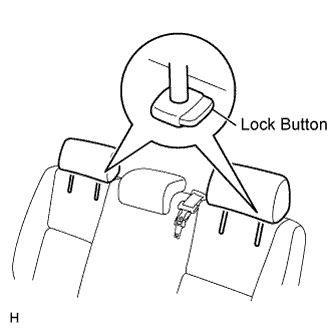 |
Push in the 2 lock buttons of the 2 front seat headrest supports and install the 2 front seat headrests.
| 6. INSTALL FRONT SEAT INNER BELT ASSEMBLY LH |
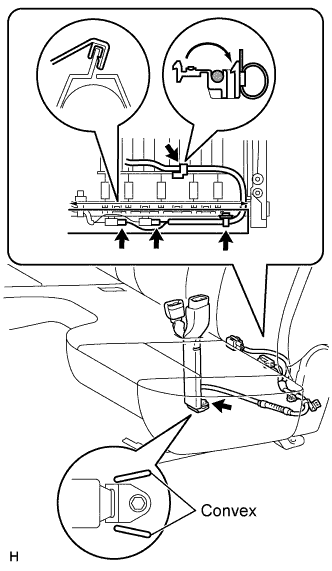 |
Slide the front seat to the most forward position.
Install the front seat inner belt with the bolt.
Install the 2 wiring harness clamps.
Connect the 2 connectors.
Engage the hook.
| 7. INSTALL FRONT SEAT INNER BELT ASSEMBLY RH |
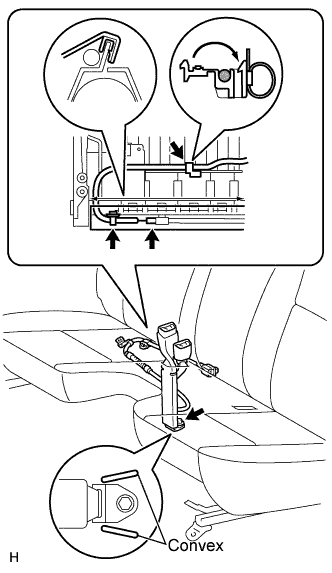 |
Slide the front seat to the most forward position.
Install the front seat inner belt with the bolt.
Install the 2 wiring harness clamps.
Connect the connector.
Engage the hook.
| 8. CONNECT CABLE TO NEGATIVE BATTERY TERMINAL |
| 9. INSPECT SRS WARNING LIGHT |