 |
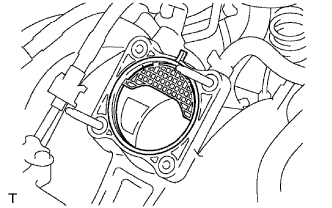
Install a new gasket onto the intake manifold.
THROTTLE BODY > INSTALLATION |
| 1. INSTALL THROTTLE WITH MOTOR BODY ASSEMBLY |
|
Install a new gasket onto the intake manifold.
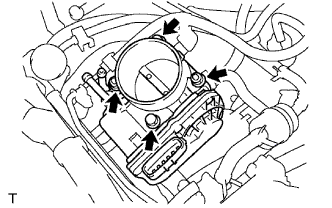 |
Install the throttle with motor body with the 2 bolts and 2 nuts.
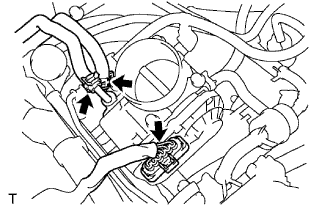 |
Connect the water by-pass hose.
Connect the water by-pass hose No. 2.
Connect the throttle motor connector.
| 2. INSTALL INTAKE AIR CONNECTOR |
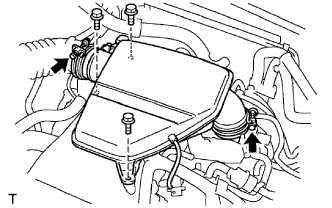 |
Install the intake air connector with the 3 bolts.
Tighten the 2 hose clamp bolts.
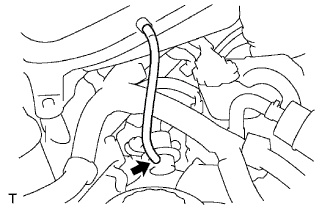 |
Connect the vacuum hose.
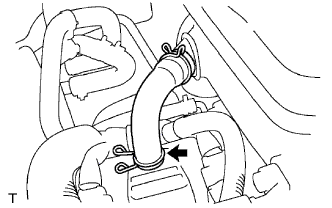 |
Connect the ventilation hose No. 2.
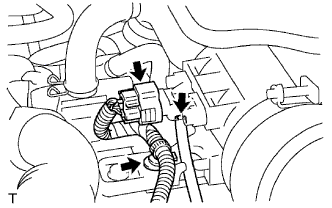 |
Connect the vacuum hose.
Engage the wire harness clamp.
Connect the pressure sensor connector.
| 3. CONNECT CABLE TO NEGATIVE BATTERY TERMINAL |
| 4. ADD ENGINE COOLANT |
Tighten the engine drain plug.
Tighten the radiator drain plug.
Disconnect the 2 vinyl hoses.
Slowly fill the system with engine coolant.
Check the coolant level inside the radiator by squeezing the inlet and outlet radiator hoses several times by hand. If the coolant level goes down, add coolant.
Install the radiator cap securely.
Slowly pour coolant into the radiator reservoir until it reaches the FULL line.
Warm up the engine until the cooling fan operates.
| Item | Condition |
| Fan speed | Any setting except OFF |
| Temperature | Toward warm |
| Air condition switch | OFF |
Squeeze the inlet and outlet radiator hoses several times by hand while warning up the engine.
Stop the engine and wait until the coolant cools down.
Remove the radiator cap and check the coolant level inside the radiator.
If the coolant level is below the full level, perform the steps from (d) through (k) and repeat the operation until the coolant level remains at the full level.
Check the coolant level inside the radiator reservoir tank again. If it is below the full level, add coolant.
Install the engine under cover No. 1 with the 4 bolts. (PRE RUNNER AND 4WD TYPE)
| 5. CHECK FOR ENGINE COOLANT LEAKAGE |
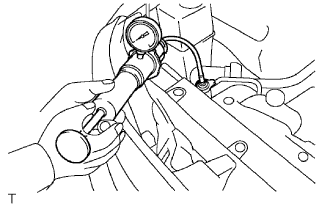 |
Fill the radiator with coolant and attach a radiator cap tester.
Warm up the engine.
Pump it up to 118 kPa (1.2 kgf/cm2, 17.1 psi) and check that the pressure does not drop.
| 6. INSTALL ENGINE UNDER COVER SUB-ASSEMBLY NO.1 (for 4WD and Pre-Runner) |
| 7. PERFORM INITIALIZATION |
Disconnect the cable from the negative (-) battery terminal. Wait at least 60 seconds and reconnect the cable.
Turn the ignition switch to the ON position without operating the accelerator pedal.
Connect the tester to the DLC3 and clear the DTCs (Click here).
Start the engine and check that the MIL is not illuminated and that the idle speed is within the specified range when the A/C is switched off after the engine is warmed up.
| Condition | Engine Idle Speed |
| A/C switched off | 600 to 700 rpm |
Enter the following menus: Powertrain / Engine and ECT / Data List / Throttle Sensor Position. Fully depress the accelerator pedal and check that the value is 60% or more.
Perform a road test and confirm that there are no abnormalities.