TIMING CHAIN (for 2WD) > REMOVAL |
| 1. DISCHARGE FUEL SYSTEM PRESSURE |
| 2. REMOVE BATTERY |
| 3. DRAIN ENGINE COOLANT |
|
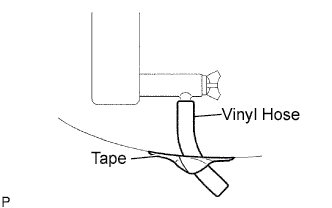
Remove the service hole cover from the engine under cover.
Install a vinyl hose onto the drain on the radiator side.
Fix the vinyl hose with tape.
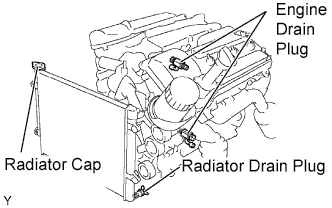 |
Loosen the 3 drain plugs on the engine and radiator, and drain the coolant.
Remove the radiator cap.
Drain the coolant from the reservoir tank.
Tighten the 3 drain plugs.
Remove the vinyl hose from the radiator.
| 4. DRAIN ENGINE OIL |
Remove the engine under cover seal No. 3.
Remove the oil pan drain plug and drain the engine oil.
Clean the oil pan drain plug and install it with a new gasket.
| 5. REMOVE ENGINE ASSEMBLY |
| 6. REMOVE OIL LEVEL GAGE GUIDE |
Remove the oil level gauge.
Remove the bolt and pull out the oil level gauge guide.
Remove the O-ring from the oil level gauge guide.
| 7. REMOVE WATER INLET |
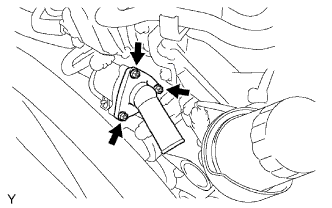 |
Remove the 3 nuts, then remove the water inlet with thermostat and gasket.
| 8. REMOVE V-RIBBED BELT TENSIONER ASSEMBLY |
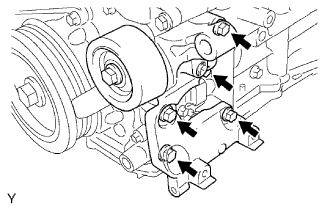 |
Remove the 5 bolts, then remove the V-ribbed belt tensioner.
| 9. REMOVE NO.2 IDLER PULLEY SUB-ASSEMBLY |
Remove the 2 bolts, then remove the idler pulley No. 2.
| 10. REMOVE NO.1 IDLER PULLEY SUB-ASSEMBLY |
Remove the bolt, then remove the idler pulley No. 1.
| 11. REMOVE CRANKSHAFT PULLEY |
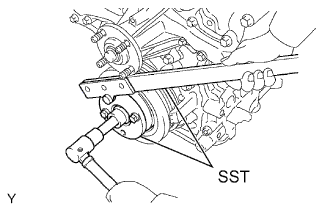 |
Using SST, hold the crankshaft pulley and loosen the pulley set bolt.
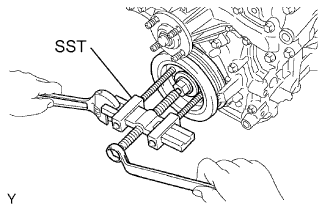 |
Using the pulley set bolt and SST, remove the crankshaft pulley.
| 12. REMOVE NO.2 OIL PAN SUB-ASSEMBLY |
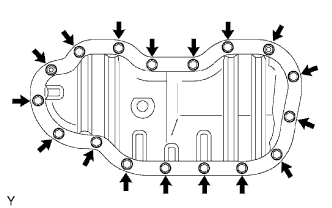 |
Remove the 15 bolts and 2 nuts.
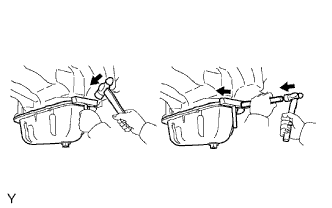 |
Insert the blade of the oil pan seal cutter between the oil pan and oil pan No. 2, cut off applied sealer and remove the oil pan No. 2.
| 13. REMOVE OIL STRAINER SUB-ASSEMBLY |
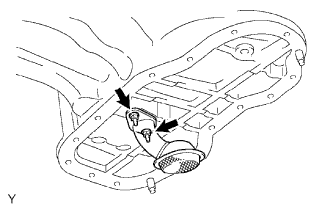 |
Remove the 2 nuts, then remove the oil strainer and gasket.
| 14. REMOVE OIL PAN SUB-ASSEMBLY |
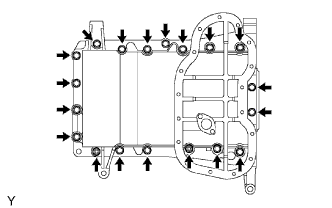 |
Remove the 17 bolts and 2 nuts.
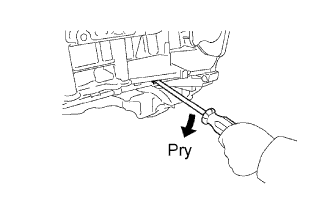 |
Using a screwdriver, remove the oil pan by prying between the oil pan and cylinder block.
| 15. REMOVE INTAKE AIR SURGE TANK |
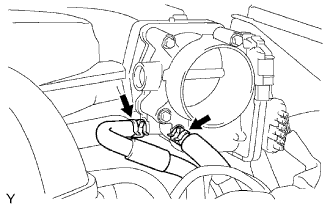 |
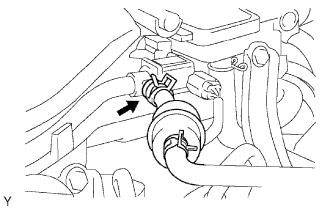
Disconnect the 2 water by-pass hoses.
 |
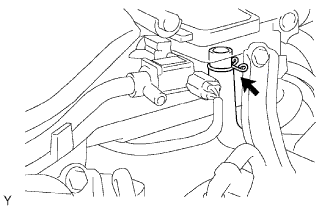
Disconnect the fuel vapor feed hose.
 |
Disconnect the ventilation hose.
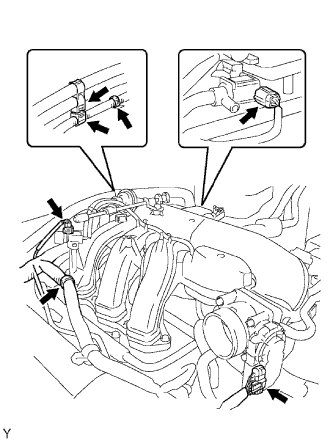 |
Disconnect the 2 VSV connectors.
Disconnect the throttle body with motor connector.
Separate the 3 wire harness clamps and hose clamp.
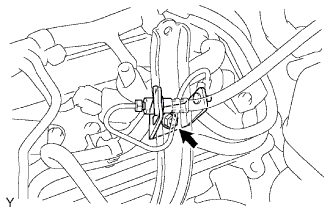 |
Remove the nut, then separate the clutch flexible hose bracket from the surge tank stay (with Manual Transmission).
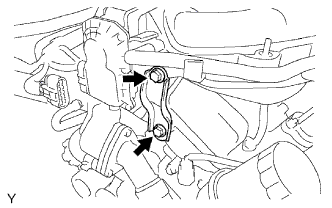 |
Remove the 2 bolts and throttle body bracket.
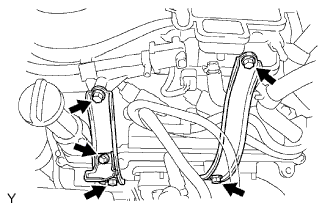 |
Remove the bolt and oil baffle plate.
Remove the 4 bolts and 2 surge tank stays.
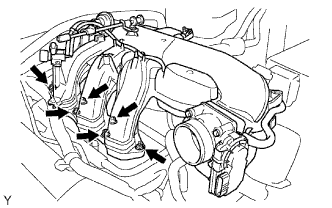 |
Remove the 2 nuts.
Using a socket hexagon wrench 8, remove the 4 bolts, intake air surge tank and gasket.
| 16. REMOVE IGNITION COIL ASSEMBLY |
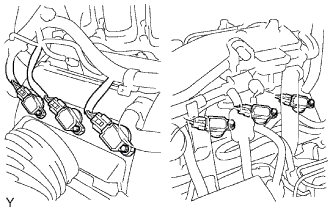 |
Disconnect the 6 connectors.
Remove the 6 bolts, then remove the 6 ignition coils.
| 17. REMOVE CYLINDER HEAD COVER SUB-ASSEMBLY |
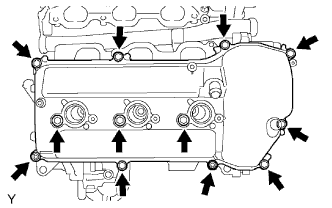 |
Remove the 10 bolts, 3 seal washers, 2 nuts, cylinder head cover and gasket.
| 18. REMOVE CYLINDER HEAD COVER SUB-ASSEMBLY LH |
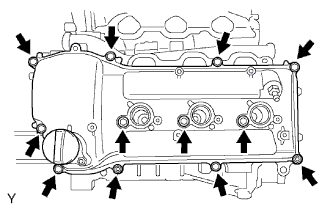 |
Remove the 10 bolts, 3 seal washers, 2 nuts, cylinder head cover and gasket.
| 19. REMOVE CAMSHAFT TIMING OIL CONTROL VALVE ASSEMBLY |
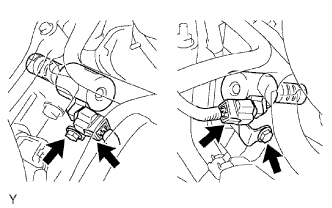 |
Disconnect the 2 connectors.
Remove the 2 bolts, then remove the 2 camshaft timing oil control valves.
| 20. REMOVE VVT SENSOR |
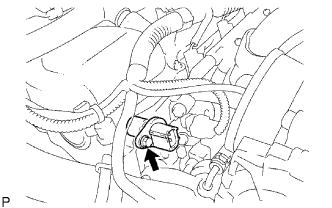 |
RH bank side VVT sensor:
Disconnect the VVT sensor connector.
Remove the bolt and VVT sensor.
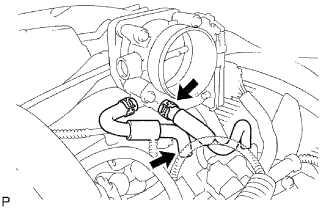 |
LH bank side VVT sensor:
Disconnect the water by-pass hoses No. 4 and No. 5 .
Disconnect the VVT sensor connector.
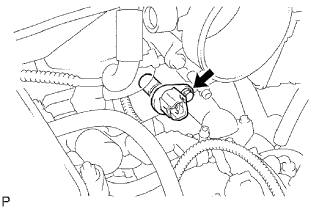 |
Remove the bolt and VVT sensor.
| 21. REMOVE TIMING CHAIN OR BELT COVER SUB-ASSEMBLY |
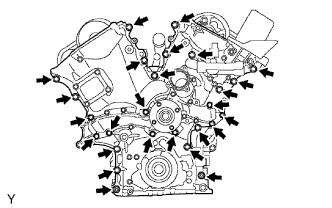 |
Remove the 24 bolts and 2 nuts.
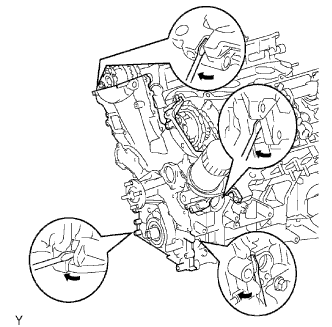 |
Remove the timing chain cover by prying between the timing chain cover and cylinder head or cylinder block with a screwdriver.
Remove the O-ring from the LH cylinder head.
| 22. REMOVE TIMING GEAR CASE OR TIMING CHAIN CASE OIL SEAL |
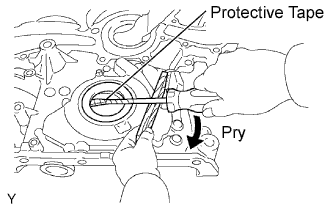 |
Using a screwdriver, pry out the oil seal.
| 23. SET NO.1 CYLINDER TO TDC/COMPRESSION |
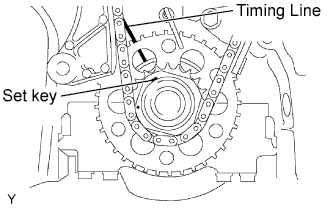 |
Using the crankshaft pulley set bolt, turn the crankshaft to align the crankshaft set key with the timing line of the cylinder block.
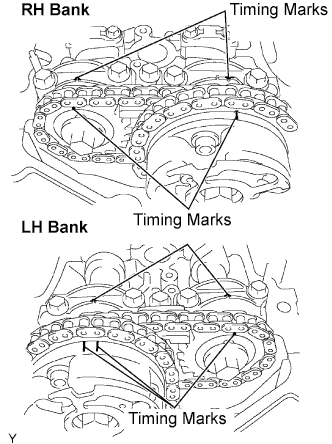 |
Check that the timing marks of the camshaft timing gears are aligned with the timing marks of the bearing cap as shown in the illustration.
If not, turn the crankshaft 1 complete revolution (360°) and align the timing marks as above.
| 24. REMOVE NO.1 CHAIN TENSIONER ASSEMBLY |
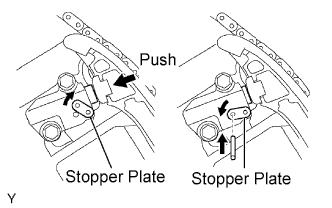 |
While turning the stopper plate of the tensioner upward, push in the plunger of the chain tensioner as shown in the illustration.
While turning the stopper plate of the tensioner down ward, insert a bar of φ 3.5 mm (0.138) into the holes in the stopper plate and tensioner to fix the stopper plate.
Remove the 2 bolts, then remove the chain tensioner.
| 25. REMOVE CHAIN TENSIONER SLIPPER |
| 26. REMOVE IDLE SPROCKET ASSEMBLY |
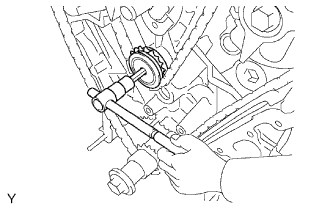 |
Using a 10 mm hexagon wrench, remove the idle gear shaft No. 2, idle gear No. 1 and idle gear shaft No. 1.
| 27. REMOVE NO.2 CHAIN VIBRATION DAMPER |
Remove the 2 chain vibration dampers No. 2.
| 28. REMOVE CHAIN SUB-ASSEMBLY |