Connect the connector to the occupant classification sensor.
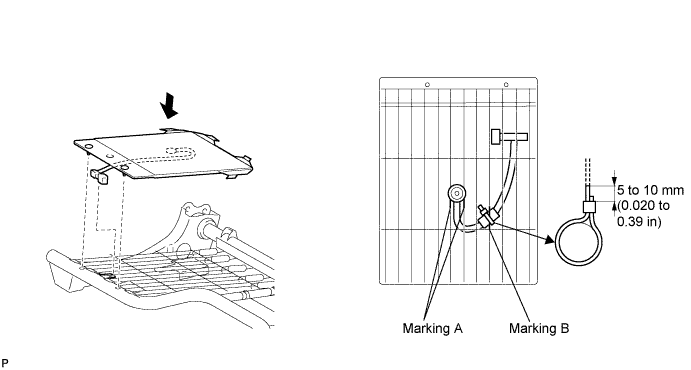
FRONT SEAT CUSHION ASSEMBLY (w/ Occupant Classification ECU, Occupant Classification Sensor) > INSTALLATION |
| 1. INSTALL OCCUPANT CLASSIFICATION SENSOR |
Install the occupant classification sensor with the 2 clips.
Engage the clamps to the seat cushion frame.
Pass the tube of the occupant classification sensor through marked portion A and then fix it at marked portion B on the front seat cushion spring assembly with the wiring harness clamp, as shown in the illustration on the following page.
Connect the connector to the occupant classification sensor.
| 2. INSTALL FRONT SEAT CUSHION SPRING ASSEMBLY |
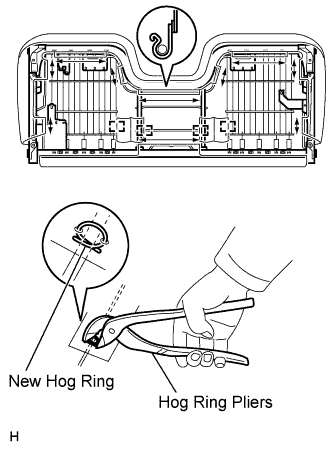 |
Engage the 10 hooks and install the front seat cushion spring.
Using hog ring pliers, install 4 new hog rings.
| 3. INSTALL FRONT SEAT OUTER TRACK ASSEMBLY LH |
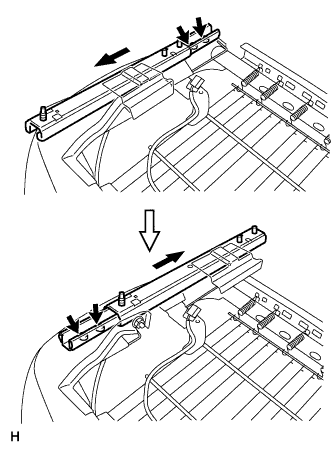 |
Insert the lever as shown in the illustration.
Slide the front seat track outer to the most forward position.
Using "TORX" socket wrench T40, tighten the 2 bolts.
Slide the front seat track outer to the most rearward position.
Using "TORX" socket wrench T40, tighten the 2 bolts.
| 4. INSTALL FRONT SEAT OUTER TRACK ASSEMBLY RH |
| 5. INSTALL FRONT SEAT TRACK LOWER REAR BRACKET LH |
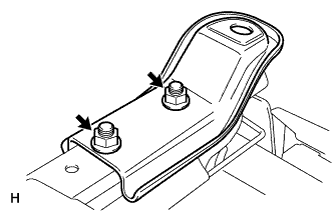 |
Install the front seat track rear bracket with the 2 nuts.
| 6. INSTALL FRONT SEAT TRACK LOWER REAR BRACKET RH |
| 7. INSTALL FRONT SEAT TRACK LOWER FRONT BRACKET LH |
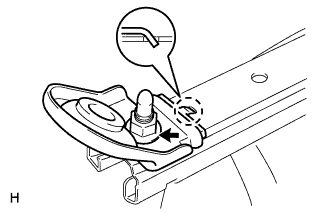 |
Engage the hook and install the front seat track front bracket with the nut.
| 8. INSTALL FRONT SEAT TRACK LOWER FRONT BRACKET RH |
| 9. INSTALL OCCUPANT CLASSIFICATION ECU |
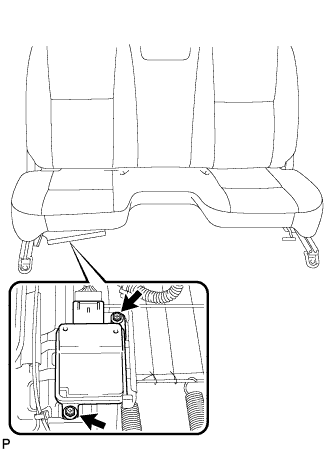 |
Check that the ignition switch is OFF.
Check that the negative battery (-) terminal is disconnected.
Install the occupant classification ECU with the 2 bolts.
Connect the connector to the occupant classification ECU.
| 10. INSTALL FRONT SEATBACK ASSEMBLY |
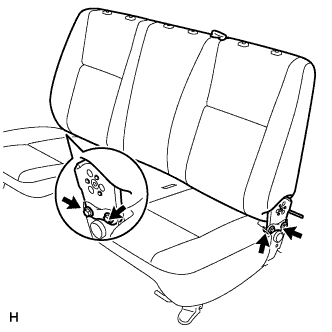 |
Install the front seat back with the 4 bolts.
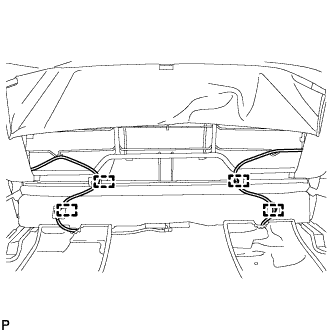 |
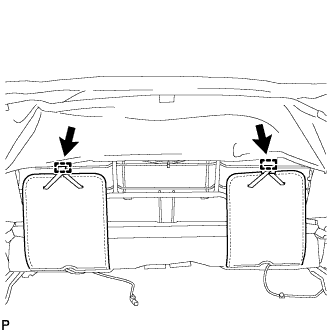
Engage the 4 airbag harness clamps.
 |
Engage the 2 seat cushion band clamps.
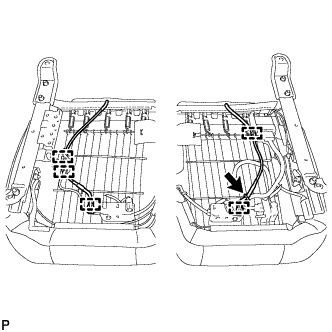 |
Engage the 5 airbag harness clamps.
Install the new tie band.
| 11. INSTALL FRONT SEAT HINGE COVER LH |
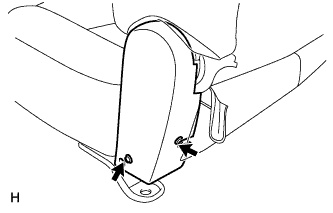 |
Install the front seat hinge cover with the 2 screws.
| 12. INSTALL FRONT SEAT HINGE COVER RH |
| 13. INSTALL FRONT SEAT ASSEMBLY |
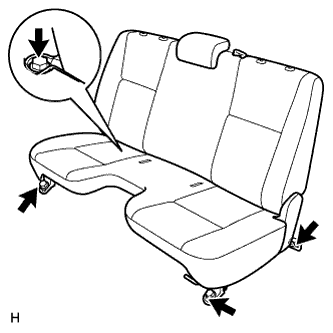 |
Place the front seat in the cabin.
Slide the front seat to the most rearward position.
Tighten the 2 bolts on the front side.
Slide the front seat to the most forward position.
Tighten the 2 bolts on the rear side.
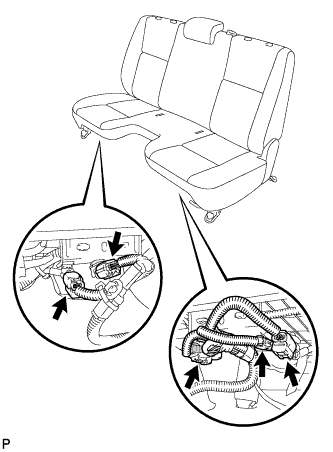 |
Install the 2 wiring harness clamps.
Connect the 5 connectors.
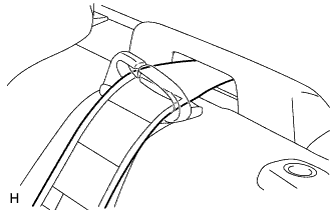 |
Install the belt of the front center seat outer belt into the front center seat outer belt guide.
| 14. INSTALL FRONT SEAT HEADREST ASSEMBLY |
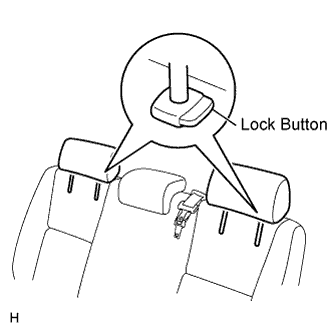 |
Push in the 2 lock buttons of the 2 front seat headrest supports and install the 2 front seat headrests.
| 15. INSTALL FRONT SEAT INNER BELT ASSEMBLY LH |
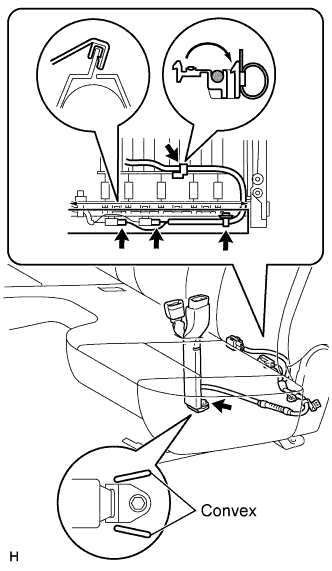 |
Slide the front seat to the most forward position.
Install the front seat inner belt with the bolt.
Install the 2 wiring harness clamps.
Connect the 2 connectors.
Engage the hook.
| 16. INSTALL FRONT SEAT INNER BELT ASSEMBLY RH |
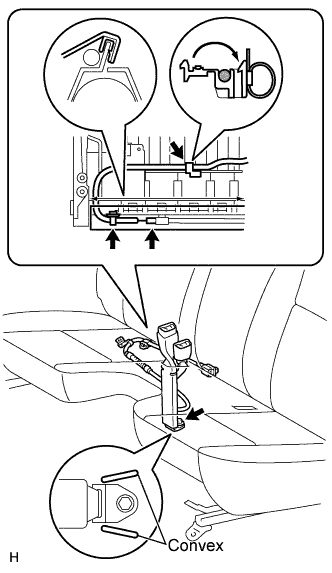 |
Slide the front seat to the most forward position.
Install the front seat inner belt with the bolt.
Install the 2 wiring harness clamps.
Connect the connector.
Engage the hook.
| 17. CONNECT CABLE TO NEGATIVE BATTERY TERMINAL |
| 18. PERFORM ZERO POINT CALIBRATION AND SENSITIVITY CHECK |
| 19. INSPECT SRS WARNING LIGHT |