 |
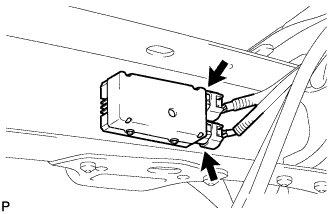
Disconnect the 2 fuel pump ECU connectors.
ENGINE ASSEMBLY > REMOVAL |
| 1. DISCHARGE FUEL SYSTEM PRESSURE |
Disconnect the cable from the negative (-) battery terminal.
|
Disconnect the 2 fuel pump ECU connectors.
Connect the cable to the negative (-) battery terminal.
Start the engine. After the engine has stopped on its own, turn the ignition switch OFF.
Crank the engine again, then check that the engine does not start.
Loosen the fuel tank cap, then discharge the pressure in the fuel tank completely.
Connect the 2 fuel pump ECU connectors.
| 2. DISCONNECT CABLE FROM NEGATIVE BATTERY TERMINAL |
| 3. REMOVE NO. 1 ENGINE UNDER COVER |
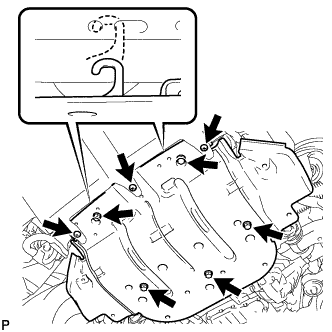 |
Remove the 3 screws and 5 bolts.
Unhook the engine under cover from the vehicle body as shown in the illustration.
| 4. DRAIN ENGINE COOLANT |
Loosen the radiator drain cock plug and 2 cylinder block drain cock plugs.
Remove the radiator cap. Then drain the coolant.
Tighten the 2 cylinder block drain cock plugs.
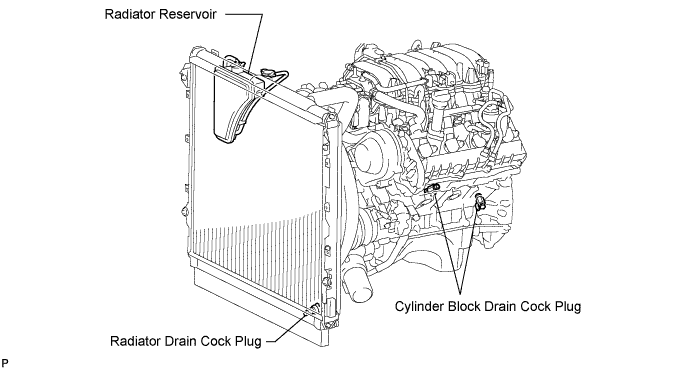
Tighten the radiator drain cock plug by hand.
| 5. DRAIN ENGINE OIL |
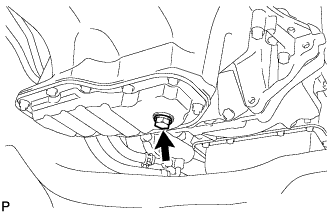 |
Remove the oil filler cap.
Remove the oil drain plug and gasket, and drain the engine oil into a container.
| 6. REMOVE HOOD SUB-ASSEMBLY |
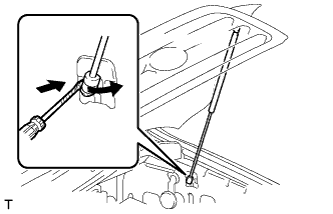 |
Using a screwdriver, remove the hood support assembly while releasing the 2 clips.
Remove the 4 bolts and hood.
| 7. REMOVE WINDSHIELD WIPER MOTOR ASSEMBLY |
Remove the windshield wiper motor (Click here).
| 8. REMOVE COWL TOP OUTER PANEL SUB-ASSEMBLY |
Disconnect the 2 washer hoses.
Remove the 7 bolts and outer panel.
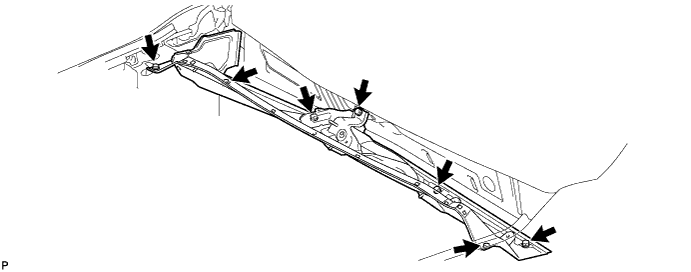
| 9. REMOVE THROTTLE BODY COVER SUB-ASSEMBLY |
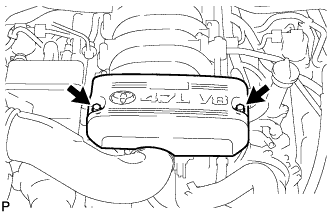 |
Remove the 2 nuts and throttle body cover.
| 10. REMOVE AIR CLEANER HOSE ASSEMBLY |
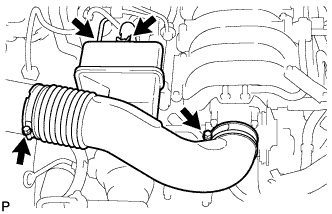 |
Disconnect the vacuum hose and No. 2 ventilation hose.
Loosen the 2 hose clamps.
Remove the air cleaner hose.
| 11. REMOVE NO. 2 VENTILATION HOSE |
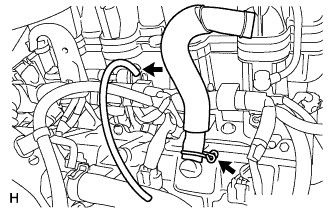 |
Remove the No. 2 ventilation hose.
Remove the vacuum hose.
| 12. REMOVE AIR CLEANER ASSEMBLY |
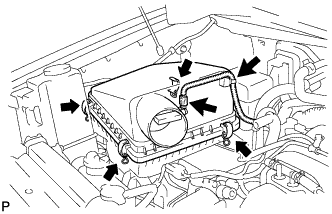 |
Remove the air cleaner cap.
Disconnect the MAF meter connector.
Using a clip remover, detach the wire harness clamp.
Unfasten the 4 hook clamps and then remove the air cleaner cap.
Remove the air cleaner element.
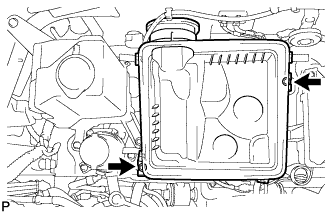 |
Remove the 2 bolts and air cleaner case.
| 13. REMOVE RADIATOR SIDE DEFLECTOR RH |
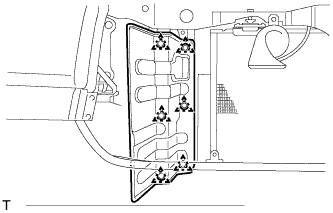 |
Using a clip remover, remove the 6 clips.
| 14. REMOVE RADIATOR SIDE DEFLECTOR LH |
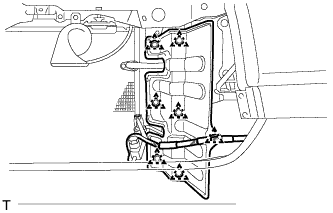 |
Using a clip remover, remove the 6 clips.
Remove the wire harness clamp.
| 15. REMOVE RADIATOR HOSE INLET |
| 16. REMOVE RADIATOR HOSE OUTLET |
| 17. REMOVE FAN AND GENERATOR V BELT |
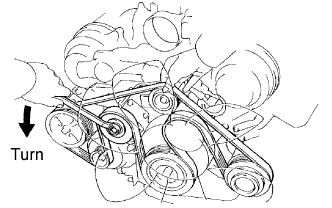 |
Loosen the belt tension by turning the belt tensioner counterclockwise, and then remove the fan and generator V belt.
| 18. REMOVE FLUID COUPLING ASSEMBLY |
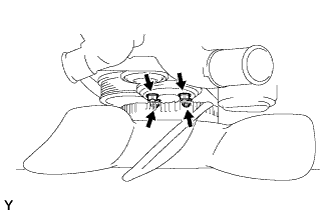 |
Loosen the 4 fluid coupling nuts.
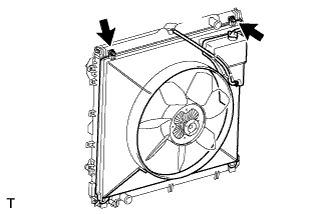 |
Remove the 2 bolts and fluid coupling nuts. Then remove the fan together with the fan shroud.
Remove the fan pulley.
| 19. REMOVE OIL COOLER ASSEMBLY (w/ Trailer Towing System) |
Remove the oil cooler (Click here).
| 20. REMOVE RADIATOR ASSEMBLY |
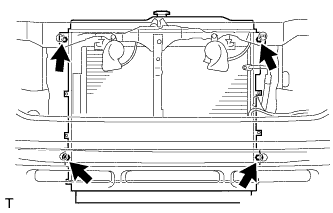 |
Remove the 4 bolts and radiator.
| 21. DISCONNECT FUEL MAIN AND RETURN HOSE |
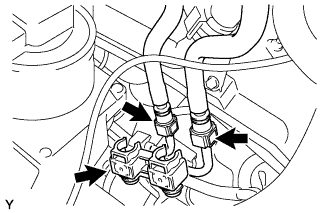 |
Remove the fuel pipe clamp.
Disconnect the fuel main and return hoses (Click here).
| 22. DISCONNECT WIRE HARNESS AND HOSE |
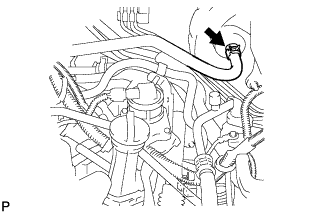 |
Disconnect the vacuum hose assembly.
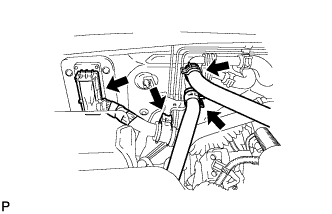 |
Disconnect the heater hoses.
Disconnect the clamp and ECM connector.
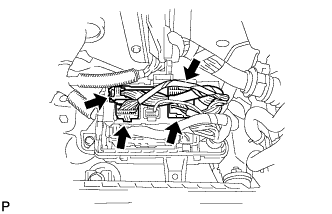 |
Disconnect the 4 connectors from the connector holder block.
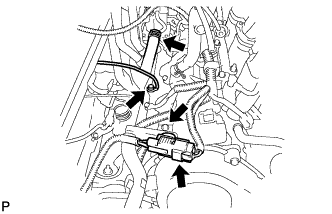 |
Remove the bolt and connector bracket and disconnect the air pump connector.
Remove the bolt and disconnect the ground wire.
Disconnect the air injection system hose.
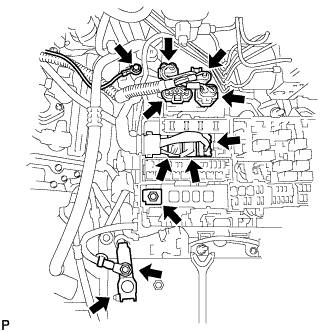 |
Remove the nut and disconnect the wire from the positive (+) battery terminal.
Disconnect the positive (+) battery terminal.
Remove the bolt and disconnect the ground wire.
Disconnect the 4 air injection control driver connectors.
Remove the nut and disconnect the wire from the engine room junction block.
Disconnect the 3 connectors from the engine room junction block.
| 23. DISCONNECT COOLER COMPRESSOR ASSEMBLY |
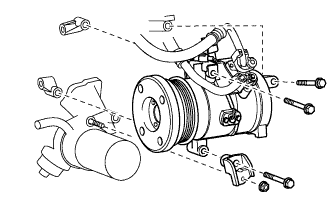 |
Disconnect the connector.
Remove the 3 bolts, nut and No. 1 compressor stay and disconnect the cooler compressor.
| 24. DISCONNECT VANE PUMP ASSEMBLY |
Disconnect the connector.
Remove the nut, 2 bolts and vane pump assembly.
| 25. REMOVE GENERATOR ASSEMBLY |
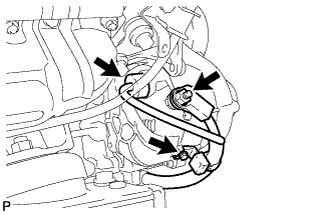 |
Disconnect the generator connector.
Remove the terminal cap and nut, and disconnect the generator wire.
Remove the bolt and disconnect the wire harness bracket from the generator.
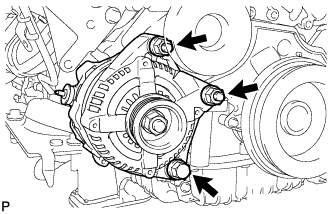 |
Remove the bolt, 2 nuts and generator.
| 26. REMOVE NO. 1 WATER BY-PASS PIPE |
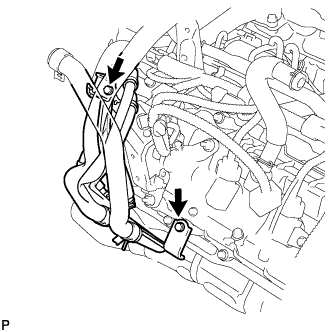 |
Remove the 2 bolts and water by-pass pipe.
| 27. REMOVE EXHAUST PIPE ASSEMBLY |
for Regular cab standard deck, refer to the following procedures (Click here).
except Regular cab standard deck, refer to the following procedures (Click here).
| 28. REMOVE PROPELLER SHAFT ASSEMBLY |
for 2 Joint type, refer to the following procedures .
for 3 Joint type, refer to the following procedures .
| 29. REMOVE AUTOMATIC TRANSMISSION ASSEMBLY |
for 2WD, refer to the following procedures (Click here).
for 4WD, refer to the following procedures (Click here).
| 30. REMOVE DRIVE PLATE AND RING GEAR SUB-ASSEMBLY |
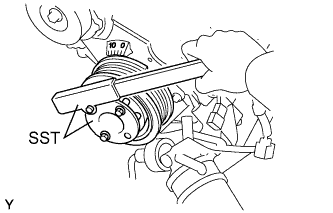 |
Using SST, hold the crankshaft.
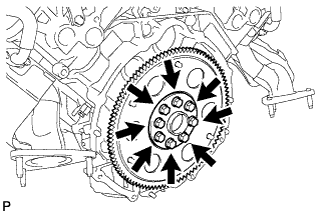 |
Remove the 8 bolts, front drive plate spacer, drive plate and rear drive plate spacer.
| 31. REMOVE ENGINE ASSEMBLY |
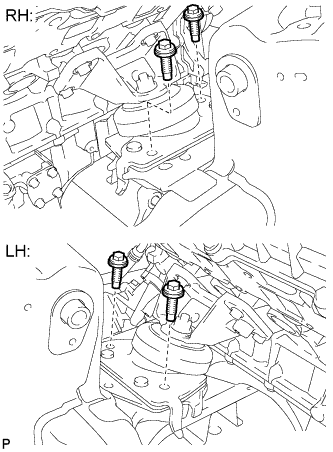 |
Attach an engine sling device and hang the engine with a chain block.
Remove the 4 engine mounting insulator's bolts.
Lift the engine out from the vehicle slowly and carefully.
| 32. REMOVE NO. 3 AIR TUBE |
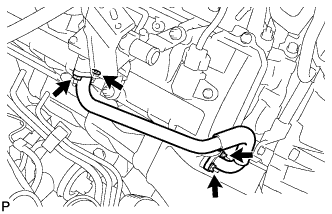 |
Remove the 4 nuts, air tube and 2 gaskets.
| 33. REMOVE NO. 2 EXHAUST MANIFOLD HEAT INSULATOR |
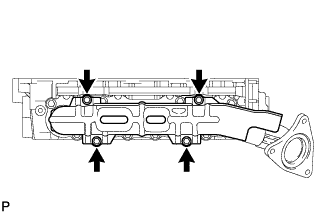 |
Remove the 4 bolts and heat insulator.
| 34. REMOVE EXHAUST MANIFOLD SUB-ASSEMBLY LH |
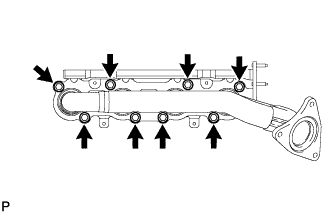 |
Remove the 8 nuts and exhaust manifold.
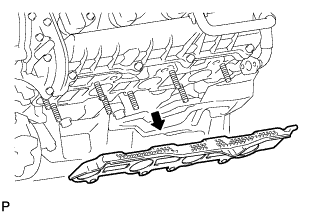 |
Remove the gasket.
| 35. REMOVE NO. 2 AIR TUBE |
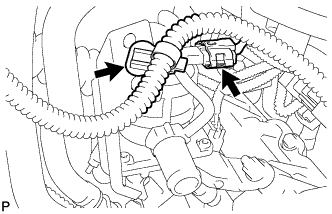 |
Disconnect the air pump connector.
Disconnect the wire harness clamp.
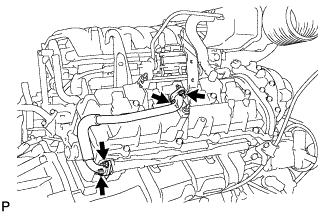 |
Remove the 4 nuts, No. 2 air tube and 2 gaskets.
| 36. REMOVE ENGINE OIL LEVEL DIPSTICK GUIDE |
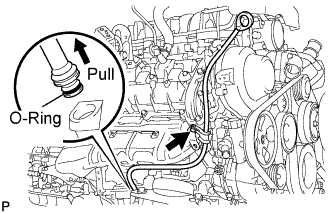 |
Remove the dipstick.
Remove the bolt and dipstick guide.
Remove the O-ring from the dipstick guide.
| 37. REMOVE NO. 1 EXHAUST MANIFOLD HEAT INSULATOR |
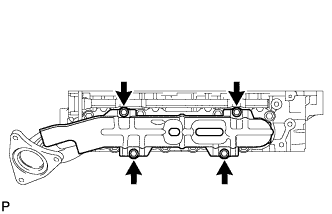 |
Remove the 4 bolts and heat insulator.
| 38. REMOVE EXHAUST MANIFOLD SUB-ASSEMBLY RH |
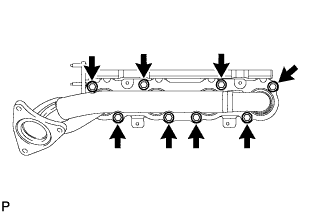 |
Remove the 8 nuts and exhaust manifold.
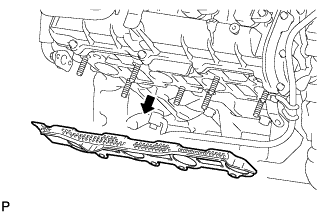 |
Remove the gasket.
| 39. INSTALL ENGINE ON ENGINE STAND |
Install the engine onto an engine stand with the bolts.