REAR BUMPER (for Resin Type Bumper) > REMOVAL |
| 1. DISCONNECT CABLE FROM NEGATIVE BATTERY TERMINAL |
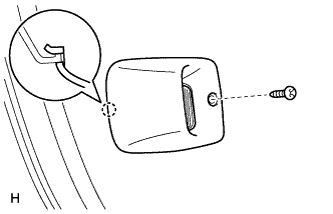
| 2. REMOVE LICENSE PLATE LIGHT ASSEMBLY LH |
|
Remove the screw.
Detach the claw and remove the license plate light.
| 3. REMOVE LICENSE PLATE LIGHT ASSEMBLY RH |
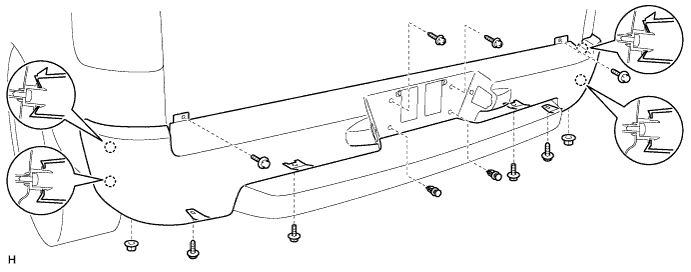
| 4. REMOVE REAR BUMPER COVER |
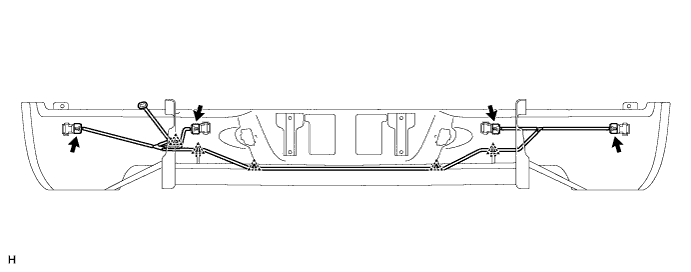
w/ Intuitive Parking Assist System:
Disconnect the connectors and clamps shown in illustration.
Remove the 2 clips and 4 screws.
Remove the 4 bolts and 2 nuts.
Detach the 4 claws and remove the rear bumper cover.
| 5. REMOVE REAR BUMPER PAD SUB-ASSEMBLY |
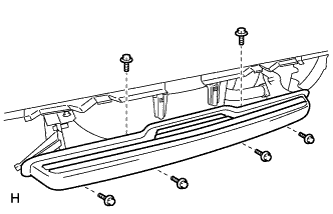 |
Remove the 6 bolts and bumper pad.
| 6. REMOVE REAR NO. 1 BUMPER SUPPORT |
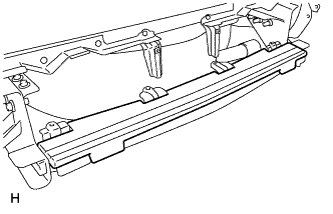 |
Remove the bumper support.
| 7. REMOVE REAR BUMPER SIDE EXTENSION SUB-ASSEMBLY LH |
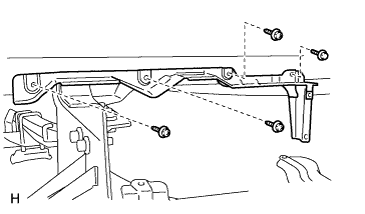 |
Remove the 3 screws, bolt and side extension.
| 8. REMOVE REAR BUMPER SIDE EXTENSION SUB-ASSEMBLY RH |
| 9. REMOVE NO. 3 WIRE FRAME (w/ Trailer Towing System) |
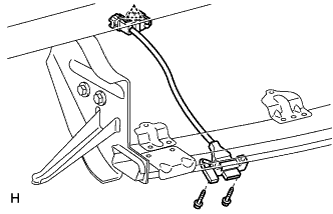 |
Disconnect the connector.
Detach the clamp.
Remove the 2 bolts and wire frame.