 |
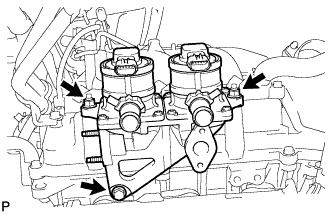
Install the air switching valve with the bolt and 2 nuts.
- Torque:
- 19 N*m{ 194 kgf*cm , 14 ft.*lbf }
AIR SWITCHING VALVE > INSTALLATION |
| 1. INSTALL AIR SWITCHING VALVE ASSEMBLY |
|
Install the air switching valve with the bolt and 2 nuts.
| 2. CONNECT NO. 2 AIR TUBE |
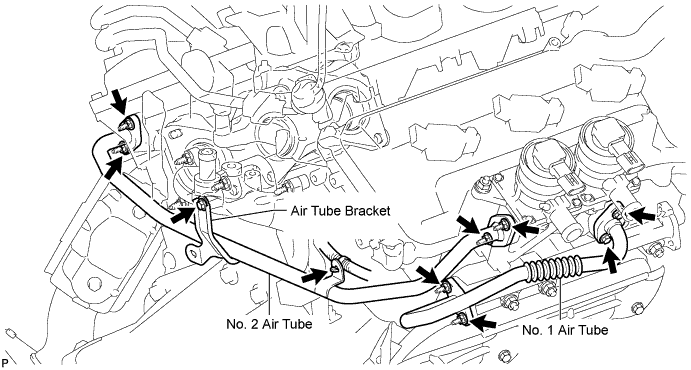
Connect the No. 2 air tube.
Temporarily install a new gasket and the No. 2 air tube to the air switching valve side with the 2 nuts. Then temporarily install a new gasket and the No. 2 air tube to the exhaust manifold side with the 2 nuts.
Temporarily install the No. 2 air tube bracket to the rear water by-pass joint with the bolt.
Tighten the bolt and 4 nuts.
Connect the wire harness clamp.
| 3. INSTALL NO. 1 AIR TUBE |
Install the No. 1 air tube.
Temporarily install a new gasket and the No. 1 air tube to the exhaust manifold side with the 2 nuts.
Install a new gasket and the No. 1 air tube to the air switching valve side with the 2 bolts.
Tighten the 2 nuts on the exhaust manifold side.
| 4. INSTALL AIR TUBE |
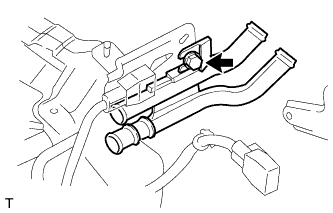 |
Install the air tube with the bolt.
| 5. INSTALL NO. 4 AIR INJECTION SYSTEM HOSE |
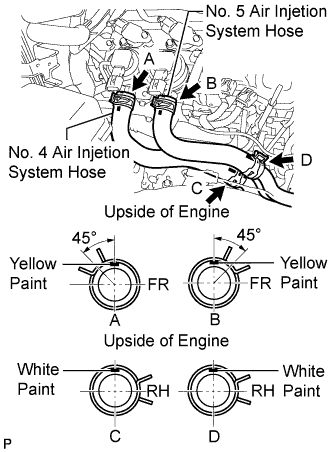 |
Install the air injection system hose and the 2 clamps as shown in the illustration.
| 6. INSTALL NO. 5 AIR INJECTION SYSTEM HOSE |
Install the air injection system hose and the 2 clamps as shown in the illustration.
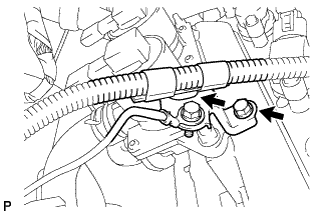 |
Connect the wire harness bracket with the bolt and attach the wire harness clamp.
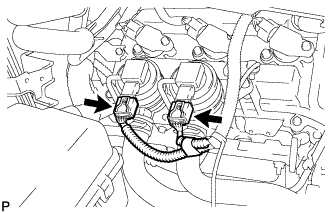 |
Connect the 2 air pump connectors.
| 7. CONNECT NO. 2 AIR INJECTION SYSTEM HOSE |
Connect the No. 2 air injection system hose to the air tube.
| 8. CONNECT NO. 3 AIR INJECTION SYSTEM HOSE |
Connect the No. 3 air injection system hose to the air tube.
| 9. INSTALL INTAKE AIR SURGE TANK |
Install a new gasket to the intake air surge tank.
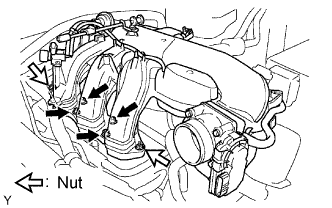 |
Using an 8 mm hexagon wrench, install the intake air surge tank with the 4 bolts and 2 nuts.
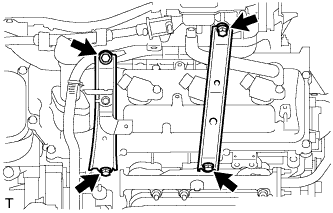 |
Install the No. 2 surge tank stay with the 2 bolts.
Install the No. 1 surge tank stay with the 2 bolts.
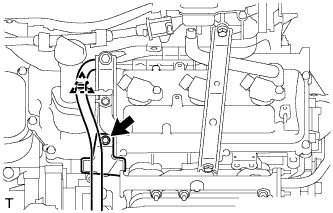 |
Install the oil baffle plate with the bolt.
Attach the wire harness clamp.
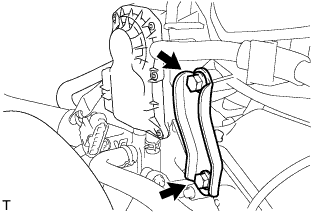 |
Install the throttle body bracket with the 2 bolts.
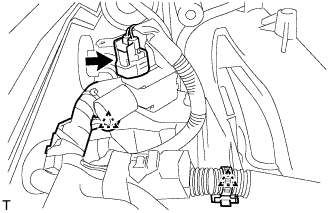 |
Connect the vacuum switching valve (for ACIS) connector.
Attach the 2 wire harness clamps.
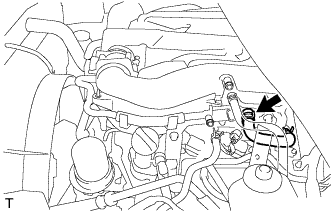 |
Connect the No. 1 ventilation hose.
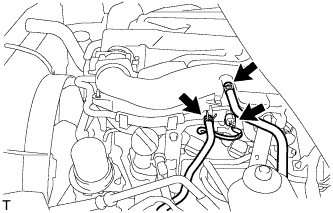 |
Connect the union to check valve hose.
Connect the purge VSV connector.
Connect the purge line hose.
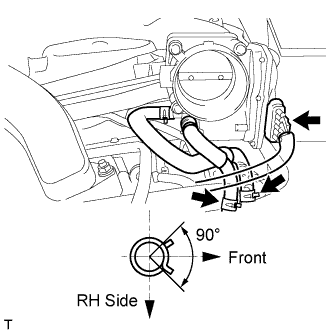 |
Connect the No. 4 water by-pass hose.
Connect the No. 5 water by-pass hose.
Connect the throttle position sensor and throttle control motor connector.
| 10. INSTALL AIR CLEANER ASSEMBLY WITH ELEMENT |
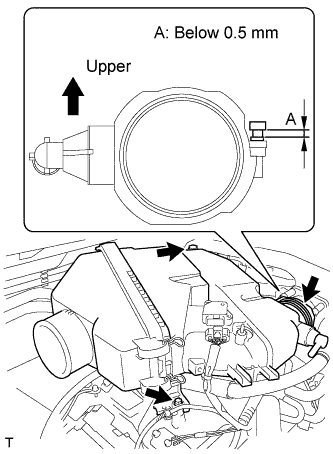 |
Install the air cleaner with element with the 2 bolts.
Tighten the hose clamp.
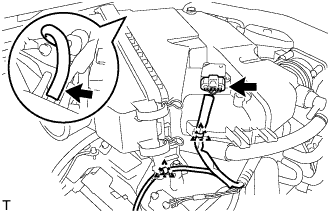 |
Connect the MAF meter connector.
Attach the 2 wire harness clamps.
Connect the vacuum hose.
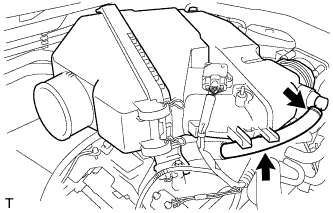 |
Attach the hose clamp.
Connect the No. 2 ventilation hose.
| 11. INSTALL NO. 2 AIR CLEANER HOSE |
 |
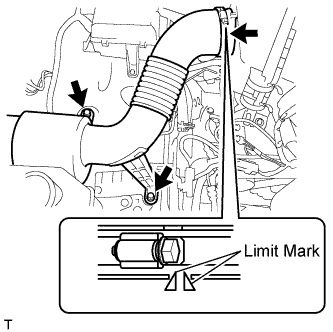 |
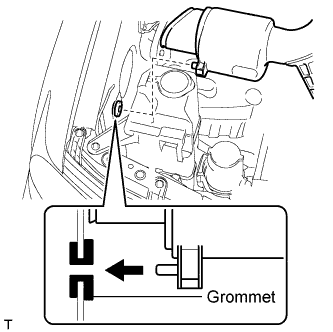
Install the air cleaner hose with the 2 bolts.
Tighten the hose clamp.
| 12. CONNECT CABLE TO NEGATIVE BATTERY TERMINAL |
| 13. ADD ENGINE COOLANT |
Add engine coolant.
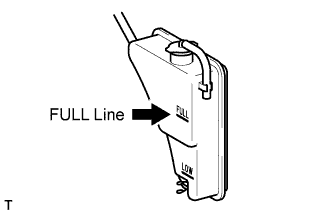 |
Slowly pour coolant into the radiator reservoir until it reaches the FULL line.
Install the reservoir cap.
Press the inlet and outlet radiator hoses several times by hand, and then check the coolant level. If the coolant level is low, add coolant.
Install the radiator cap.
Start the engine and warm it up until the thermostat opens.
Maintain the engine speed at 2000 to 2500 rpm.
Press the inlet and outlet radiator hoses several times by hand to bleed air.
Stop the engine, and wait until the engine coolant cools down to ambient temperature.
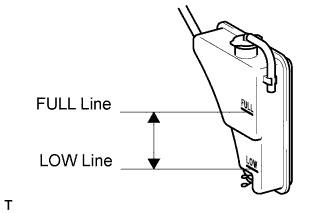 |
Check that the coolant level is between the FULL and LOW lines.
If the coolant level is below the LOW line, repeat all of the procedures above.
If the coolant level is above the FULL line, drain coolant so that the coolant level is between the FULL and LOW lines.
| 14. INSPECT FOR ENGINE COOLANT LEAK |
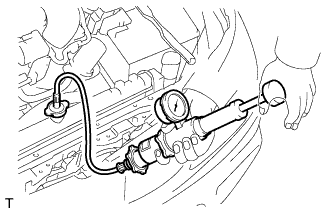 |
Fill the radiator with coolant and attach a radiator cap tester.
Warm up the engine.
Using the radiator cap tester, increase the pressure inside the radiator to 118 kPa (1.2 kgf/cm2, 17 psi), and check that the pressure does not drop.
If the pressure drops, check the hoses, radiator and water pump for leaks. If no external leaks are found, check the heater core, cylinder block and head.
| 15. INSTALL V-BANK COVER |
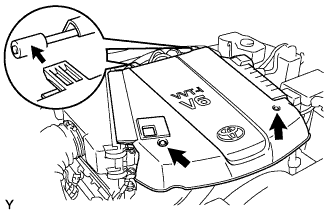 |
Install the V-bank cover with the 2 nuts.
| 16. INSTALL FRONT COWL TOP OUTER PANEL SUB-ASSEMBLY |
Install the front cowl top outer panel with the 7 bolts.
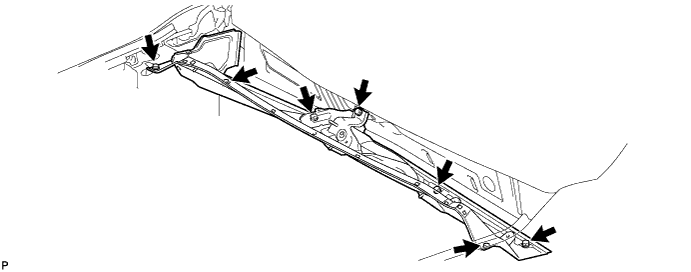
Connect the 2 washer hoses.
| 17. INSTALL FRONT WIPER MOTOR AND LINK ASSEMBLY |
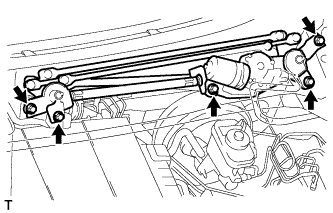 |
Install the wiper motor and link assembly with the 4 bolts and nut.
Connect the connector.
| 18. INSTALL NO. 1 ENGINE UNDER COVER |
Install the engine under cover with the 5 bolts and 3 screws.