Home › BODY ELECTRICAL › PARK ASSIST / MONITORING › CLEARANCE WARNING ECU

CLEARANCE WARNING ECU > REMOVAL

for Preparation Click here


1. DISCONNECT CABLE FROM NEGATIVE BATTERY TERMINAL

NOTICE:
  1. Some systems need to be initialized after the cable is reconnected (Click here).
  2. After the ignition switch is turned OFF, the navigation system requires approximately 90 seconds to record various types of memory and settings. As a result, after turning the ignition switch OFF, wait 90 seconds or more before disconnecting the cable from the negative (-) battery terminal.


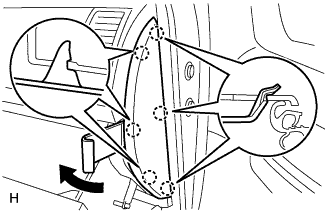
2. REMOVE INSTRUMENT SIDE PANEL RH


    B160590
  1. Using a moulding remover, detach the 6 claws and remove the side panel.


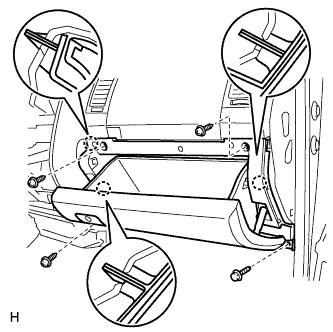
3. REMOVE LOWER INSTRUMENT PANEL FINISH PANEL SUB-ASSEMBLY RH


    B160593
  1. Remove the bolt.

  1. Remove the 3 screws.

  1. Detach the 3 claws and remove the finish panel.


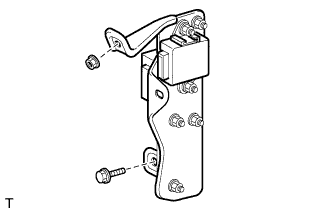
4. REMOVE CLEARANCE WARNING ECU WITH BRACKET


    E146397
  1. Disconnect the ECU connectors.

    NOTICE:
    Do not apply excessive force to the wire harnesses.

  1. Remove the bolt, nut and ECU with bracket.


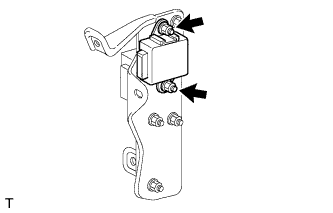
5. REMOVE CLEARANCE WARNING ECU


    E146398
  1. Remove the 2 nuts and clearance warning ECU from the bracket.

    NOTICE:
    1. Avoid any impact to the clearance warning ECU.
    2. Do not drop the ECU. If it is dropped, replace it with a new one.