STEERING COLUMN ASSEMBLY (for Manual Tilt) > INSTALLATION |
| 1. INSTALL STEERING COLUMN ASSEMBLY |
|
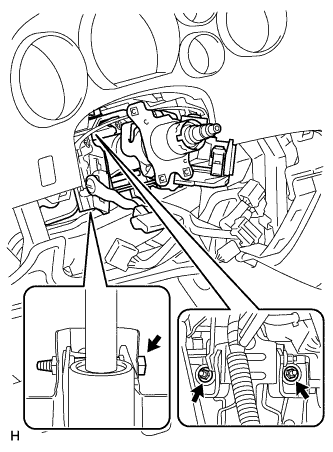
Install the steering column with the bolt and 2 nuts.
| 2. INSTALL NO. 2 STEERING INTERMEDIATE SHAFT SUB-ASSEMBLY |
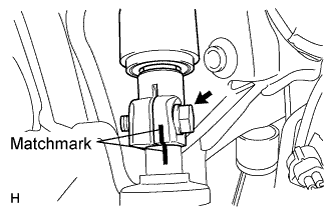 |
Align the matchmarks on the No. 2 steering intermediate shaft and power steering gear.
Install the bolt.
| 3. INSTALL STEERING INTERMEDIATE SHAFT ASSEMBLY |
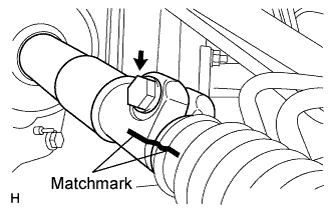 |
Align the matchmarks on the steering intermediate shaft and No. 2 steering intermediate shaft.
Install the bolt.
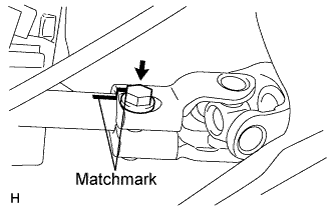 |
Align the matchmarks on the steering column and steering intermediate shaft.
Install the bolt.
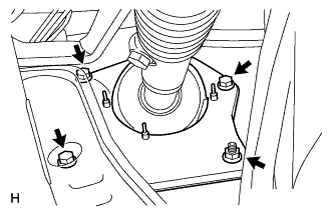 |
Install the 3 bolts and nut.
| 4. INSTALL NO. 1 AIR DUCT SUB-ASSEMBLY |
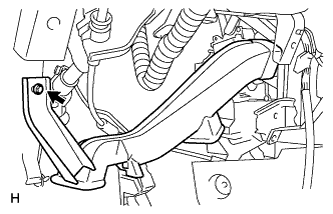 |
Install the air duct with the bolt.
| 5. INSTALL LOWER INSTRUMENT PANEL FINISH PANEL SUB-ASSEMBLY LH |
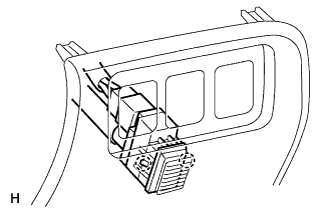 |
for Automatic Air Conditioning System:
Attach the 2 claws to install the sensor.
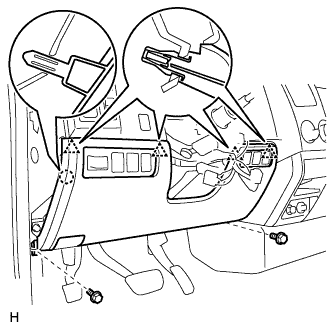 |
Connect the connectors.
Attach the 4 clips and claw to install the finish panel.
Install the 2 bolts.
Install the hood lock control lever.
| 6. INSTALL INSTRUMENT SIDE PANEL LH |
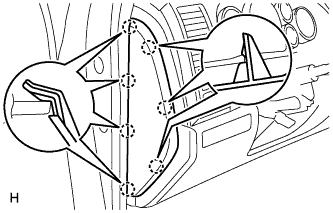 |
Attach the 7 claws to install the side panel.
| 7. INSTALL COWL SIDE TRIM BOARD LH |
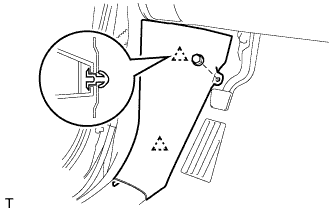 |
Attach the 2 clips to install the cowl side trim board.
Install the clip.
| 8. INSTALL FRONT DOOR SCUFF PLATE LH (for Regular Cab) |
| 9. INSTALL FRONT DOOR SCUFF PLATE LH (for Double Cab, CrewMax) |
| 10. INSTALL COLUMN SHIFT SHIFT LEVER SUB-ASSEMBLY |
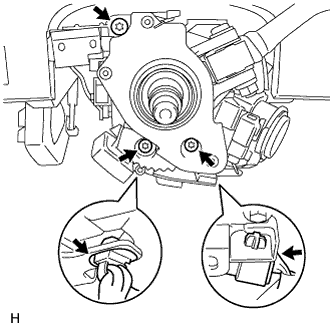 |
Using a T30 ''TORX'' wrench, install the column shift with the 3 bolts.
Connect the connector and attach the harness clamp.
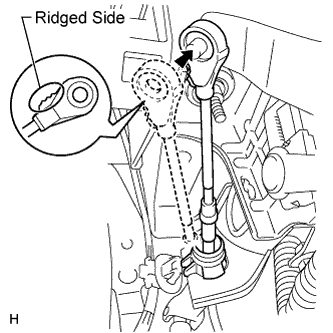 |
Connect the column shift transmission control cable end to the column shift.
| 11. CONNECT COLUMN SHIFT TRANSMISSION CONTROL CABLE ASSEMBLY |
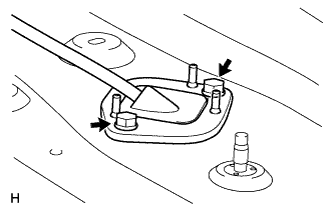 |
Insert the column shift transmission control cable from the vehicle interior, and install the cable retainer with the 2 bolts.
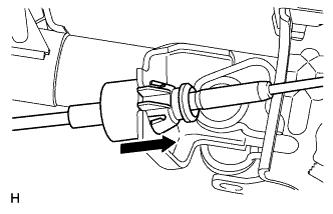 |
Connect the cable to the steering column shaft bracket so that the outer cable socket's claws attach securely.
|
Connect the column shift transmission control cable end to the column shift.
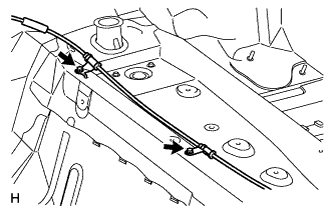 |
Connect the 2 cable clamps with the 2 bolts.
Return the floor carpet front LH side to its original position.
Move the shift lever to the N position.
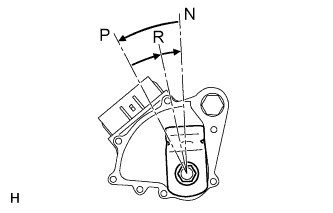 |
Turn the control shaft lever counterclockwise until it stops, and then turn it clockwise 2 notches to set it to the N position.
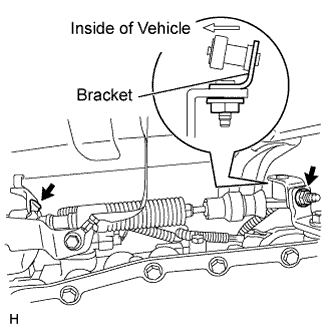 |
Connect the control cable with a new clip and the nut.
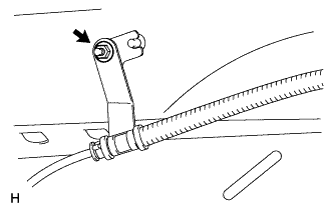 |
Connect the transmission control cable support with the nut.
| 12. INSTALL TURN SIGNAL SWITCH ASSEMBLY WITH SPIRAL CABLE SUB-ASSEMBLY |
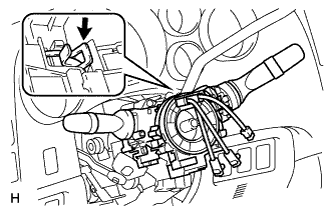 |
Install the turn signal switch with spiral cable to the steering column with the clamp.
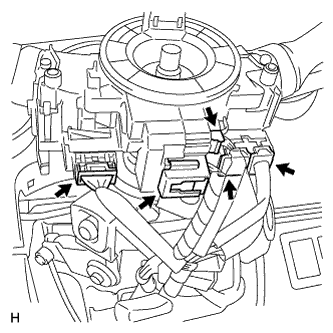 |
Connect the 5 connectors to the turn signal switch with spiral cable.
| 13. INSTALL UPPER STEERING COLUMN COVER |
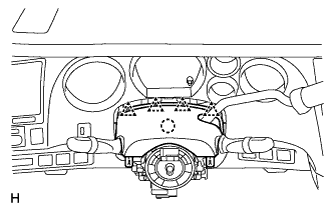 |
Attach the claw to install the upper steering column cover.
Attach the 4 clips.
| 14. INSTALL LOWER STEERING COLUMN COVER |
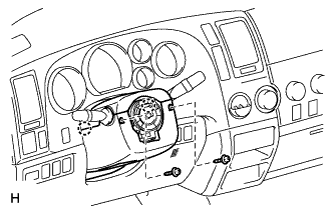 |
Attach the 2 claws to install the lower steering column cover.
Install the 2 screws.
| 15. INSTALL STEERING WHEEL ASSEMBLY |
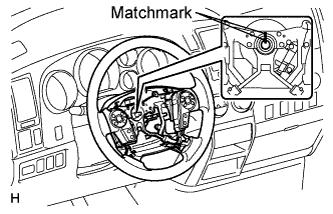 |
Align the matchmarks on the steering wheel and steering main shaft.
Install the steering wheel set nut.
| 16. INSPECT STEERING WHEEL CENTER POINT |
| 17. INSTALL STEERING PAD (w/ Steering Pad Switch) |
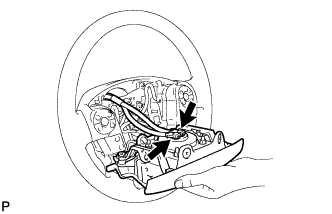 |
Support the steering pad with one hand.
Connect the 2 connectors to the steering pad.
Confirm that the circumference groove of the screw fits in the screw case, and place the steering pad onto the steering wheel .
Using a T30 "TORX" socket wrench, tighten the 2 screws.
| 18. INSTALL STEERING PAD (w/o Steering Pad Switch) |
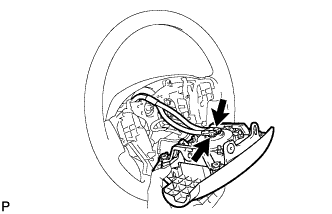 |
Support the steering pad with one hand.
Connect the 2 connectors to the steering pad.
Confirm that the circumference groove of the screw fits in the screw case, and place the steering pad onto the steering wheel.
Using a T30 "TORX" socket wrench, tighten the 2 screws.
| 19. INSTALL LOWER NO. 3 STEERING WHEEL COVER |
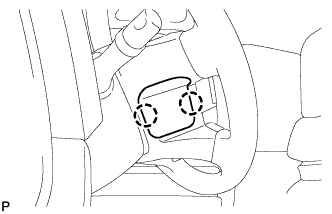 |
Attach the 2 claws to install the cover.
| 20. INSTALL LOWER NO. 2 STEERING WHEEL COVER |
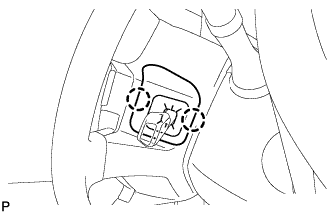 |
w/ Cruise Control:
Attach the 2 claws to install the cover.
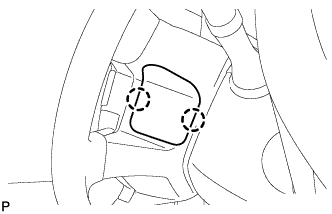 |
w/o Cruise Control:
Attach the 2 claws to install the cover.
| 21. CONNECT CABLE TO NEGATIVE BATTERY TERMINAL |
| 22. CHECK SRS WARNING LIGHT |
Check the SRS warning light (Click here).