INSTRUMENT PANEL SPEAKER (for Regular Cab) > INSTALLATION |
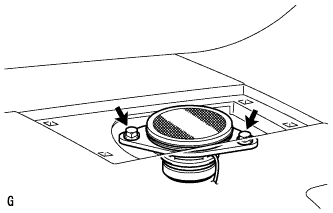
| 1. INSTALL FRONT NO. 2 SPEAKER ASSEMBLY RH |
|
Connect the speaker connector.
Temporarily install the speaker by aligning the positioning pins of the speaker with the instrument panel.
Install the speaker with the 2 bolts.
| 2. INSTALL FRONT NO. 2 SPEAKER ASSEMBLY LH |
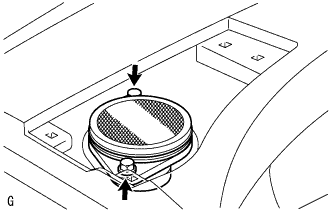 |
Connect the speaker connector.
Temporarily install the speaker by aligning the positioning pins of the speaker with the instrument panel.
Install the speaker with the 2 bolts.
| 3. INSTALL NO. 2 INSTRUMENT PANEL SPEAKER PANEL SUB-ASSEMBLY |
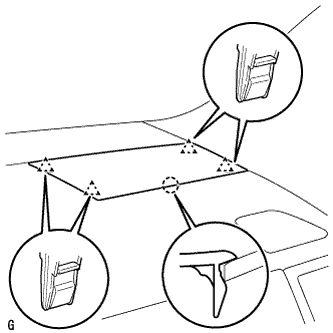 |
Attach the 4 clips and claw to install the speaker panel.
| 4. INSTALL NO. 1 INSTRUMENT PANEL SPEAKER PANEL SUB-ASSEMBLY |
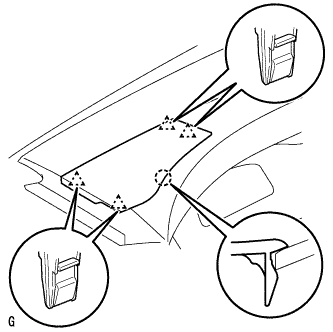 |
Attach the 4 clips and claw to install the speaker panel.
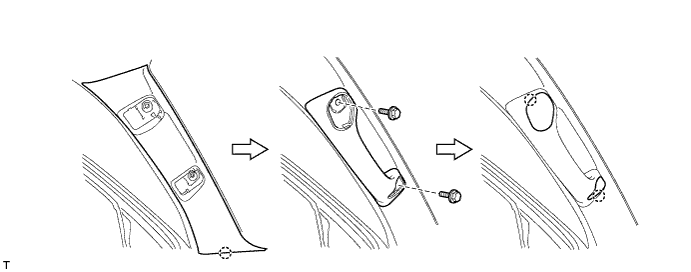
| 5. INSTALL FRONT PILLAR GARNISH RH |
| 6. INSTALL FRONT PILLAR GARNISH LH |
Attach the claw to install the front pillar garnish.
Install the assist grip with the 2 bolts.
Attach the 2 claws to install the 2 assist grip plugs.
| 7. CONNECT CABLE TO NEGATIVE BATTERY TERMINAL |