Detach the claw and remove the front pillar garnish.
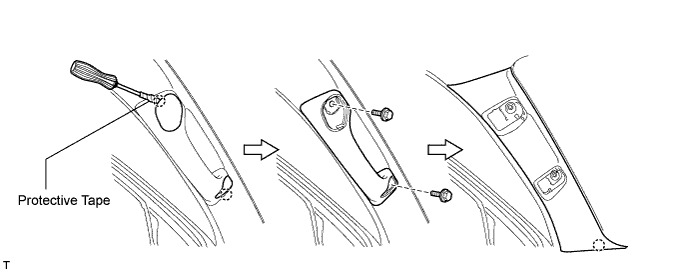
INSTRUMENT PANEL SPEAKER (for Regular Cab) > REMOVAL |
| 1. DISCONNECT CABLE FROM NEGATIVE BATTERY TERMINAL |
| 2. REMOVE FRONT PILLAR GARNISH LH |
Using a screwdriver, detach the 2 claws and remove the 2 assist grip plugs.
Remove the 2 bolts and assist grip.
Detach the claw and remove the front pillar garnish.
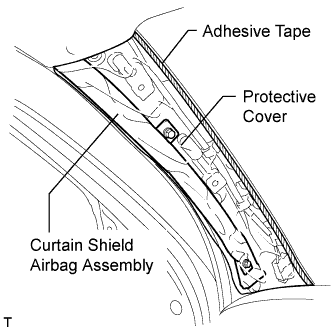 |
Protect the curtain shield airbag.
Thoroughly cover the airbag with a cloth or nylon sheet and fix the ends of the cover with adhesive tape, as shown in the illustration.
| 3. REMOVE FRONT PILLAR GARNISH RH |
| 4. REMOVE NO. 1 INSTRUMENT PANEL SPEAKER PANEL SUB-ASSEMBLY |
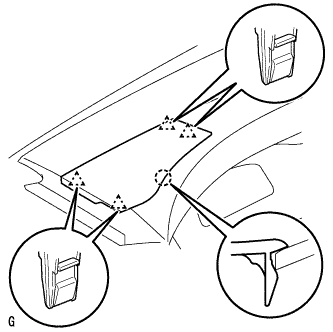 |
Using a screwdriver, detach the 4 clips and claw.
Remove the speaker panel.
| 5. REMOVE NO. 2 INSTRUMENT PANEL SPEAKER PANEL SUB-ASSEMBLY |
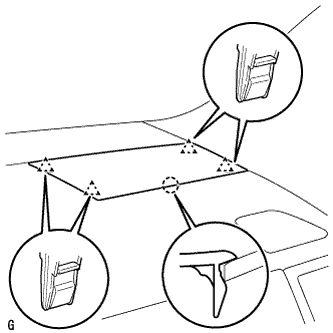 |
Using a screwdriver, detach the 4 clips and claw.
Remove the speaker panel.
| 6. REMOVE FRONT NO. 2 SPEAKER ASSEMBLY LH |
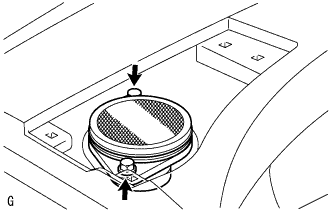 |
Remove the 2 bolts.
Remove the speaker and disconnect the connector.
| 7. REMOVE FRONT NO. 2 SPEAKER ASSEMBLY RH |
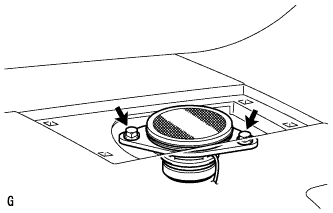 |
Remove the 2 bolts.
Remove the speaker and disconnect the connector.