BACK WINDOW GLASS (for Regular Cab and Double Cab) > REMOVAL |
| 1. REMOVE FRONT SEAT ASSEMBLY (for Manual Seat) |
Remove the front seat (Click here).
| 2. REMOVE FRONT SEAT ASSEMBLY (for Power Seat) |
Remove the front seat (Click here).
| 3. REMOVE FRONT SEAT ASSEMBLY (for Center Seat) |
Remove the front seat (Click here).
| 4. REMOVE REAR SEAT ASSEMBLY (for Double Cab) |
Remove the rear seat (Click here).
| 5. REMOVE FRONT DOOR SCUFF PLATE LH |
|
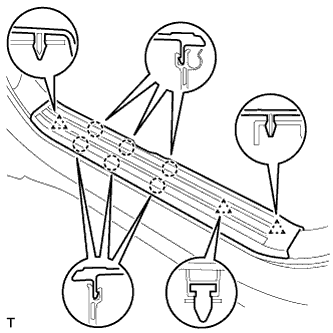
Detach the 6 claws and 3 clips, and remove the front door scuff plate.
| 6. REMOVE FRONT DOOR SCUFF PLATE RH |
| 7. REMOVE REAR DOOR SCUFF PLATE LH (for Double Cab) |
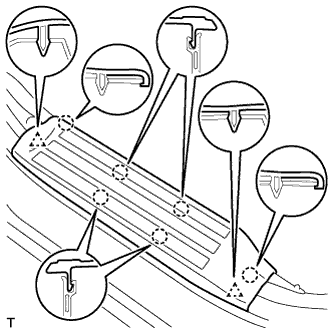 |
Detach the 6 claws and 2 clips, and remove the rear door scuff plate.
| 8. REMOVE REAR DOOR SCUFF PLATE RH (for Double Cab) |
| 9. REMOVE FRONT DOOR OPENING TRIM WEATHERSTRIP LH (for Regular Cab) |
Partially remove the front door opening trim weatherstrip LH so that the quarter trim panel front LH and quarter trim panel lower LH can be removed .
| 10. REMOVE FRONT DOOR OPENING TRIM WEATHERSTRIP RH (for Regular Cab) |
| 11. REMOVE REAR DOOR OPENING TRIM WEATHERSTRIP LH (for Double Cab) |
Partially remove the front door opening trim weatherstrip LH so that the quarter trim panel front LH and quarter trim panel lower LH can be removed .
| 12. REMOVE REAR DOOR OPENING TRIM WEATHERSTRIP RH (for Double Cab) |
| 13. REMOVE UPPER BACK PANEL GARNISH (for Regular Cab) |
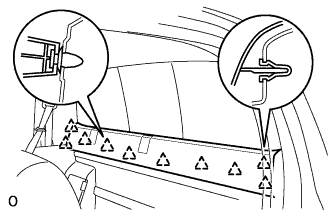 |
Detach the 10 clips and remove the upper back panel garnish.
| 14. REMOVE LUGGAGE COMPARTMENT BOX LH (for Regular Cab) |
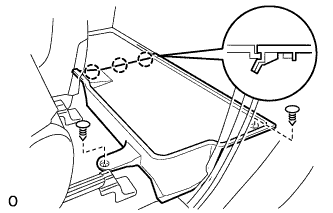 |
Remove the 2 clips.
Detach the 3 claws and remove the luggage compartment box.
| 15. REMOVE LUGGAGE COMPARTMENT BOX RH (for Regular Cab) |
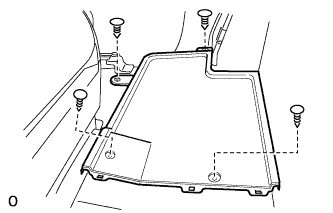 |
Remove the 4 clips and luggage compartment box.
| 16. REMOVE LOWER QUARTER TRIM PANEL ASSEMBLY LH |
for Regular Cab:
Remove the quarter trim panel .
for Double Cab:
Remove the quarter trim panel .
| 17. REMOVE LOWER QUARTER TRIM PANEL ASSEMBLY RH |
for Regular Cab:
Remove the quarter trim panel .
for Double Cab:
Remove the quarter trim panel .
| 18. REMOVE FRONT QUARTER TRIM PANEL ASSEMBLY LH |
for Regular Cab:
Remove the quarter trim panel .
for Double Cab:
Remove the quarter trim panel .
| 19. REMOVE FRONT QUARTER TRIM PANEL ASSEMBLY RH |
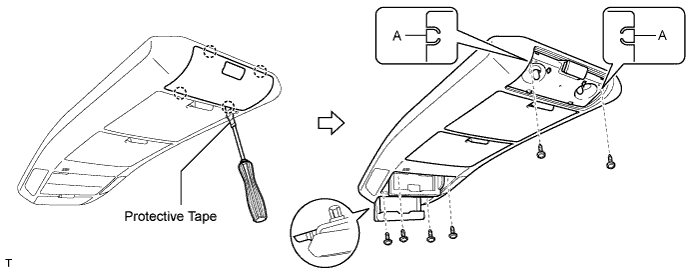
| 20. REMOVE ROOF CONSOLE BOX ASSEMBLY (for Long Type Overhead Console Box) |
Using a screwdriver, detach the 4 claws and remove the lens.
Bend up part A shown in the illustration, and remove the 2 screws.
Remove the 4 screws.
Disconnect the connector and then remove the roof console box.
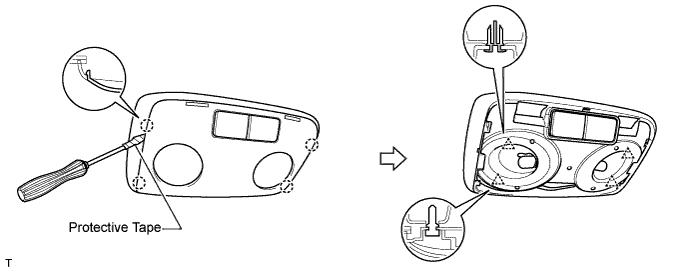
| 21. REMOVE ROOM LIGHT ASSEMBLY (for Short Type Overhead Console Box) |
Using a screwdriver, detach the 4 claws and remove the lens.
Detach the 4 clips.
Disconnect the connector and then remove the room light.
| 22. REMOVE COAT HOOK |
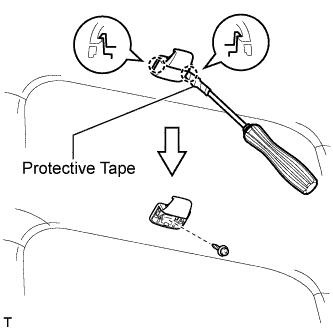 |
Using a screwdriver, detach the 2 claws and remove the coat hook cap.
Remove the screw and coat hook.
| 23. REMOVE NO. 1 BACK PANEL SILENCER (for Power Slide Type) |
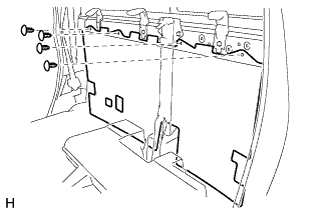 |
Using a clip remover, remove the 4 clips and No. 1 back panel silencer.
| 24. REMOVE DOOR WINDOW REGULATOR CABLE SUB-ASSEMBLY (for Power Slide Type) |
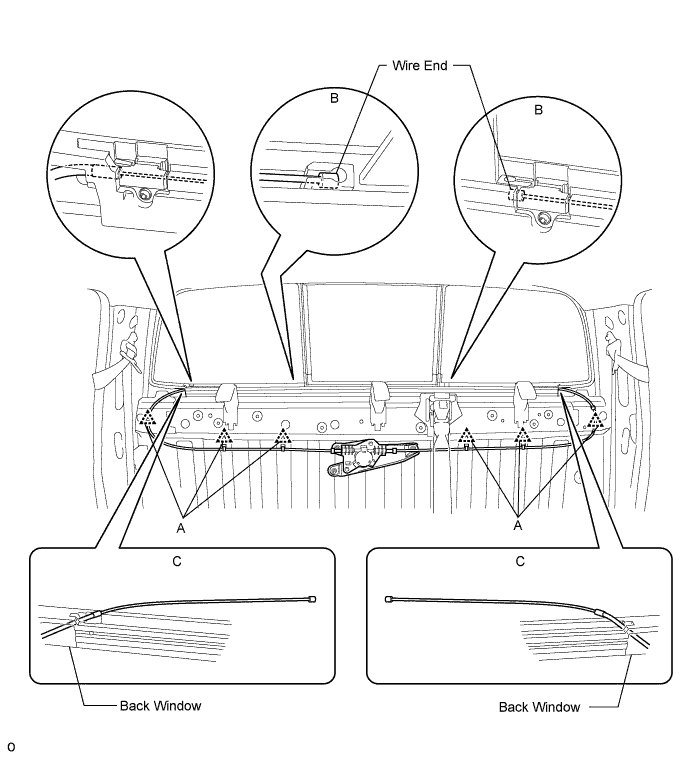
Using a clip remover, detach the 6 clips labeled A in the illustration.
Compress the springs to release the tension in the cables, and then disconnect the wire ends from the back window shown in the illustration labeled B.
Pull out the wires from the back window shown in the illustration labeled C.
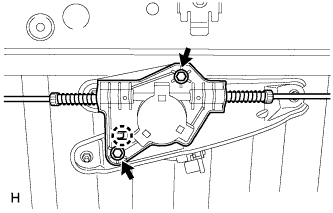 |
Remove the 2 bolts.
Detach the claw and remove the door window regulator cable sub-assembly.
| 25. REMOVE DOOR WINDOW REGULATOR BASE PLATE (for Power Slide Type) |
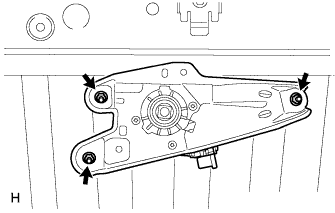 |
Remove the 3 nuts and door window regulator base plate.
| 26. REMOVE POWER WINDOW REGULATOR MOTOR ASSEMBLY (for Power Slide Type) |
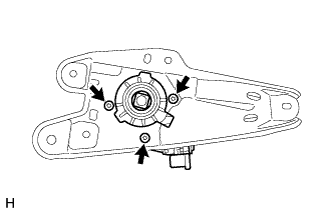 |
Using a T25 "TORX" socket, remove the 3 screws and power window regulator motor.
| 27. REMOVE BACK WINDOW GLASS |
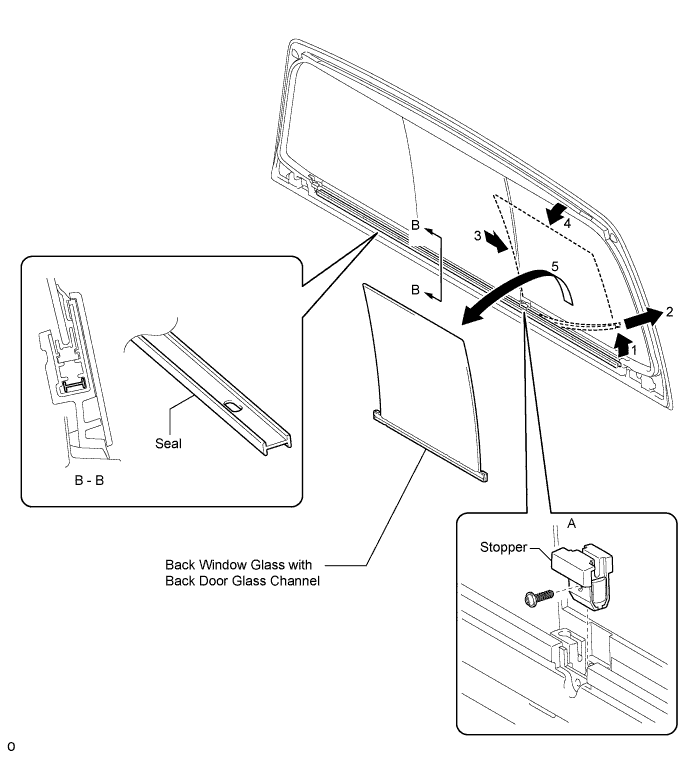
Using a T10 "TORX" driver, remove the screw and stopper (illustration A).
Slightly pull up the seal (arrow 1), and then pull out the seal from the channel in the direction of arrow 2.
Slide the back window glass towards the LH side (arrow 3). Lower the back window glass into the channel and tilt it (arrow 4) to detach the upper part of the back window glass from the upper channel. Then remove the back window glass (arrow 5).
| 28. TEMPORARILY REMOVE ROOF HEADLINING ASSEMBLY |
for Regular Cab:
It is not necessary to completely remove the roof headlining. Slightly lower the rear section of the roof headlining so that the back window glass can be removed in a later step.
for Double Cab:
It is not necessary to completely remove the roof headlining. Slightly lower the rear section of the roof headlining so that the back window glass can be removed in a later step.
| 29. REMOVE REAR ROOF DRIP SIDE FINISH MOULDING LH |
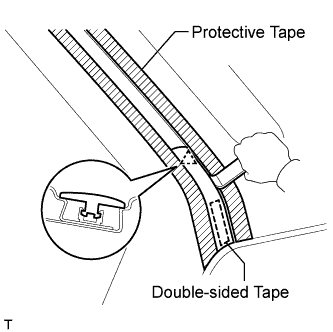 |
Put protective tape around the moulding.
Using a heat light, heat the moulding.
Using a moulding remover, detach the clip and remove the moulding.
| 30. REMOVE REAR ROOF DRIP SIDE FINISH MOULDING RH |
| 31. REMOVE BACK WINDOW ASSEMBLY |
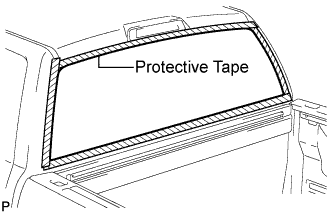 |
Apply protective tape to the outer surface of the vehicle body to prevent scratches.
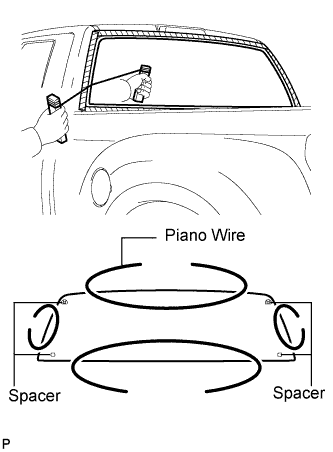 |
From the interior, insert a piano wire between the vehicle body and back window as shown in the illustration.
Tie objects that can serve as handles (for example, wooden blocks) to both wire ends.
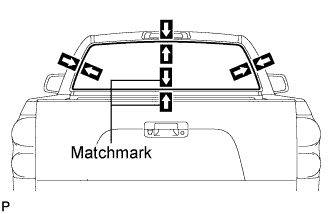 |
Place matchmarks over the window and vehicle body on the locations indicated in the illustration.
Cut through the adhesive by pulling the piano wire around the back window.
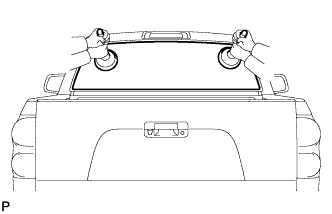 |
Using suction cups, remove the back window glass.
| 32. REMOVE UPPER OUTSIDE BACK WINDOW MOULDING (for Slide Type, for Power Slide Type) |
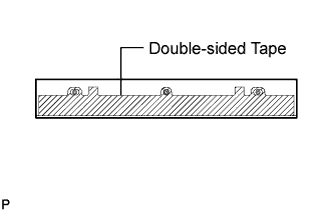 |
Using a moulding remover, detach the 3 clips and remove the back window moulding.
| 33. REMOVE LOWER OUTSIDE BACK WINDOW MOULDING (for Slide Type, for Power Slide Type) |
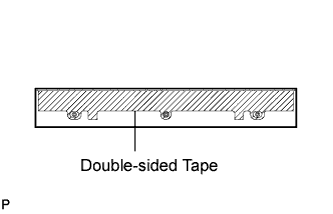 |
Using a moulding remover, detach the 3 clips and remove the back window moulding.
| 34. CLEAN BACK WINDOW ASSEMBLY |
Using a scraper, remove the damaged spacers and adhesive sticking to the glass.
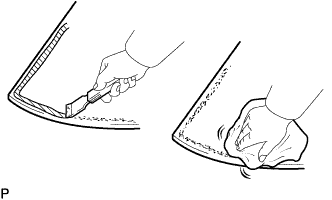 |
Clean the outer edge of the back window with a non-residue solvent.
| 35. CLEAN VEHICLE BODY |
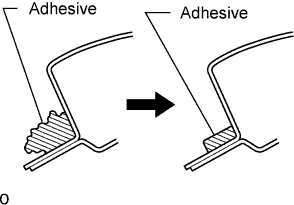 |
Using a scraper, remove the moulding and adhesive from the vehicle body.
Clean and shape the contact surface of the vehicle body.
On the contact surface of the vehicle body, use a knife to cut away excess adhesive as shown in the illustration.
Clean the contact surface of the vehicle body with cleaner.
| 36. REMOVE BACK DOOR GLASS CHANNEL |