Loosen the radiator drain cock plug and 2 cylinder block drain cock plugs.
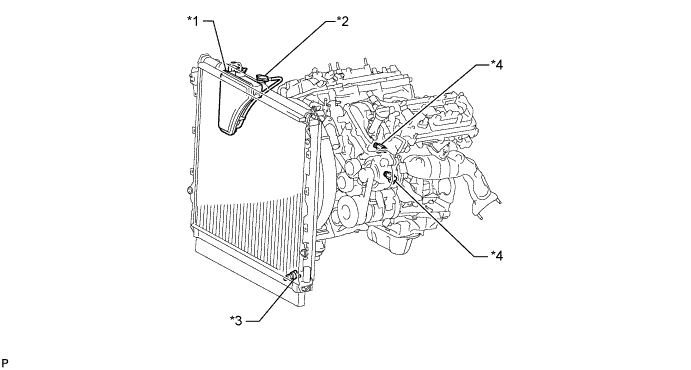
| *1 | Radiator Reservoir | *2 | Radiator Cap |
| *3 | Radiator Drain Cook Plug | *4 | Cylinder Block Drain Cock Plug |
WATER PUMP > REMOVAL |
| 1. DRAIN ENGINE COOLANT |
Loosen the radiator drain cock plug and 2 cylinder block drain cock plugs.
| *1 | Radiator Reservoir | *2 | Radiator Cap |
| *3 | Radiator Drain Cook Plug | *4 | Cylinder Block Drain Cock Plug |
Remove the radiator cap. Then drain the coolant.
Tighten the 2 cylinder block drain cock plugs.
Tighten the radiator drain cock plug by hand.
| 2. REMOVE RADIATOR HOSE INLET |
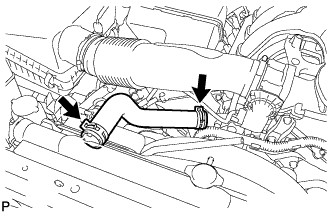 |
Slide the 2 clamps and remove the radiator hose inlet.
| 3. REMOVE RADIATOR HOSE OUTLET |
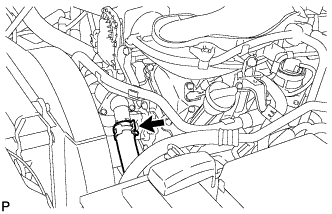 |
Slide the clamp and disconnect the radiator hose outlet from the water inlet.
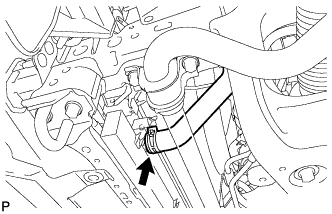 |
Slide the clamp and remove the radiator hose outlet from the radiator assembly.
| 4. REMOVE FAN SHROUD |
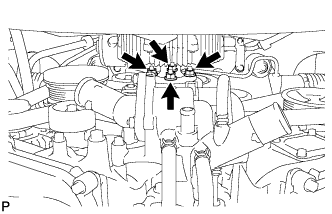 |
Loosen the 4 nuts holding the fan with fluid coupling.
Remove the fan and generator V-belt (Click here).
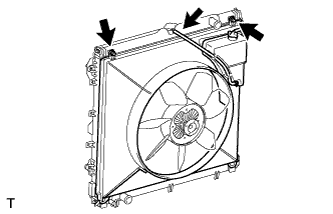 |
Disconnect the reservoir hose from the radiator tank upper.
Remove the 2 bolts holding the fan shroud.
Remove the 4 nuts of the fan with fluid coupling, and then remove the fan shroud together with the fan with fluid coupling.
Remove the fan pulley from the water pump assembly.
| 5. DISCONNECT AIR TUBE |
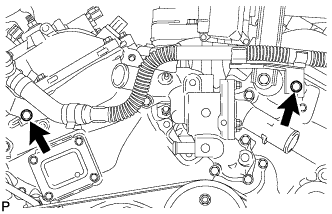 |
Remove the 2 bolts and disconnect the air tube.
| 6. REMOVE WATER INLET HOUSING |
Disconnect the throttle body connector.
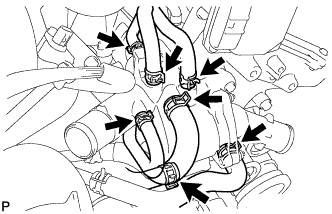 |
Disconnect the 5 water by-pass hoses.
Disconnect the oil cooler hose.
Disconnect the No. 2 oil cooler hose.
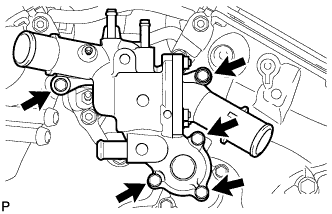 |
Remove the 5 bolts and water inlet.
Remove the O-ring from the water outlet pipe.
Remove the gasket from the water pump.
| 7. REMOVE NO. 2 IDLER PULLEY SUB-ASSEMBLY |
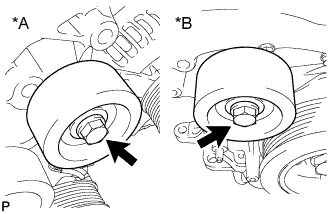 |
for Separate Type:
Remove the 2 bolts, 2 idler pulley cover plates, 2 No. 2 idler pulleys and 2 No. 2 idler pulley cover plates.
| *A | LH |
| *B | RH |
for Integrated Type:
Remove the 2 bolts and 2 No. 2 idler pulleys.
| 8. DISCONNECT VANE PUMP ASSEMBLY |
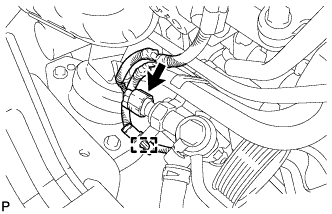 |
Disconnect the connector.
Detach the wire harness clamp.
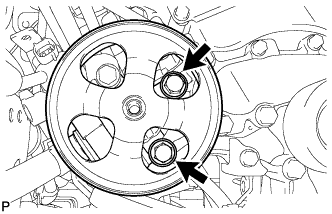 |
Remove the 2 bolts and disconnect the vane pump.
| 9. REMOVE GENERATOR ASSEMBLY |
| 10. DISCONNECT COOLER COMPRESSOR ASSEMBLY |
Disconnect the cooler compressor connector.
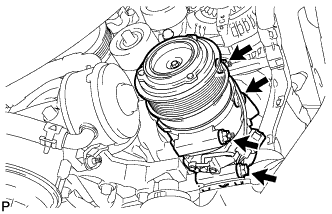 |
Remove the 2 bolts, 2 nuts and 2 stud bolts and disconnect the cooler compressor.
| 11. REMOVE V-RIBBED BELT TENSIONER ASSEMBLY |
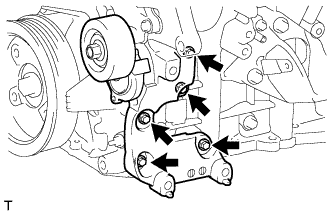 |
Remove the 5 bolts and V-ribbed belt tensioner.
| 12. REMOVE WATER PUMP ASSEMBLY |
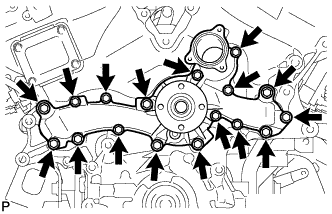 |
Remove the 17 bolts, water pump and gasket.