 |
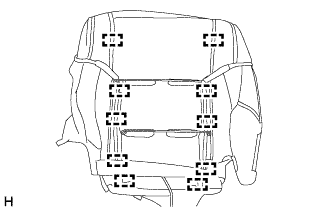
Using a tacker, install the front seat cushion heater assembly LH to the separate type front seat cushion cover with 10 new tack pins as shown in the illustration.
- NOTICE:
- Do not substitute other metal parts for tack pins.
FRONT SEAT CUSHION HEATER (for Manual Seat) > INSTALLATION |
| 1. INSTALL FRONT SEAT CUSHION HEATER ASSEMBLY RH |
Set the front seat cushion heater assembly LH on the separate type front seat cushion cover.
|
Using a tacker, install the front seat cushion heater assembly LH to the separate type front seat cushion cover with 10 new tack pins as shown in the illustration.
| 2. INSTALL SEPARATE TYPE FRONT SEAT CUSHION COVER |
Set the separate type front seat cushion cover in place.
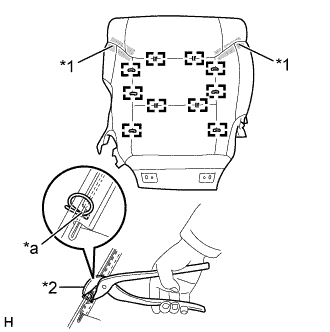 |
Using hog ring pliers, install the separate type front seat cushion cover to the separate type front seat cushion pad with 10 new hog rings as shown in the illustration.
Attach the 2 fasteners.
| *1 | Fastener |
| *2 | Hog Ring Pliers |
| *a | Cutout |
| 3. INSTALL SEPARATE TYPE FRONT SEAT CUSHION COVER WITH PAD |
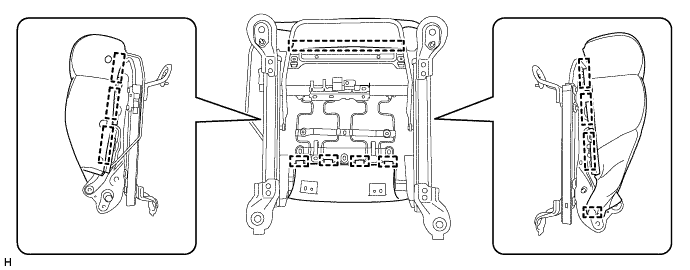
Attach the 12 hooks to install the separate type front seat cushion cover with pad.
| 4. INSTALL SEPARATE TYPE FRONT SEATBACK ASSEMBLY |
When reusing a bolt:
Clean the threads of the bolt with non-residue solvent.
Apply adhesive to the threads of the bolt.
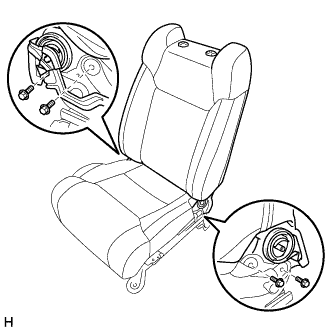 |
Install the separate type front seatback assembly with the 4 bolts.
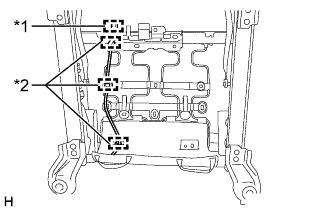 |
Attach the connector clamp and 3 wire harness clamps to connect the wire harness of the front seat airbag assembly RH.
| *1 | Connector Clamp |
| *2 | Wire Harness Clamp |
Attach the wire harness clamp to connect the wire harness of the front seatback heater assembly RH.
Connect the connector.
| 5. INSTALL FRONT INNER NO. 1 SEAT CUSHION SHIELD RH |
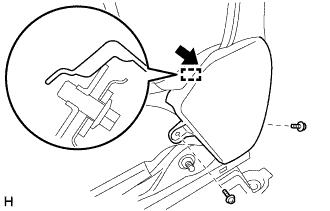 |
Attach the guide in the direction indicated by the arrow shown in the illustration to install the front inner No. 1 seat cushion shield RH.
Install the 2 screws.
| 6. INSTALL FRONT SEAT CUSHION SHIELD RH |
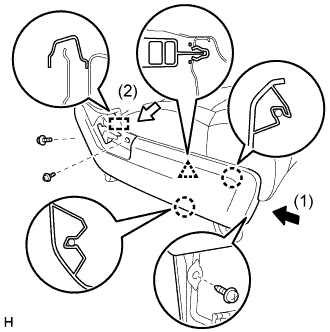 |
Attach the 2 claws, clip and guide as indicated by the arrows in the order shown in the illustration to install the front seat cushion shield RH.
Install the 3 screws.
Connect the 2 rubber bands.
| 7. INSTALL RECLINING ADJUSTER RELEASE HANDLE RH |
Attach the claw to install the reclining adjuster release handle RH.
| 8. INSTALL FRONT SEAT ASSEMBLY RH |