 |
w/o Leg Support Adjustment Switch:
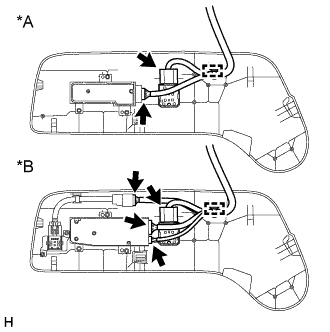
Connect the 2 connectors and attach the clamp to install the front seat cushion shield LH.
POWER SEAT SWITCH (w/o Seat Position Memory System) > INSTALLATION |
| 1. INSTALL FRONT POWER SEAT SWITCH LH |
Install the front power seat switch LH with the 3 screws.
| 2. INSTALL RECLINING POWER SEAT SWITCH KNOB |
Attach the 2 claws to install the reclining power seat switch knob.
| 3. INSTALL SLIDE AND VERTICAL POWER SEAT SWITCH KNOB |
Attach the 2 claws to install the slide and vertical power seat switch knob.
| 4. INSTALL FRONT SEAT CUSHION SHIELD LH |
|
w/o Leg Support Adjustment Switch:
Connect the 2 connectors and attach the clamp to install the front seat cushion shield LH.
w/ Leg Support Adjustment Switch:
Connect the 4 connectors and attach the clamp to install the front seat cushion shield LH.
| *A | w/o Leg Support Adjustment Switch |
| *B | w/ Leg Support Adjustment Switch |
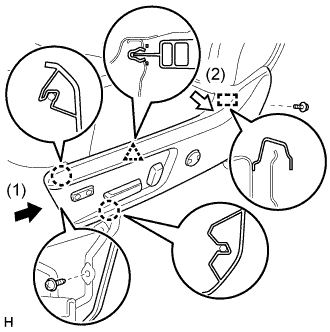 |
Attach the 2 claws, clip and guide as indicated by the arrows in the order shown in the illustration.
Install the 2 screws.
Connect the 2 rubber bands.
| 5. INSTALL FRONT SEAT ASSEMBLY LH |