 |
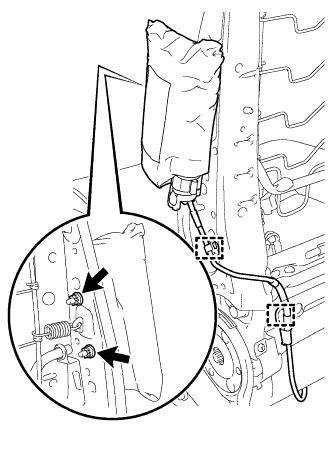
Install the front seat airbag assembly LH with 2 new nuts.
- Torque:
- 6.0 N*m{ 61 kgf*cm , 53 in.*lbf }
FRONT SEAT SIDE AIRBAG ASSEMBLY (for Power Seat) > INSTALLATION |
| 1. INSTALL FRONT SEAT AIRBAG ASSEMBLY LH |
|
Install the front seat airbag assembly LH with 2 new nuts.
Connect the 2 clamps.
| 2. INSTALL SEPARATE TYPE FRONT SEATBACK PAD |
Install the separate type front seatback pad to the front seatback frame sub-assembly LH.
w/ Climate Control Seat System:
Attach the 6 clips.
| 3. INSTALL FRONT SEAT BACK HEATER ASSEMBLY LH (w/ Seat Heater System) |
Set the front seatback heater assembly LH on the separate type front seatback cover.
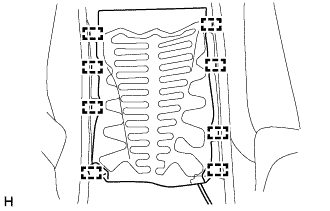 |
Using a tacker, install the front seatback heater assembly LH to the separate type front seatback cover with 8 new tack pins as shown in the illustration.
| 4. INSTALL SEPARATE TYPE FRONT SEATBACK COVER |
Set the separate type front seatback cover in place.
Attach the 4 claws to install the 2 front seat headrest supports.
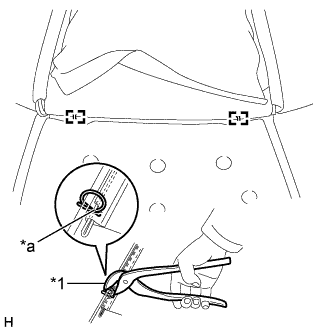 |
Using hog ring pliers, install the separate type front seatback cover to the separate type front seatback pad with 2 new hog rings as shown in the illustration.
| *1 | Hog Ring Pliers |
| *a | Cutout |
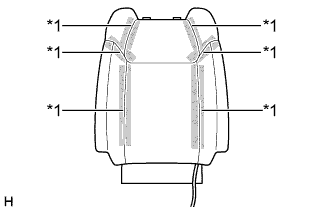 |
Attach the 6 fasteners.
| *1 | Fastener |
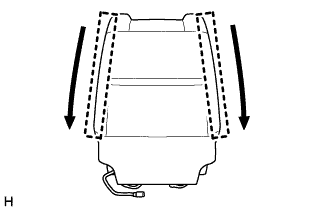
Pass the 4 straps of the separate type front seatback cover through the separate type front seatback pad.
Attach the 2 hooks.
Slide each hook to attach them.
Install the 4 clips.
 |
Close the 2 fasteners.
 |
w/o Seat Heater System:
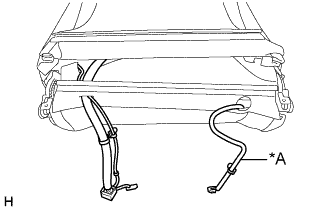
Pass the 2 wire harnesses through the separate type front seatback cover.
w/ Seat Heater System:
Pass the 3 wire harnesses through the separate type front seatback cover.
| *A | w/ Seat Heater System |
Detach the hook.
| 5. INSTALL SEPARATE TYPE FRONT SEATBACK ASSEMBLY |
When reusing a bolt:
Clean the threads of the bolt with non-residue solvent.
Apply adhesive to the threads of the bolt.
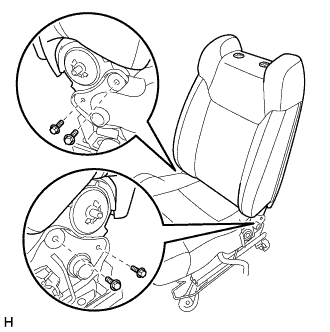 |
Install the separate type front seatback assembly with the 4 bolts.
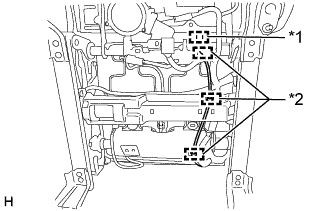 |
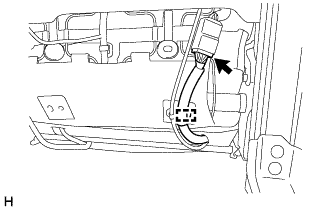
Attach the connector clamp and 3 wire harness clamps to connect the wire harness of the front seat airbag assembly LH.
| *1 | Connector Clamp |
| *2 | Wire Harness Clamp |
 |
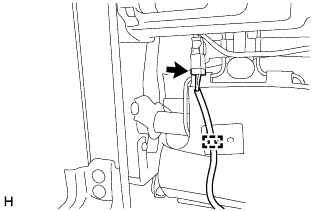
Attach the wire harness clamp to connect the wire harness of the front seatback wire LH.
Connect the connector.
 |
w/ Seat Heater System:
Attach the wire harness clamp to connect the wire harness of the front seatback heater assembly LH.
Connect the connector.
| 6. INSTALL FRONT INNER NO. 1 SEAT CUSHION SHIELD LH |
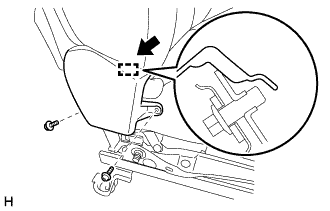 |
Attach the guide in the direction indicated by the arrow shown in the illustration to install the front inner No. 1 seat cushion shield LH.
Install the 2 screws.
| 7. INSTALL FRONT SEAT CUSHION SHIELD LH |
 |
w/o Leg Support Adjustment Switch:
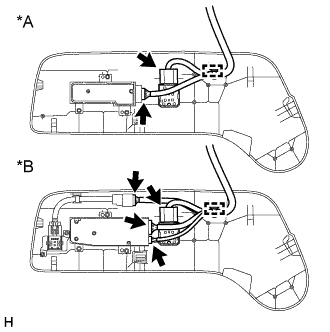
Connect the 2 connectors and attach the clamp to install the front seat cushion shield LH.
w/ Leg Support Adjustment Switch:
Connect the 4 connectors and attach the clamp to install the front seat cushion shield LH.
| *A | w/o Leg Support Adjustment Switch |
| *B | w/ Leg Support Adjustment Switch |
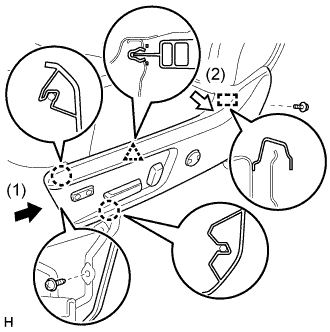 |
Attach the 2 claws, clip and guide as indicated by the arrows in the order shown in the illustration.
Install the 2 screws.
Connect the 2 rubber bands.
| 8. INSTALL FRONT SEAT ASSEMBLY LH |
| 9. CONNECT CABLE TO NEGATIVE BATTERY TERMINAL |