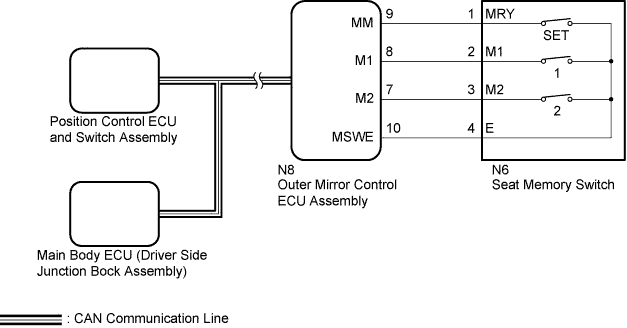
FRONT POWER SEAT CONTROL SYSTEM (w/ Memory) > Power Seat does not Return to Memorized Position |
| 1.CHECK CAN COMMUNICATION SYSTEM |
Use the Techstream to check if the CAN communication system is functioning normally (Click here).
|
| ||||
| OK | |
 |
| 2.CHECK FRONT POWER SEAT OPERATION |
Check that each function of the power seat operates normally by using the power seat switches (Click here).
|
| ||||
| OK | |
|
| 3.CHECK SEAT POSITION MEMORY FUNCTION |
Perform a memory operation and check that the buzzer sounds to indicate the completion of the memory operation (Click here).
|
| ||||
| OK | |
|
| 4.CHECK SEAT POSITION RESTORING FUNCTION |
Under each of the following conditions, check that the seat restoring function operates by pressing the M1 switch or M2 switch (Click here).
| Result | Proceed to |
| Seat restoring function does not operate at all. | A |
| Seat restoring function does not operate when the condition is [*1]. | B |
| C |
|
| ||||
|
| ||||
| A | |
|
| 5.READ VALUE USING TECHSTREAM (SEAT MEMORY) |
Perform the seat position memorized function for the M1 switch and M2 switch (Click here).
Connect the Techstream to the DLC3.
Turn the ignition switch to ON.
Turn the Techstream on.
Enter the following menus: Body Electrical / Driver Seat / Data List.
Read the Data List according to the display on the Techstream.
| Tester Display | Measurement Item/Range | Normal Condition | Diagnostic Note |
| Seat Memory No1 | Seat position memorized with M1 switch / Mem or Not Mem | Mem: Memorized Not Mem: Not memorized | - |
| Seat Memory No2 | Seat position memorized with M2 switch / Mem or Not Mem | Mem: Memorized Not Mem: Not memorized | - |
|
| ||||
| OK | |
|
| 6.REPLACE OUTER MIRROR CONTROL ECU ASSEMBLY |
Temporarily replace the outer mirror control ECU assembly with a new or normally functioning one (Click here).
| NEXT | |
|
| 7.CHECK SEAT POSITION RESTORING FUNCTION |
Perform a seat position restoring function (Click here).
Check that the buzzer sounds for 0.1 seconds and the seat automatically moves to the memorized position.
|
| ||||
| OK | ||
 | ||
| ||
| 8.REPLACE POSITION CONTROL ECU AND SWITCH ASSEMBLY |
Temporarily replace the position control ECU and switch assembly with a new or normally functioning one (Click here).
| NEXT | |
|
| 9.CHECK SEAT POSITION RESTORING FUNCTION |
Perform a seat position memory function (Click here).
Check that the buzzer sounds for 0.1 seconds and the seat automatically moves to the memorized position.
|
| ||||
| OK | ||
| ||
| ||
| 10.READ VALUE USING TECHSTREAM (P SWITCH) |
Connect the Techstream to the DLC3.
Turn the ignition switch to ON.
Turn the Techstream on.
Enter the following menus: Body Electrical / Driver Seat / Data List.
Read the Data List according to the display on the Techstream.
| Tester Display | Measurement Item/Range | Normal Condition | Diagnostic Note |
| P Switch | Park state signal / ON or OFF | ON: Shift lever in P OFF: Shift lever in a position other than P | - |
| Result | Proceed to |
| OK | A |
| NG (for AB60E) | B |
| NG (for AB60F) | C |
|
| ||||
|
| ||||
| A | ||
| ||
| ||
| 11.READ VALUE USING TECHSTREAM (D DOOR COURTESY) |
Connect the Techstream to the DLC3.
Turn the ignition switch to ON.
Turn the Techstream on.
Enter the following menus: Body Electrical / Main Body / Data List.
Read the Data List according to the display on the Techstream.
| Tester Display | Measurement Item/Range | Normal Condition | Diagnostic Note |
| D Door Courtesy | Front door courtesy light switch assembly signal / ON or OFF | ON: Driver door open OFF: Driver door closed | - |
|
| ||||
| OK | ||
| ||
| ||

