A760E AUTOMATIC TRANSMISSION / TRANSAXLE SHIFT LEVER ASSEMBLY(for Floor Shift Type) DISASSEMBLY
PROCEDURE

 33554
1.REMOVE SHIFT LEVER CAP
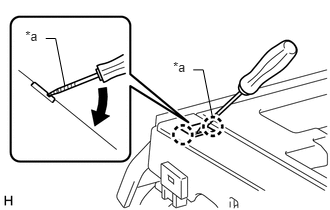
Using a screwdriver, detach the 2 claws and remove the shift lever cap from the upper position indicator housing.
| *a | Protective Tape |
- NOTICE:
-
Be careful not to damage the shift lever cap.
- HINT:
-
Tape the screwdriver tip before use.
35971A
2.REMOVE UPPER POSITION INDICATOR HOUSING
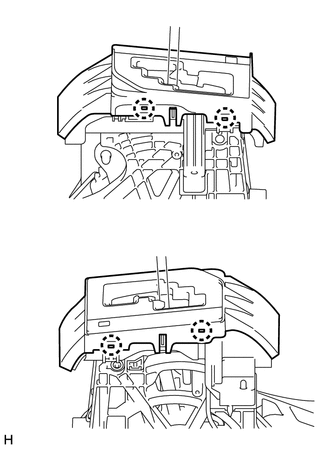
Detach the 4 claws and remove the upper position indicator housing from the shift lever assembly.
35975
3.REMOVE POSITION INDICATOR SLIDE COVER
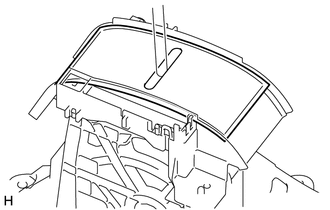
Remove the position indicator slide cover together with the No. 2 position indicator slide cover from the shift lever assembly.
35976
4.REMOVE NO. 2 POSITION INDICATOR SLIDE COVER
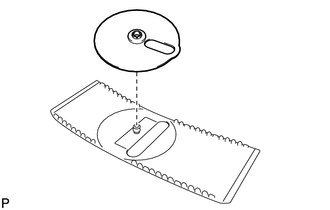
Remove the No. 2 position indicator slide cover from the position indicator slide cover.
35906
5.DISCONNECT INDICATOR LIGHT WIRE SUB-ASSEMBLY
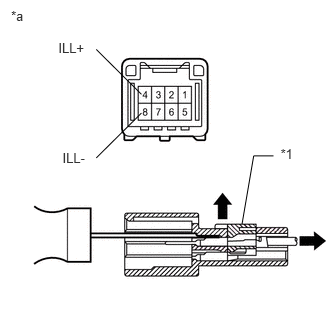
Using a thin-bladed screwdriver, release the connector housing retainer.
| *1 | Connector Housing Retainer |
| *a | Component without harness connected
(Transmission Control Switch) |
Using a thin-bladed screwdriver, pull out the 4 (ILL+) and 8 (ILL-) terminals from the rear as shown in the illustration.
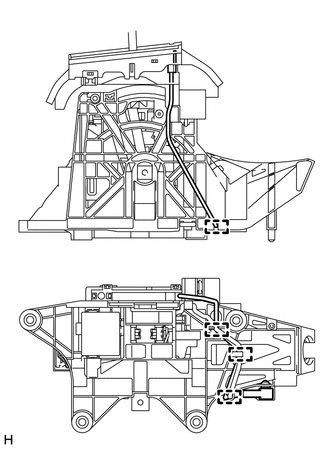
Detach the 4 guides from the shift lever assembly.
35974
6.REMOVE LOWER POSITION INDICATOR HOUSING
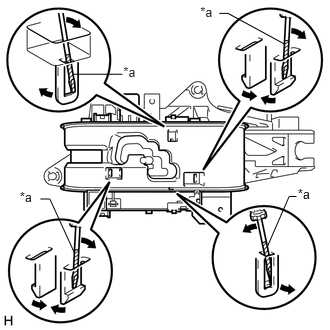
Using a small screwdriver, detach the 4 claws and remove the lower position indicator housing from the shift lever assembly.
| *a | Protective Tape |
- NOTICE:
-
Be careful not to damage the lower position indicator housing and shift lever assembly.
- HINT:
-
Tape the screwdriver tip before use.
35906
7.REMOVE INDICATOR LIGHT WIRE SUB-ASSEMBLY
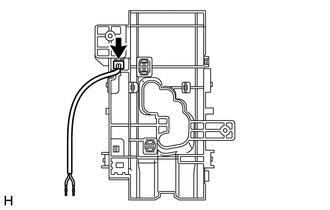
Disconnect the connector and remove the indicator light wire sub-assembly from the lower position indicator housing.
35959A
8.REMOVE POSITION INDICATOR LED
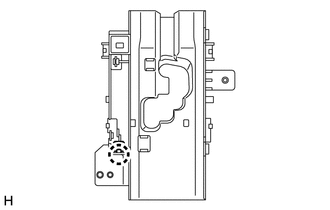
Detach the claw and remove the position indicator LED from the lower position indicator housing.
85903
9.REMOVE SHIFT LOCK CONTROL ECU
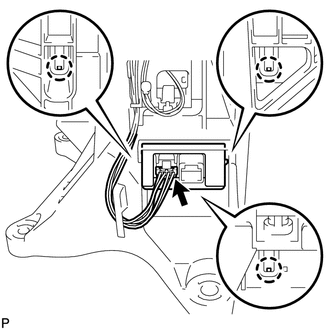
Disconnect the shift lock solenoid connector.
Detach the 3 claws and remove the shift lock control ECU from the shift lever assembly.