SLIDING ROOF SLIDING ROOF HOUSING(for CrewMax) REASSEMBLY
PROCEDURE

 63246D
1.INSTALL REAR SLIDING ROOF HOUSING MOUNTING BRACKET LH
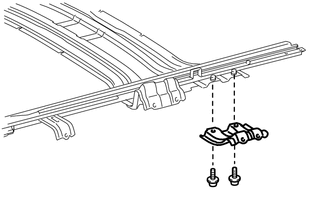
Install the mounting bracket with the 2 bolts.
63245D
2.INSTALL REAR SLIDING ROOF HOUSING MOUNTING BRACKET RH
- HINT:
-
Use the same procedures described for the LH side.
63205A
3.INSTALL SLIDING ROOF DRIVE CABLE SUB-ASSEMBLY
Hold down the window deflector.
- NOTICE:
-
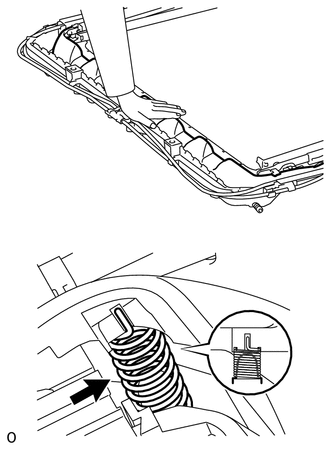
-
Make sure that the spring indicated by the arrow in the illustration is securely installed.
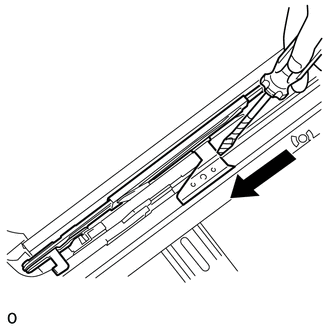
Using a screwdriver, slide the drive cable in the direction indicated by the arrow in the illustration to install it.
- HINT:
-
Tape the screwdriver tip before use.
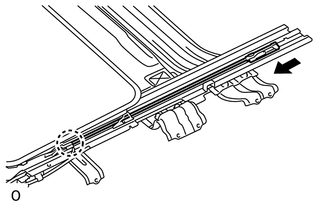
Slide each roof wind deflector lifter link in the direction indicated by the arrow in the illustration to install it, then attach the claw.
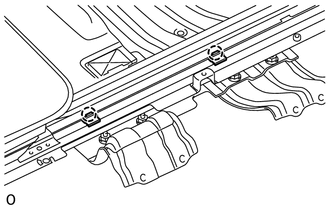
Attach the 4 claws to install the 4 roof wind deflector panel guide clips.
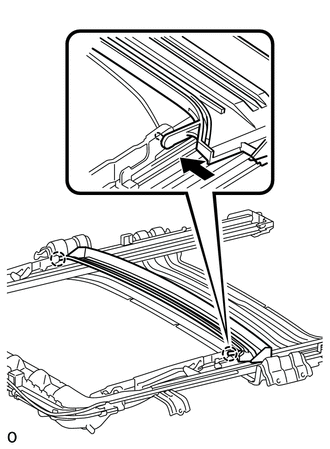
Attach the 2 claws to install the drip channel.
63205A
4.ADJUST SLIDING ROOF DRIVE CABLE SUB-ASSEMBLY
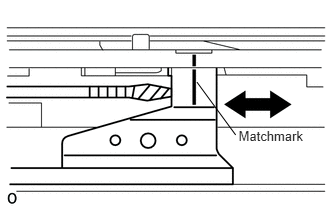
Using a screwdriver, align the matchmarks by sliding the drive cable in the directions indicated by the arrow in the illustration.
- HINT:
-
Tape the screwdriver tip before use.
63306
5.INSTALL SUNSHADE TRIM SUB-ASSEMBLY
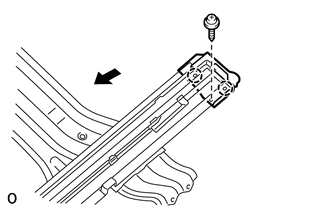
Insert the sunshade trim into the sliding roof housing.
Attach the 4 claws to install the sliding roof piece LH and RH.
Install the 2 screws.
63260A
6.INSTALL SLIDING ROOF DRIVE GEAR SUB-ASSEMBLY
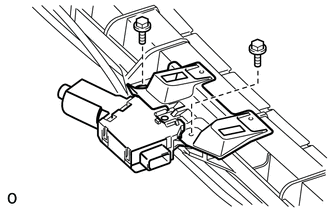
Install the drive gear and room light bracket with the 2 bolts.
- Torque:
- 5.4 N*m (5.5 kgf*cm, 48 in.*lbf)