1NZ-FE ENGINE MECHANICAL CYLINDER BLOCK DISASSEMBLY
PROCEDURE

 1.REMOVE PISTON SUB-ASSEMBLY WITH CONNECTING ROD
Using a ridge reamer, remove all the carbon from the top of the cylinder.
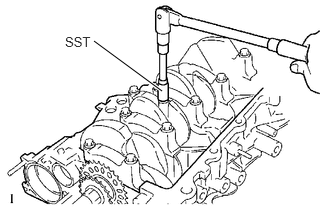
Using SST, remove the connecting rod cap bolt and cap.
- SST
- 09205-16011
Push the piston, connecting rod assembly and upper bearing through the top of the cylinder block to remove them.
- HINT:
- ·
Keep the bearing, connecting rod and cap together.
·Keep the piston and the connecting rod assemblies in the correct order so that they can be returned to their original locations when reassembled.
13041
2.REMOVE CONNECTING ROD BEARING
13411
3.REMOVE CRANKSHAFT
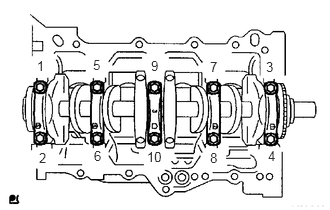
Using several steps, loosen and remove the 10 bearing cap sub-assembly bolts uniformly using 12 mm socket wrench in the sequence shown in the illustration.
Remove the bearing cap and the crankshaft.
11711
4.REMOVE CRANKSHAFT BEARING
11791
5.REMOVE CRANKSHAFT THRUST WASHER UPPER
13011
6.REMOVE PISTON RING SET
- NOTICE:
-
Keep the piston rings in the correct combination and correct order so that they can be returned to their original locations when re-assembling.
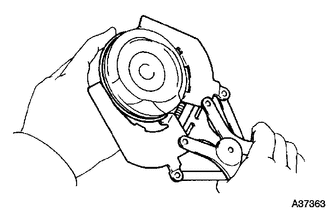
Using a piston ring expander, remove the 2 compression rings.
Remove the 2 side rails and the oil ring by hand.
13101
7.REMOVE WITH PIN PISTON SUB-ASSEMBLY
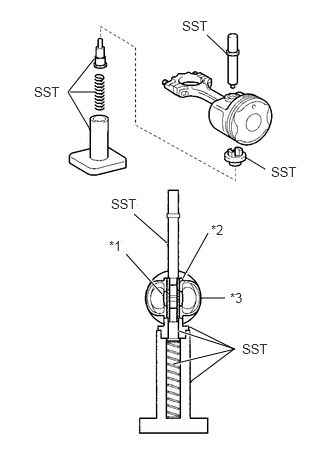
Using SST, press the piston pin out of the piston.
| *1 | Connecting Rods |
| *2 | Piston Pin |
| *3 | Piston |
- SST
- 09221-25026 (09221-00021, 09221-00030, 09221-00150, 09221-00090, 09221-00100)
- NOTICE:
-
Keep the pistons, pins, rings, connecting rods and bearings in the correct order so that they can be returned to their original locations when reassembled.
11415
8.REMOVE CYLINDER BLOCK WATER DRAIN COCK SUB-ASSEMBLY (w/ Cylinder Block Water Drain Cock Sub-assembly)
11432A
9.REMOVE NO.1 TAPER SCREW PLUG WITH HEAD (w/o Cylinder Block Water Drain Cock Sub-assembly)
17159
10.REMOVE STUD BOLT
15100A
11.REMOVE OIL PUMP SET RING PIN
11434C
12.REMOVE STRAIGHT PIN