1NZ-FE STARTING STARTER REASSEMBLY
PROCEDURE

 28021
1.INSTALL STARTER CENTER BEARING CLUTCH SUB-ASSEMBLY
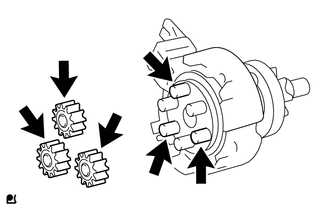
Apply high-temperature grease to the 3 planet gears and the starter center bearing clutch sub-assembly.
- HINT:
-
Apply approximately 0.5 g of high-temperature grease total to the planet gear section, end section, and pins without depression.

|
High-temperature Grease |
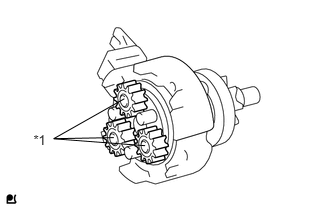
Install the 3 planet gears to the pins without depressions on the starter center bearing clutch sub-assembly.
| *1 | Pins without Depressions |
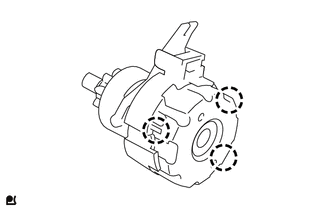
Engage the 3 claws and install the starter armature plate to the starter center bearing clutch sub-assembly.
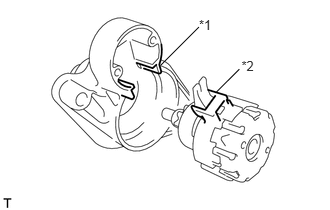
Align the depression in the starter drive housing assembly with the protrusion on the starter center bearing clutch sub-assembly and install the starter center bearing clutch subassembly.
| *1 | Depression |
| *2 | Protrusion |
Install the rubber seal to the starter drive housing assembly.
28140
2.INSTALL STARTER BRUSH HOLDER ASSEMBLY
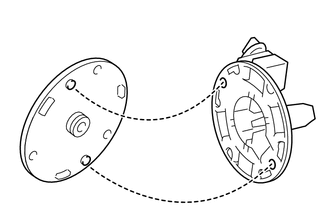
Install the starter commutator end frame assembly to the starter brush holder assembly as shown in the illustration.
- HINT:
-
If the attachment location is not correct, the through bolt cannot be attached.
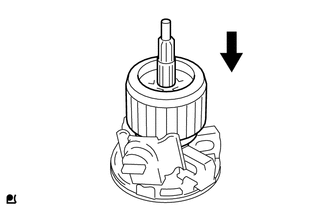
Spread the brushes on the starter brush holder assembly, and install the starter armature assembly to the starter brush holder assembly.
28160
3.INSTALL STARTER ARMATURE ASSEMBLY
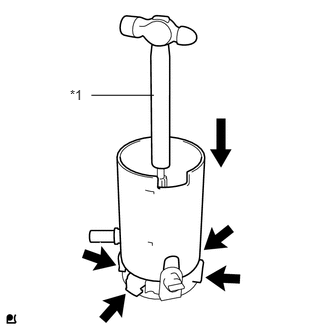
Install the starter yoke assembly while holding down the starter armature assembly and the starter brush holder assembly with the handle of a hammer.
- HINT:
-
The starter armature assembly will be attracted by the magnetic field of the starter yoke assembly, so the starter armature assembly is held with the handle of the hammer.
| *1 | Hammer |
28120
4.INSTALL STARTER YOKE ASSEMBLY
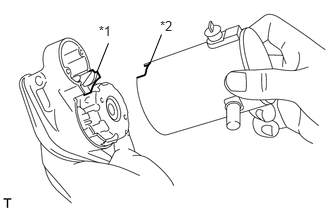
Align the depression in the starter yoke assembly with the protrusion on the starter center bearing clutch sub-assembly.
| *1 | Protrusion |
| *2 | Depression |
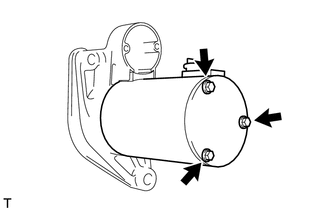
Using a 7 mm socket wrench, install the starter yoke assembly with the 3 through bolts.
- Torque:
- 3.0 N*m (31 kgf*cm, 27 in.*lbf)
28150
5.INSTALL MAGNET STARTER SWITCH ASSEMBLY
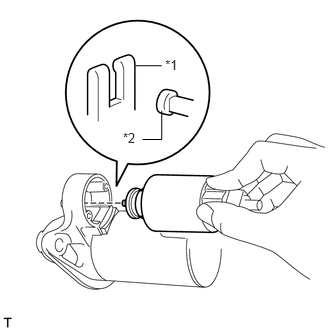
Catch the hook on the magnet starter switch assembly on the starter pinion drive lever from the top of the lever.
| *1 | Starter Pinion Drive Lever |
| *2 | Hook |
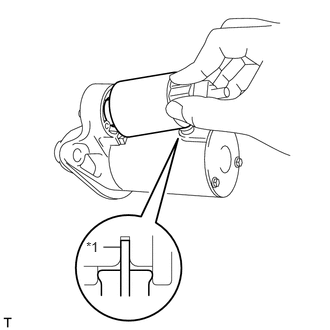
Push down the back of the magnet starter switch assembly and connect it to the terminal C.
- NOTICE:
- ·
Connect the magnet starter switch assembly securely to the terminal C.
·Check that the parts are free of foreign matter, oil, or grease.
| *1 | Terminal C |
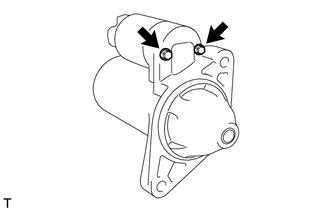
Using a 7 mm socket wrench, install the magnet starter switch assembly with the 2 bolts.
- Torque:
- 3.0 N*m (31 kgf*cm, 27 in.*lbf)