PARKING BRAKE PARKING BRAKE SYSTEM ADJUSTMENT
PROCEDURE

 1.INSPECT PARKING BRAKE LEVER TRAVEL
Slowly pull the parking brake lever to the fully applied position, counting the number of clicks.
- Parking brake lever travel at 200 N (20 kgf, 45 lbf):
8 to 11 clicks
2.ADJUST PARKING BRAKE LEVER TRAVEL
Remove the rear console box (See page Vehicle Interior>INTERIOR PANELS / TRIM>REAR CONSOLE BOX>REMOVAL).
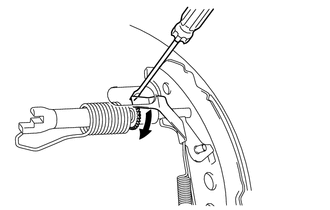
Remove the hole plug, and turn the adjuster to expand the shoe until the drum locks.

|
Expand |
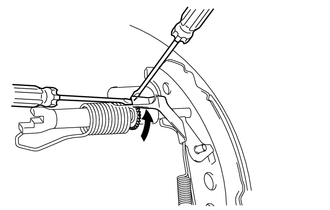
Hold the automatic adjust lever away from the adjuster, and contract the brake shoe by turning the adjust bolt using another screwdriver until the drum can rotate smoothly.
|
|
Contract |
- Standard:
12 notches
Check that there is no brake drag against the shoe.
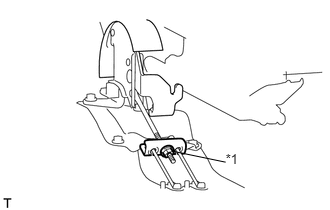
Turn the lock nut until the parking brake lever travel is corrected to within the specified range.
| *1 | Lock nut |
- Parking brake lever travel at 200 N (20 kgf, 45 lbf):
8 to 11 clicks
Operate the parking brake lever 3 to 4 times, and check the parking brake lever travel.
Install the rear console box (See page Vehicle Interior>INTERIOR PANELS / TRIM>REAR CONSOLE BOX>INSTALLATION).
3.INSPECT BRAKE WARNING LIGHT
When operating the parking brake lever, check that the brake warning light illuminates.
- OK:
Brake warning light always illuminates at the first click.