1NZ-FE BATTERY / CHARGING GENERATOR DISASSEMBLY
PROCEDURE

 27446A
1.REMOVE CLAMP
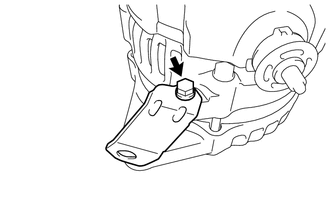
Remove the bolt and clamp from the generator coil assembly.
27411
2.REMOVE GENERATOR PULLEY
Secure the generator with regulator assembly in a vise between aluminum plates.
- NOTICE:
-
Do not overtighten the vise.
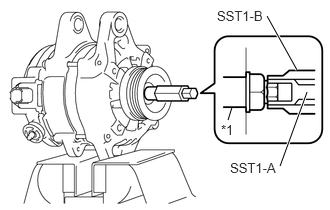
Install SST1-A and SST2-B to the generator rotor assembly shaft as shown in the illustration.
| *1 | Generator Rotor Assembly Shaft |
- SST
- 09820-63011 (09820-06010)
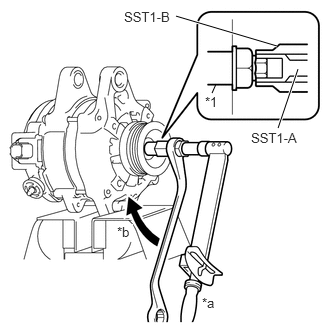
Hold SST1-A with a torque wrench, and tighten SST1-B clockwise to the specified torque.
| *1 | Generator Rotor Assembly Shaft |
| *a | Hold |
| *b | Turn |
- Torque:
- 39 N*m (398 kgf*cm, 29 ft.*lbf)
- NOTICE:
-
Check that SST is securely fitted onto the generator rotor assembly shaft.
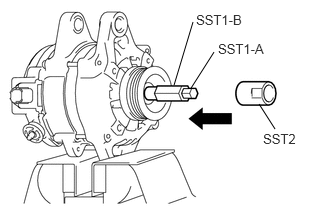
Place SST2 to the nut.
- SST
- 09820-63011
- NOTICE:
-
Securely attach SST to the generator pulley and generator rotor assembly shaft.
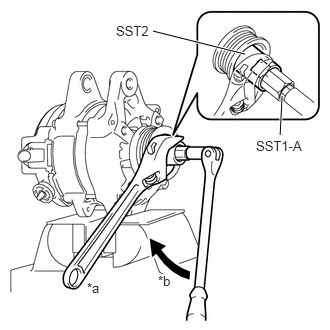
While holding SST2, turn SST1-A in the direction shown in the illustration to loosen the nut.
| *a | Hold |
| *b | Turn |
- NOTICE:
-
To prevent damage to the generator rotor assembly shaft, do not loosen the nut by more than one half turn.
Remove SST2 from the nut.
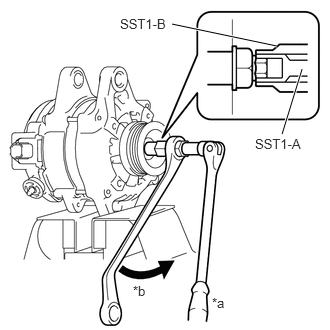
Hold SST1-A, turn SST1-B in the direction shown in the illustration, and remove SST1-A and SST1-B from the generator rotor assembly shaft.
| *a | Hold |
| *b | Turn |
Remove the nut and generator pulley from the generator rotor assembly shaft.
Remove the generator with regulator assembly from the vise.
27039
3.REMOVE GENERATOR REAR END COVER
Place the generator drive end frame assembly on the generator pulley.
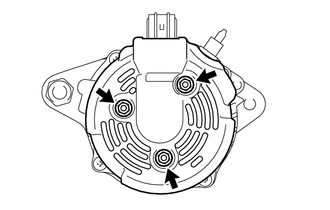
Remove the 3 bolts and generator rear end cover from the generator coil assembly.
27387B
4.REMOVE GENERATOR TERMINAL INSULATOR
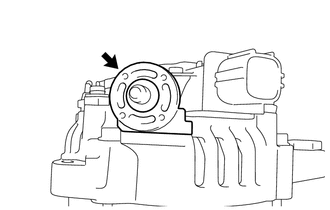
Remove the generator terminal insulator from the generator coil assembly.
27370
5.REMOVE GENERATOR BRUSH HOLDER ASSEMBLY
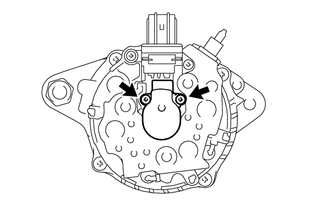
Remove the 2 screws and generator brush holder assembly from the generator coil assembly.
27360
6.REMOVE GENERATOR COIL ASSEMBLY
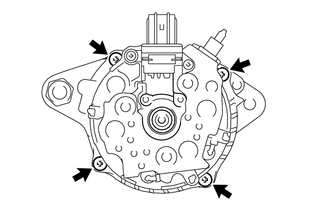
Remove the 4 bolts.
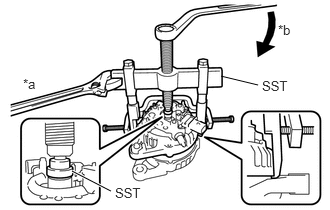
Using SST, remove the generator coil assembly from the generator drive end frame assembly.
| *a | Hold |
| *b | Turn |
- SST
- 09950-40011 (09951-04020, 09952-04010, 09953-04020, 09954-04010, 09955-04071, 09957-04010, 09958-04011)
09950-60010 (09951-00250)
- NOTICE:
-
Apply grease to the threads and tip of the SST center bolt before use.
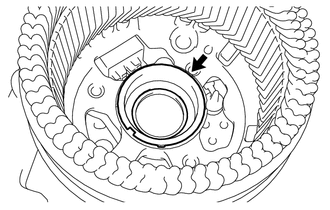
Remove the generator bearing cover packing from the generator coil assembly.
- NOTICE:
-
If the generator bearing cover packing breaks, remove broken pieces completely.
- HINT:
-
The generator bearing cover packing may be installed on the generator rotor assembly.
27330
7.REMOVE GENERATOR ROTOR ASSEMBLY
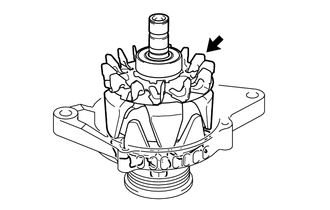
Remove the generator rotor assembly from the generator drive end frame assembly.
- NOTICE:
-
Do not drop the generator rotor assembly.
8.INSPECT GENERATOR DRIVE END FRAME BEARING
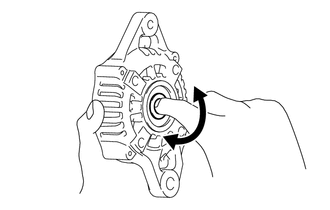
Check that the generator drive end frame bearing is not rough or worn.
If the generator drive end frame bearing does not rotate smoothly, replace the generator drive end frame bearing.
9.REMOVE GENERATOR DRIVE END FRAME BEARING
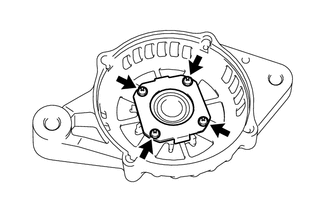
Remove the 4 screws and retainer plate from the generator drive end frame assembly.
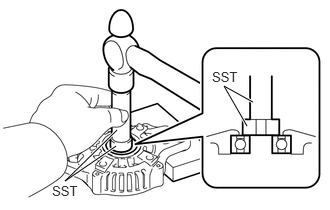
Using SST and a hammer, tap out the generator drive end frame bearing from the generator drive end frame assembly.
- SST
- 09950-60010 (09951-00250)
09950-70010 (09951-07100)