WIPER / WASHER FRONT WIPER MOTOR REMOVAL
PROCEDURE

 85292B
1.REMOVE FRONT WIPER ARM HEAD CAP
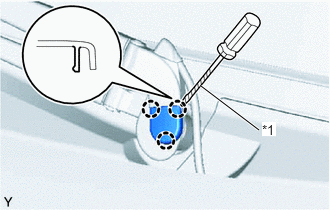
Using a screwdriver with its tip wrapped in protective tape, disengage the 3 claws and remove the front wiper arm head cap.
| *1 | Protective Tape |
2.REMOVE FRONT WIPER ARM AND BLADE ASSEMBLY
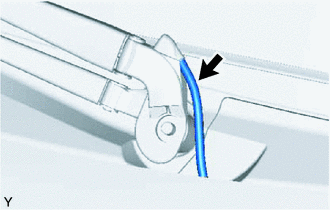
Disconnect the washer hose.
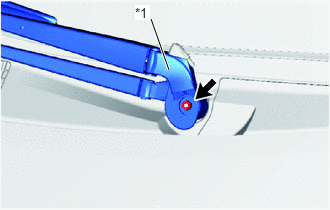
Remove the nut and the front wiper main arm.
| *1 | Front Wiper Main Arm |
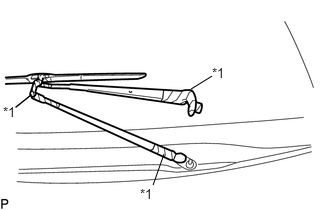
Apply protective tape to the areas shown in the illustration.
| *1 | Protective Tape |
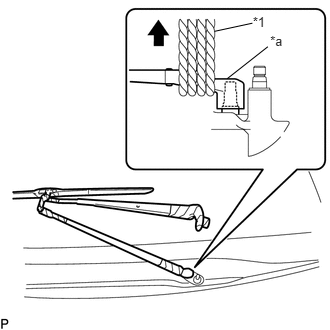
Twist a rope around the front wiper sub arm at the area shown in the illustration and pull the rope upward to disengage and remove the front wiper arm and blade assembly.
| *1 | Rope |
| *a | Head of the Front Wiper Sub Arm |
- NOTICE:
- ·
If you forcibly disengage the front wiper sub arm in the incorrect direction, it could be deformed or damaged.
·If you forcibly pry off the front wiper main arm or front wiper sub arm, the joint section on the end of the front wiper arm could be deformed or damaged.
53867
3.REMOVE FRONT FENDER TO COWL SIDE SEAL LH
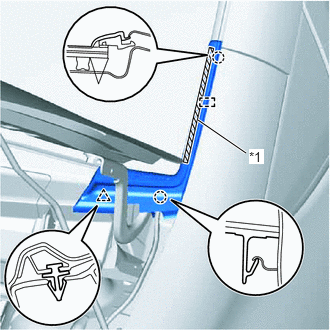
Peel off the double - sided tape and disengage the claw and guide.
| *1 | Double - sided Tape |
Disengage the clip and claw and remove the front fender to cowl side seal.
53866
4.REMOVE FRONT FENDER TO COWL SIDE SEAL RH
- HINT:
-
Use the same procedure as for the LH side.
55781E
5.REMOVE COWL TOP VENTILATOR LOUVER SUB-ASSEMBLY
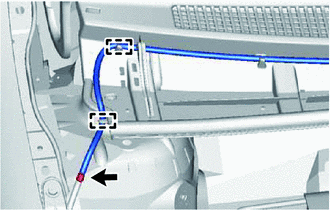
Disconnect the washer hose.
Disengage the 2 clamps.
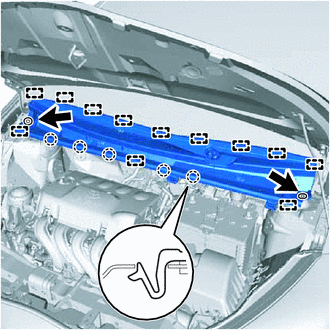
Remove the 2 clips.
Disengage the 5 claws and 3 guides.
Disengage the 9 guides and remove the cowl top ventilator louver.
6.REMOVE WINDSHIELD WIPER MOTOR AND LINK ASSEMBLY
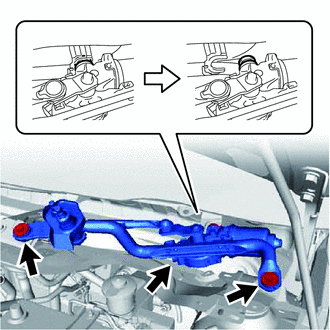
Remove the 2 bolts.
Disengage the grommet and remove the windshield wiper motor and link as shown in the illustration.
Disconnect the connector.
85110
7.REMOVE WINDSHIELD WIPER MOTOR ASSEMBLY
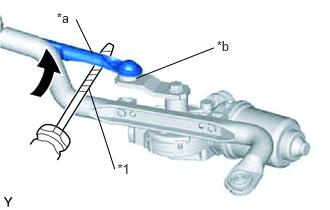
Using a screwdriver with its tip wrapped in protective tape, disengage the windshield wiper link rod from the crank arm pivot of the windshield wiper motor as shown in the illustration.
| *1 | Protective Tape |
| *a | Windshield Wiper Link Rod |
| *b | Crank Arm Pivot of the Windshield Wiper Motor Assembly |
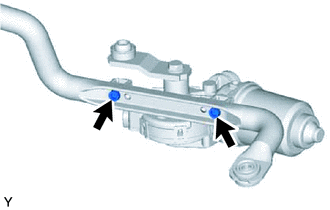
Using a T30 "TORX" socket wrench, remove the 2 bolts and the windshield wiper motor from the windshield wiper link.