AUDIO / VIDEO FRONT DOOR SPEAKER INSPECTION
PROCEDURE

 86160
1.INSPECT FRONT NO. 1 SPEAKER ASSEMBLY (for Type A)
Check the speaker installation.
- OK:
The speaker is securely installed.
Visually check the speaker.
- OK:
The cone paper of the speaker is not torn.
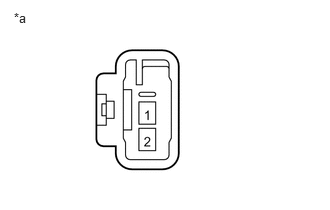
Check the speaker resistance.
| *a | Component without harness connected
(Front No. 1 Speaker Assembly) |
Disconnect the front No. 1 speaker assembly connector.
Measure the resistance according to the value(s) in the table below.
- Standard Resistance:
Tester Connection Condition Specified Condition 1 - 2 Always Approximately 4 Ω
If the result is not as specified, replace the front No. 1 speaker assembly.
86160
2.INSPECT FRONT NO. 1 SPEAKER ASSEMBLY (for Type B)
Check the resistance.
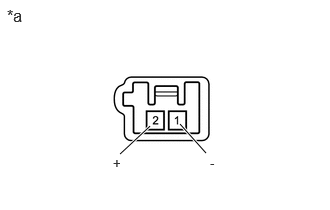
| *a | Component without harness connected
(Front No. 1 Speaker Assembly) |
Measure the resistance according to the value(s) in the table below.
- Standard Resistance:
Tester Connection Condition Specified Condition 2 (+) - 1 (-) Always 4.0 Ω
If the result is not as specified, replace the front No. 1 speaker assembly.
Visually check the speaker.
- OK:
The cone paper of the front No. 1 speaker assembly is not torn.
If the result is not as specified, replace the front No. 1 speaker assembly.