 |
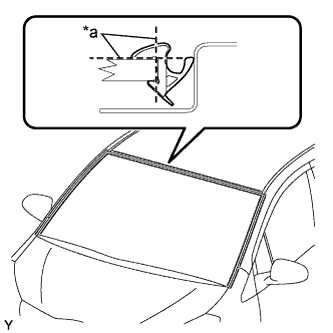
Using a knife, cut off the windshield outside moulding, as shown in the illustration.
| *a | Cut |
- NOTICE:
- Do not damage the vehicle body with the knife.
WINDSHIELD GLASS (for Hatchback) > REMOVAL |
| 1. REMOVE WINDSHIELD WIPER MOTOR AND LINK |
| 2. REMOVE INNER REAR VIEW MIRROR ASSEMBLY |
| 3. REMOVE ROOF HEADLINING ASSEMBLY (for 5 Door) |
| 4. REMOVE ROOF HEADLINING ASSEMBLY (for 3 Door) |
| 5. REMOVE WINDSHIELD OUTSIDE MOULDING |
|
Using a knife, cut off the windshield outside moulding, as shown in the illustration.
| *a | Cut |
| 6. REMOVE WINDSHIELD GLASS |
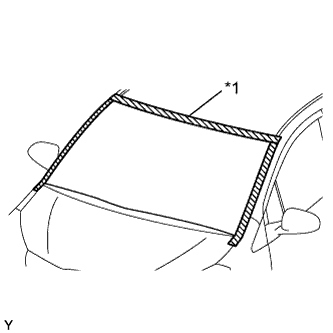 |
Apply protective tape to the installation area on the windshield glass on the vehicle body.
| *1 | Protective Tape |
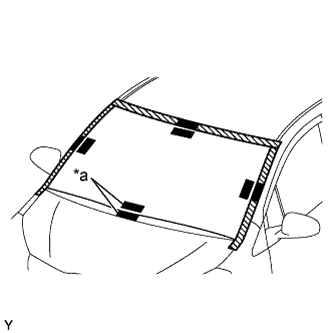 |
Place matchmarks on the windshield glass and vehicle body on the locations indicated in the illustration.
| *a | Mark |
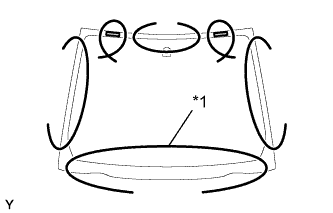 |
Pass a piano wire between the vehicle body and glass from the interior.
| *1 | Piano Wire |
Tie both wire ends to wooden blocks or similar objects.
Cut off the adhesive by pulling the piano wire around the windshield glass.
Using suction cups, disengage the windshield glass stopper and remove the windshield glass.
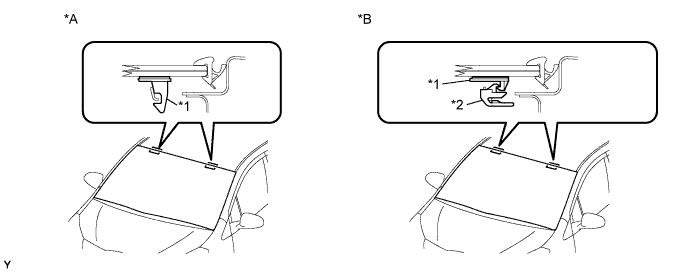
| *A | for 1 - piece Type | *B | for 2 - piece Type |
| *1 | No. 1 Windshield Glass Stopper | *2 | No. 2 Windshield Glass Stopper |
| 7. REMOVE WINDOW GLASS ADHESIVE DAM |
Using a scraper, remove the windshield glass adhesive dam.
| 8. REMOVE NO. 1 WINDSHIELD GLASS STOPPER (for 1-piece Type) |
Using a scraper, remove the 2 No. 1 windshield glass stoppers.
| 9. REMOVE NO. 2 WINDSHIELD GLASS STOPPER (for 2-piece Type) |
Using a scraper, remove the 2 No. 2 windshield glass stoppers.
| 10. REMOVE NO. 1 WINDSHIELD GLASS STOPPER (for 2-piece Type) |
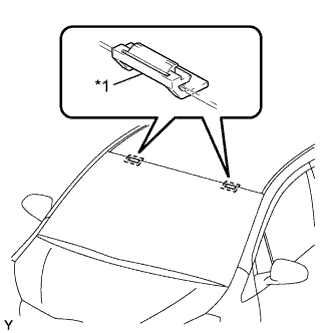 |
Remove the 2 No. 1 windshield glass stoppers.
| *1 | No. 1 Windshield Glass Stopper |