DIFFERENTIAL OIL SEAL (for Sedan) > REPLACEMENT |
| 1. DISCONNECT CABLE FROM NEGATIVE BATTERY TERMINAL |
| 2. REMOVE FRONT WHEELS |
| 3. REMOVE ENGINE UNDER COVER LH |
| 4. REMOVE ENGINE UNDER COVER RH |
| 5. DRAIN AUTOMATIC TRANSAXLE FLUID |
Remove the drain plug and gasket, and drain the automatic transaxle fluid.
Install a new gasket and the drain plug.
| 6. REMOVE FRONT AXLE HUB NUT LH |
|
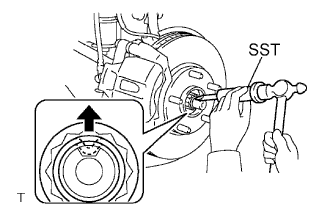
Using SST and a hammer, release the staked part of the axle hub nut.
Using a 30 mm socket wrench, remove the axle hub nut.
| 7. REMOVE FRONT AXLE HUB NUT RH |
| 8. SEPARATE FRONT SPEED SENSOR LH (w/ ABS) |
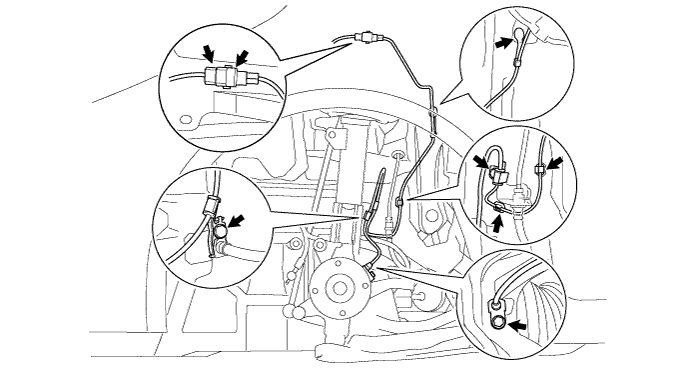
Remove the speed sensor clip from the body.
Disconnect the speed sensor connector.
Remove the 3 clips.
Remove the bolt and separate the clamp from the body.
Remove the bolt and separate the clamp from the shock absorber.
Remove the bolt and remove the speed sensor from the steering knuckle.
| 9. SEPARATE FRONT SPEED SENSOR RH (w/ ABS) |
| 10. SEPARATE FRONT STABILIZER LINK ASSEMBLY LH |
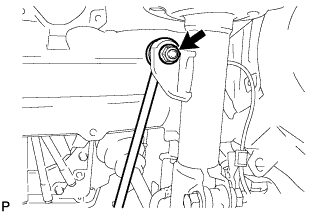 |
Remove the nut and separate the front stabilizer link assembly from the front shock absorber.
| 11. SEPARATE FRONT STABILIZER LINK ASSEMBLY RH |
| 12. SEPARATE TIE ROD END SUB-ASSEMBLY LH |
Remove the cotter pin and castle nut.
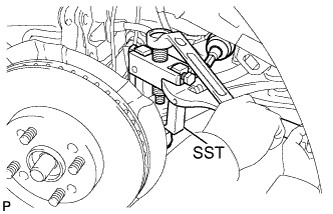 |
Using SST, separate the tie rod end from the steering knuckle.
| 13. SEPARATE TIE ROD END SUB-ASSEMBLY RH |
| 14. SEPARATE FRONT LOWER SUSPENSION ARM LH |
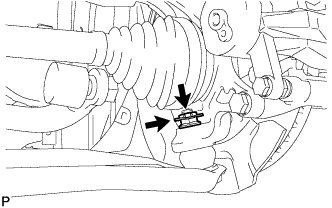 |
Remove the clip and castle nut.
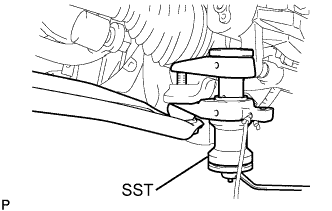 |
Using SST, separate the lower arm.
| 15. SEPARATE FRONT LOWER SUSPENSION ARM RH |
| 16. SEPARATE FRONT AXLE ASSEMBLY LH |
Using a plastic hammer, tap the end of the drive shaft and disengage the fitting between the drive shaft and front axle.
Push the front axle out of the vehicle to remove the drive shaft from the front axle.
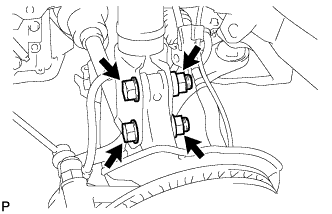 |
Remove the 2 nuts and 2 bolts and remove the front axle assembly.
| 17. SEPARATE FRONT AXLE ASSEMBLY RH |
| 18. REMOVE AUTOMATIC TRANSMISSION CASE PROTECTOR (w/o ABS) |
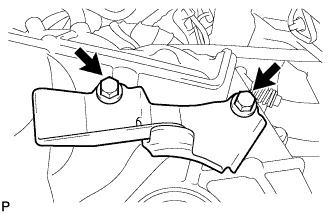 |
Remove the 2 bolts and remove the transmission case protector from the automatic transaxle.
| 19. REMOVE FRONT DRIVE SHAFT ASSEMBLY LH |
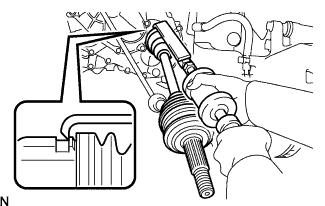 |
Using SST, remove the drive shaft.
| 20. REMOVE FRONT DRIVE SHAFT ASSEMBLY RH |
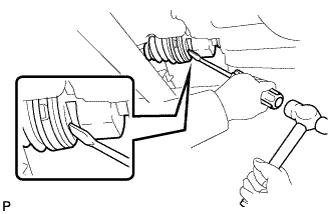 |
Using a screwdriver and hammer, remove the drive shaft.
| 21. REMOVE FRONT TRANSAXLE CASE OIL SEAL |
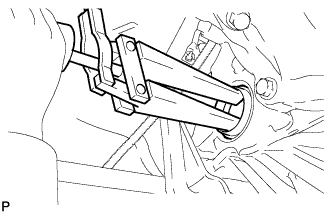 |
Using SST, remove the front transaxle case oil seal.
| 22. REMOVE TRANSAXLE CASE OIL SEAL |
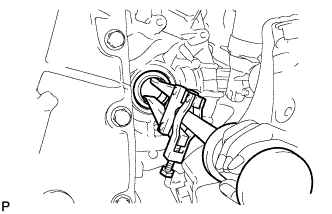 |
Using SST, remove the transaxle case oil seal.
| 23. INSTALL FRONT TRANSAXLE CASE OIL SEAL |
Coat the lip of a new oil seal with MP grease.
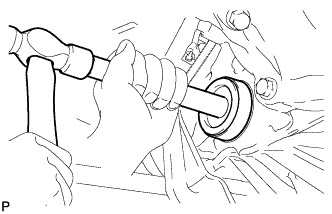 |
Using SST and a hammer, install the front transaxle case oil seal.
| 24. INSTALL TRANSAXLE CASE OIL SEAL |
Coat the lip of a new oil seal with MP grease.
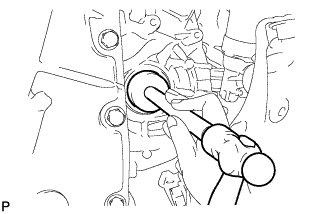 |
Using SST and a hammer, install the transaxle case oil seal.
| 25. INSTALL FRONT DRIVE SHAFT ASSEMBLY LH |
for Automatic Transaxle:
Coat the spline of the inboard joint with ATF.
for Manual Transaxle:
Coat the spline of the inboard joint with gear oil.
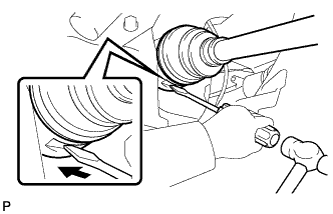 |
Align the inboard joint splines and install the drive shaft with a screwdriver and hammer.
| 26. INSTALL FRONT DRIVE SHAFT ASSEMBLY RH |
| 27. INSTALL AUTOMATIC TRANSMISSION CASE PROTECTOR (w/o ABS) |
|
Install the transmission case protector onto the automatic transaxle with the 2 bolts.
| 28. INSTALL FRONT AXLE ASSEMBLY LH |
Install the front axle assembly to the shock absorber.
Install the 2 bolts and 2 nuts.
Push the front axle out of the vehicle to align the spline of the drive shaft with the front axle and insert the front axle.
| 29. INSTALL FRONT AXLE ASSEMBLY RH |
| 30. INSTALL FRONT LOWER SUSPENSION ARM LH |
Install the front lower suspension arm sub-assembly LH to the steering knuckle with a new castle nut.
Install a new clip.
| 31. INSTALL FRONT LOWER SUSPENSION ARM RH |
| 32. INSTALL TIE ROD END SUB-ASSEMBLY LH |
Install the tie rod end sub-assembly LH to the steering knuckle with a new castle nut.
Install a new cotter pin.
| 33. INSTALL TIE ROD END SUB-ASSEMBLY RH |
| 34. INSTALL FRONT STABILIZER LINK ASSEMBLY LH |
Install the front stabilizer link assembly LH with the nut.
| 35. INSTALL FRONT STABILIZER LINK ASSEMBLY RH |
| 36. INSTALL FRONT SPEED SENSOR LH (w/ ABS) |
Install the speed sensor to the steering knuckle with the bolt.
Install the clamp to the shock absorber with the bolt.
Install the clamp to the body with the bolt.
Install the 3 clips.
Connect the speed sensor connector.
Install the speed sensor clip to the body.
| 37. INSTALL FRONT SPEED SENSOR RH (w/ ABS) |
| 38. INSTALL FRONT AXLE HUB NUT LH |
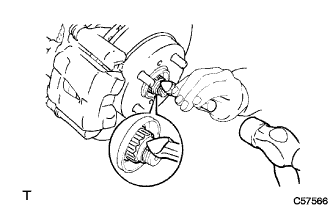 |
Using a 30 mm socket wrench, install a new axle hub nut.
Using a chisel and a hammer, stake the axle hub nut.
| 39. INSTALL FRONT AXLE HUB NUT RH |
| 40. INSTALL FRONT WHEELS |
| 41. CONNECT CABLE TO NEGATIVE BATTERY TERMINAL |
| 42. ADD AUTOMATIC TRANSAXLE FLUID |
| Classification | Capacity (Reference) | |
| Toyota Genuine ATF WS or equivalent | Dry fill | 6.4 liters (6.8 US qts, 5.6 Imp. qts) |
| Drain and refill | 2.5 liters (2.6 US qts, 2.2 Imp. qts) | |
| 43. INSPECT AUTOMATIC TRANSAXLE FLUID |
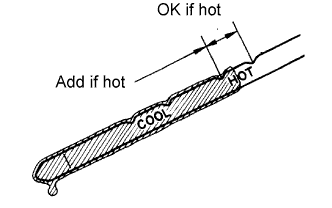 |
Park the vehicle on a level surface and engage the parking brake.
With the engine idling and the brake pedal depressed, shift the shift lever into all positions from P to L, and then return it to the P position.
Pull out the oil level gauge and wipe it clean.
Push it fully back into the pipe.
Pull it out and check that the fluid level is within the HOT range.
If there is any leakage, repair or replace O-rings, FIPGs, oil seals, plugs or other parts.
| 44. AUTOMATIC TRANSAXLE FLUID LEAKAGE |
| 45. INSPECT AND ADJUST FRONT WHEEL ALIGNMENT |
| 46. INSTALL ENGINE UNDER COVER RH |
| 47. INSTALL ENGINE UNDER COVER LH |