FRONT SHOCK ABSORBER (for Hatchback) > REMOVAL |
| 1. REMOVE WINDSHIELD WIPER MOTOR ASSEMBLY |
| 2. REMOVE FRONT NO. 1 VENTILATOR SEAL |
|
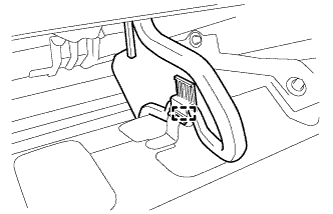
Disengage the clamp and remove the front No. 1 ventilator seal.
| 3. REMOVE FRONT AIR SHUTTER SEAL RH |
| 4. REMOVE INNER COWL TOP TO COWL BRACE |
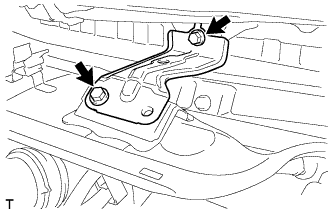 |
Remove the 2 bolts and the inner cowl top to cowl brace.
| 5. REMOVE OUTER COWL TOP PANEL |
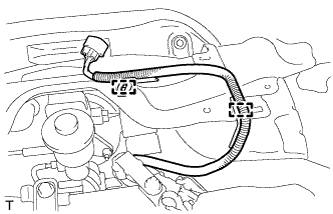 |
Disengage the 2 clamps and separate the wire harness.
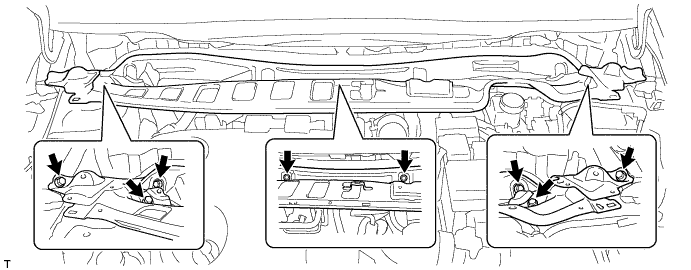
Remove the 8 bolts and the outer cowl top panel.
| 6. REMOVE FRONT WHEEL |
| 7. SEPARATE FRONT STABILIZER LINK ASSEMBLY |
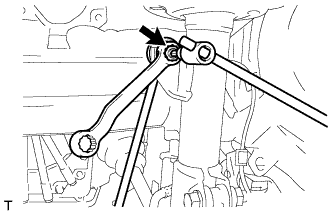 |
Remove the nut and separate the front stabilizer link assembly from the front shock absorber.
| 8. SEPARATE FRONT FLEXIBLE HOSE (w/ ABS) |
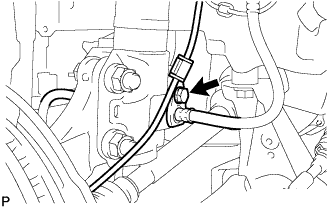 |
Remove the bolt and separate the front speed sensor and the front flexible hose.
| 9. SEPARATE FRONT FLEXIBLE HOSE (w/o ABS) |
Remove the bolt and separate the front flexible hose.
| 10. REMOVE FRONT SUSPENSION SUPPORT DUST COVER |
| 11. REMOVE FRONT SHOCK ABSORBER WITH COIL SPRING |
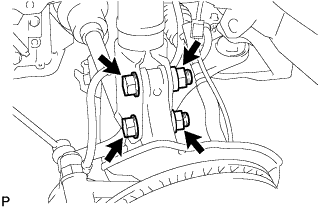 |
Remove the 2 nuts and 2 bolts, and separate the front shock absorber with coil spring from the steering knuckle.
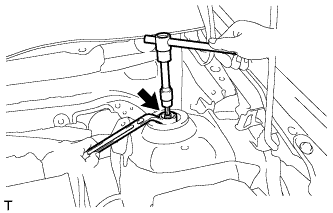 |
Using a socket hexagon wrench 6 mm, fix the front shock absorber rod and remove the nut.
Remove the front No. 2 suspension support.
Remove the front shock absorber with coil spring from the vehicle.
| 12. REMOVE FRONT SUSPENSION SUPPORT SUB-ASSEMBLY |
| 13. REMOVE FRONT COIL SPRING UPPER SEAT |
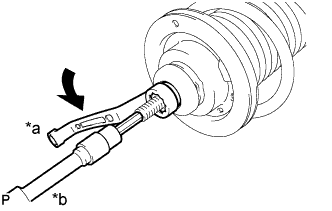 |
Using a socket hexagon wrench 6 mm, fix the shock absorber rod and loosen the nut.
| *a | Turn |
| *b | Hold |
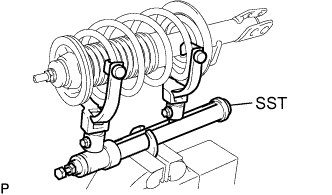 |
Secure SST in a vise.
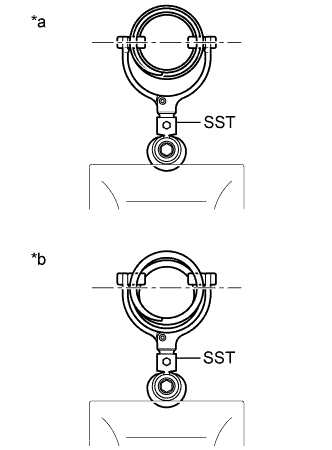 |
Attach the arm of SST to the diameter of the front coil spring.
| *a | Correct |
| *b | Incorrect |
Using SST, compress the front coil spring.
Confirm that the front coil spring becomes free and remove the nut.
Remove the front coil spring upper seat with the strut mounting bearing and the front spring bumper from the front shock absorber.
| 14. REMOVE FRONT SPRING BUMPER |
Remove the front spring bumper from the front coil spring upper seat.
| 15. REMOVE FRONT COIL SPRING UPPER INSULATOR |
| 16. REMOVE FRONT COIL SPRING |
| 17. REMOVE STRUT MOUNTING BEARING |
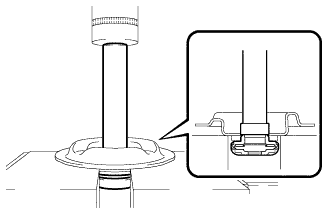 |
Using a brass bar and press, remove the strut mounting bearing from the front coil spring upper seat.