 |
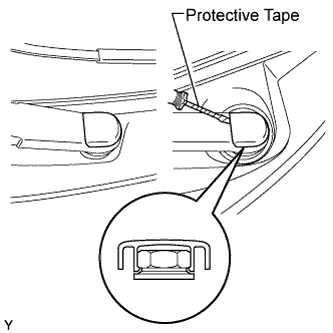
Using a screwdriver with its tip wrapped in protective tape, disengage the claw and remove the 2 front wiper arm head caps.
CYLINDER HEAD GASKET (for Sedan) > REMOVAL |
| 1. DISCHARGE FUEL SYSTEM PRESSURE |
| 2. DISCONNECT CABLE FROM NEGATIVE BATTERY TERMINAL |
| 3. REMOVE FRONT WIPER ARM HEAD CAP |
|
Using a screwdriver with its tip wrapped in protective tape, disengage the claw and remove the 2 front wiper arm head caps.
| 4. REMOVE FRONT WIPER ARM AND BLADE ASSEMBLY LH |
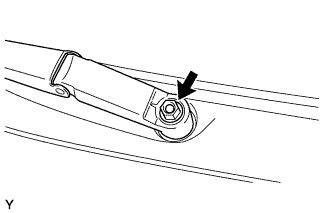 |
Operate the wiper, then stop the windshield wiper motor in the automatic stop position.
Remove the nut and front wiper arm.
| 5. REMOVE FRONT WIPER ARM AND BLADE ASSEMBLY RH |
| 6. REMOVE COWL SIDE VENTILATOR SUB-ASSEMBLY LH |
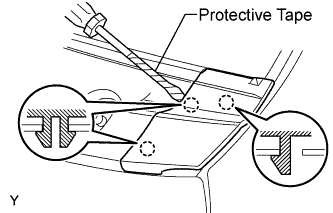 |
Using a screwdriver with its tip wrapped in protective tape, disengage the 3 claws and remove the cowl side ventilator sub-assembly LH.
| 7. REMOVE COWL SIDE VENTILATOR SUB-ASSEMBLY RH |
| 8. REMOVE COWL TOP VENTILATOR LOUVER SUB-ASSEMBLY |
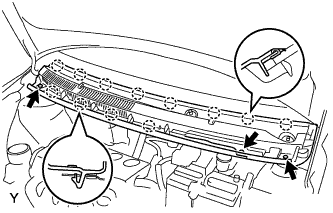 |
Disengage the 3 clips, the 4 claws and the 8 hooks.
Remove the cowl top ventilator louver sub-assembly.
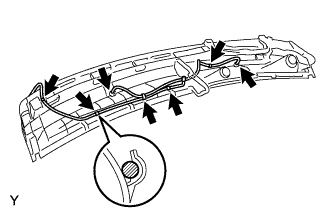 |
Disconnect the washer hoses.
Disengage the 5 hooks.
| 9. REMOVE FRONT WIPER MOTOR AND LINK |
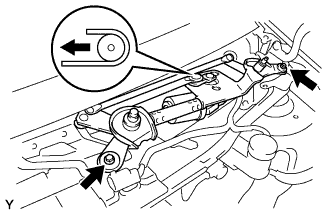 |
Remove the 2 bolts.
Slide the wiper link. Disengage the meshing of the rubber pin, then disconnect the connector and remove the front wiper motor and link.
| 10. REMOVE FRONT AIR SHUTTER SEAL RH |
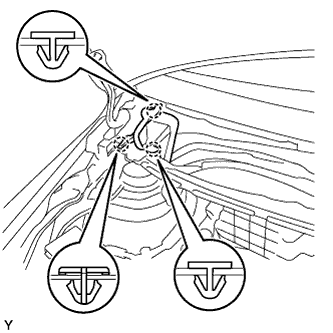 |
Disengage the 3 claws and remove the front air shutter seal RH.
| 11. REMOVE COWL TOP PANEL OUTER |
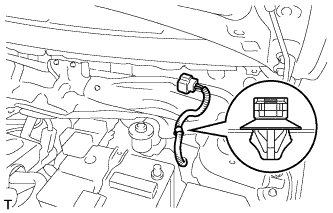 |
Disengage the wire harness clamp.
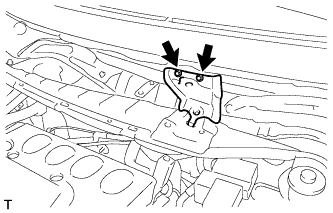 |
Remove the 2 bolts and remove the cowl top to cowl inner brace.
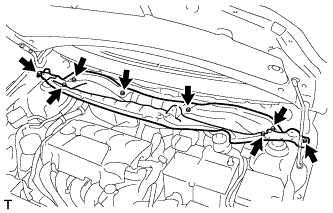 |
Remove the 8 bolts and remove the cowl top panel outer.
| 12. REMOVE BATTERY |
| 13. REMOVE BATTERY TRAY |
| 14. REMOVE FRONT WHEEL RH |
| 15. REMOVE ENGINE UNDER COVER LH |
| 16. REMOVE ENGINE UNDER COVER RH |
| 17. DRAIN ENGINE OIL |
Remove the oil filler cap sub-assembly.
Remove the oil pan drain plug and the gasket from the No. 2 oil pan sub-assembly, and drain the engine oil into a container.
Clean and install the oil pan drain plug with a new gasket to the No. 2 oil pan sub-assembly.
| 18. DRAIN ENGINE COOLANT |
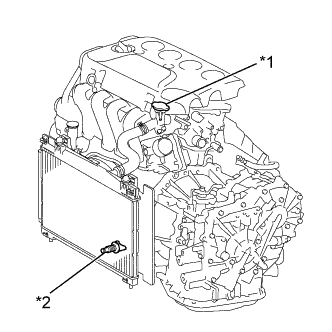 |
Loosen the radiator drain cock plug.
| *1 | Water Filler Cap Sub-assembly |
| *2 | Radiator Drain Cock Plug |
Remove the water filler cap sub-assembly, then drain coolant.
| 19. REMOVE NO. 2 CYLINDER HEAD COVER |
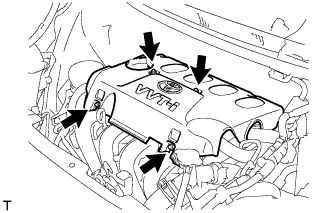 |
Remove the 4 nuts and cylinder head cover No. 2.
| 20. REMOVE NO. 1 AIR CLEANER CAP SUB-ASSEMBLY WITH AIR CLEANER HOSE |
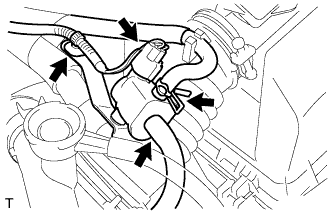 |
Disconnect fuel vapor feed hose No. 1 and fuel vapor feed hose No. 2 from the vacuum switching valve assembly.
Disconnect the vacuum switching valve assembly connector and wire harness clamp.
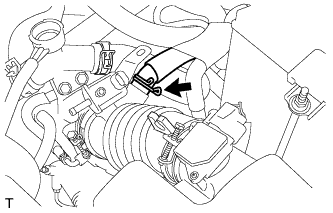 |
Disconnect ventilation hose No. 2.
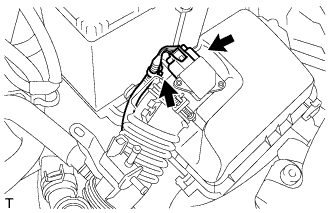 |
Disconnect the wire harness clamp and mass air flow meter connector.
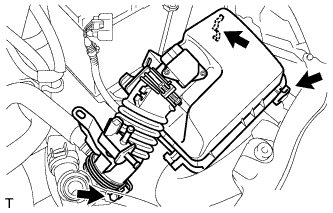 |
Loosen the hose clamp, unlock the air cleaner assembly clamp and remove air cleaner cap sub-assembly with air cleaner hose No. 1.
| 21. DISCONNECT NO. 3 RADIATOR HOSE |
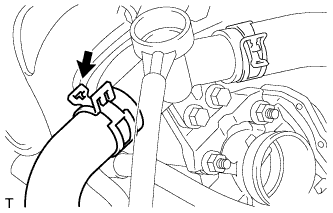 |
Disconnect No. 3 radiator hose.
| 22. DISCONNECT RESERVE TANK HOSE |
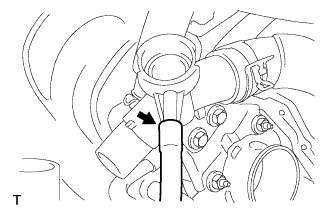 |
Disconnect the reserve tank hose.
| 23. REMOVE WATER FILLER SUB-ASSEMBLY |
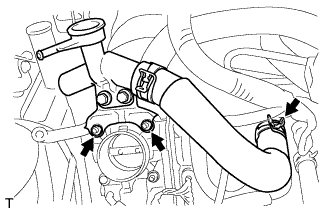 |
Separate No. 1 radiator hose from the cylinder head.
Remove the 2 nuts and remove the water filler sub-assembly.
| 24. DISCONNECT NO. 2 WATER BY-PASS HOSE |
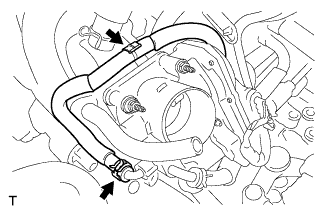 |
Disconnect No. 2 water by-pass hose.
| 25. DISCONNECT WATER BY-PASS HOSE |
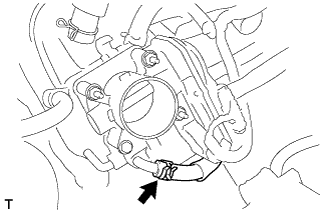 |
Disconnect the water by-pass hose.
| 26. DISCONNECT THROTTLE WITH MOTOR BODY CONNECTOR |
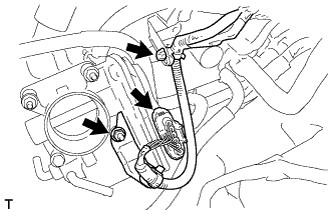 |
Separate the wire harness clamp.
Remove the nut and separate the throttle with motor body connector.
| 27. DISCONNECT VENTILATION HOSE |
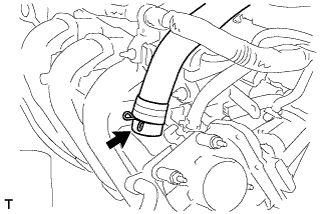 |
Disconnect the ventilation hose.
| 28. DISCONNECT UNION TO CONNECTOR TUBE HOSE |
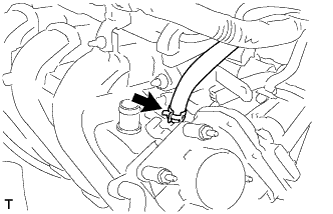 |
Disconnect the union to connector tube hose.
| 29. REMOVE OIL LEVEL DIPSTICK SUB-ASSEMBLY |
| 30. REMOVE INTAKE MANIFOLD |
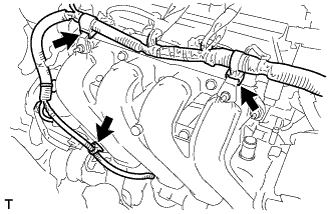 |
Separate the 3 wire harness clamps shown in the illustration.
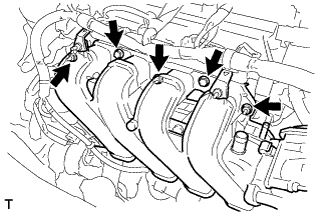 |
Remove the 3 bolts and 2 nuts and remove the intake manifold.
| 31. REMOVE OIL LEVEL DIPSTICK GUIDE |
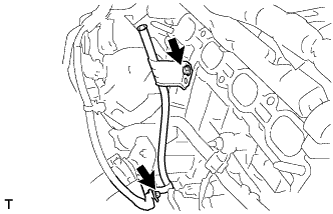 |
Remove the wire harness clamp and the bolt and remove the oil level dipstick guide.
| 32. DISCONNECT FUEL TUBE SUB-ASSEMBLY |
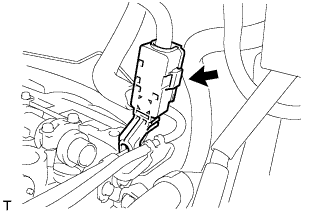 |
Remove the fuel pipe clamp.
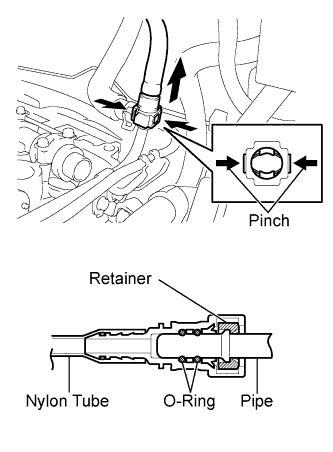 |
Pinch the retainer of the fuel tube connector, then pull the fuel tube connector to disconnect the fuel tube out of the fuel delivery pipe sub-assembly.
| 33. DISCONNECT BOOSTER VACUUM TUBE |
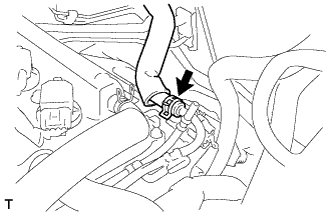 |
Disconnect the booster vacuum tube.
| 34. DISCONNECT CAMSHAFT POSITION SENSOR CONNECTOR |
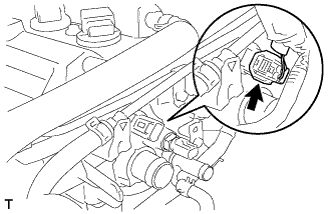 |
Disconnect the camshaft position sensor connector.
| 35. DISCONNECT ENGINE COOLANT TEMPERATURE SENSOR CONNECTOR |
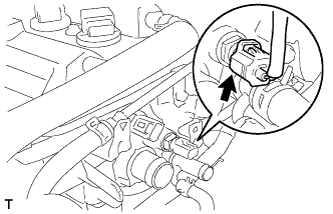 |
Disconnect the engine coolant temperature sensor connector.
| 36. DISCONNECT HEATED OXYGEN SENSOR CONNECTOR |
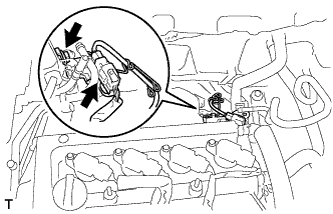 |
Remove the bolts and separate the sensor bracket.
Disconnect the heated oxygen sensor connector.
| 37. DISCONNECT HEATER WATER HOSE INLET A |
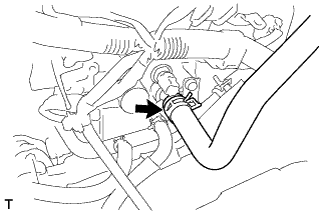 |
Disconnect heater water inlet hose A.
| 38. SEPARATE NO. 1 WATER BY-PASS PIPE |
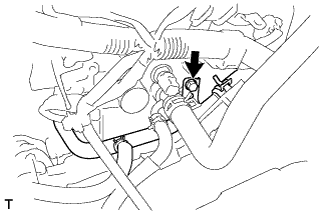 |
Remove the bolt and separate No. 1 water by-pass pipe.
| 39. DISCONNECT WIRE HARNESS |
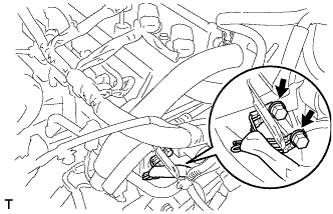 |
Remove the 2 bolts and disconnect the wire harness.
| 40. SEPARATE FRONT EXHAUST PIPE ASSEMBLY |
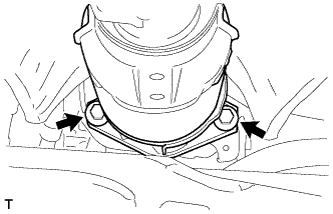 |
Remove the 2 bolts and 2 compression springs and separate the front exhaust pipe assembly.
| 41. REMOVE MANIFOLD SUPPORT BRACKET |
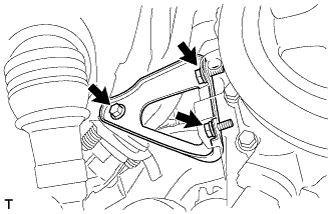 |
Remove the 3 bolts and remove the manifold support bracket.
| 42. REMOVE FAN AND GENERATOR V BELT |
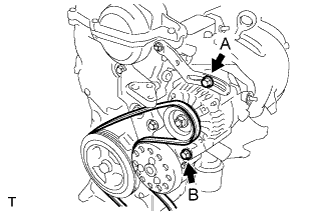 |
Loosen bolts A and B.
Release the fan and generator V belt tension and remove the fan and generator V belt.
| 43. REMOVE GENERATOR ASSEMBLY |
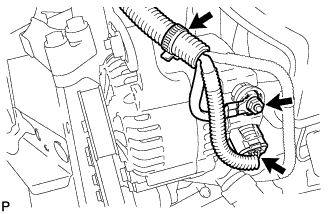 |
Remove the terminal cap.
Separate the connector and the harness clamp.
Remove the nut and remove terminal B.
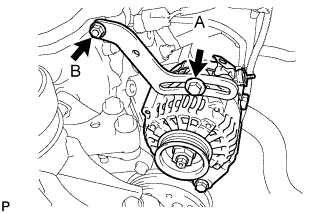 |
Remove fan belt adjusting slider fixing bolts A and B and remove the fan belt adjusting slider.
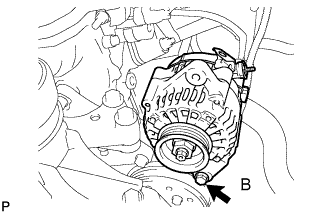 |
Remove fixing bolt B and remove the generator.
| 44. REMOVE NO. 1 IGNITION COIL |
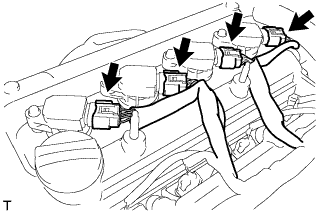 |
Disconnect the 4 ignition coil connectors.
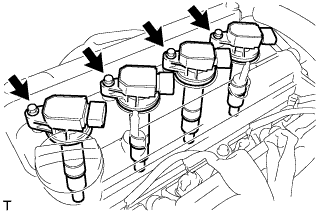 |
Remove the 4 bolts and 4 ignition coils.
| 45. DISCONNECT VENTILATION HOSE |
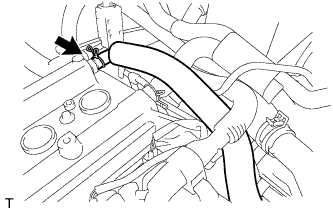 |
Disconnect the ventilation hose.
| 46. DISCONNECT FUEL VAPOR FEED HOSE ASSEMBLY |
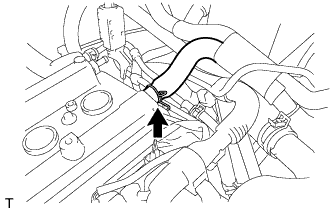 |
Disconnect fuel vapor feed hose assembly.
| 47. REMOVE CYLINDER HEAD COVER SUB-ASSEMBLY |
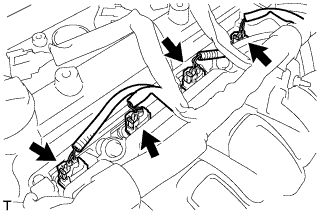 |
Disconnect the fuel injector connectors.
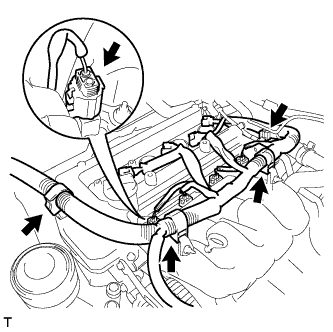 |
Disconnect the connector and 3 wire harness clamps shown in the illustration and disconnect the engine wire harness.
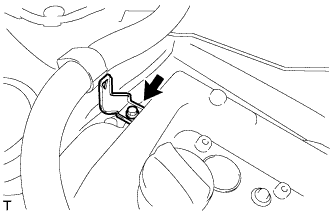 |
Remove the bolt and remove the wire harness bracket.
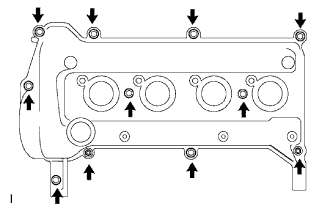 |
Remove the 9 bolts, 2 nuts and 2 seal washers and then remove the cylinder head cover sub-assembly.
Remove the gasket from the cylinder head cover sub-assembly.
| 48. REMOVE ENGINE MOUNTING INSULATOR SUB-ASSEMBLY RH |
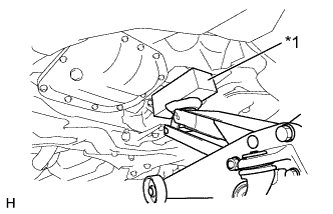 |
Place a wooden block on a jack underneath the oil pan sub-assembly.
| *1 | Wooden Block |
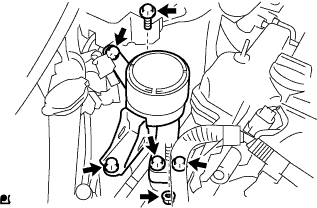 |
Remove the 5 bolts, the nut and the engine mounting insulator sub-assembly RH from the transverse engine engine mounting bracket and the vehicle.
| 49. REMOVE CRANKSHAFT DAMPER SUB-ASSEMBLY |
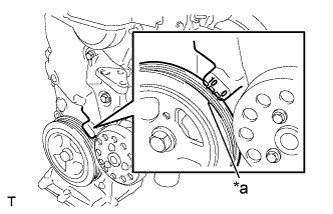 |
Set the No. 1 cylinder to TDC/compression.
Turn the crankshaft damper sub-assembly, and align its timing notch with timing mark "0" of the oil pump assembly.
| *a | Timing Mark |
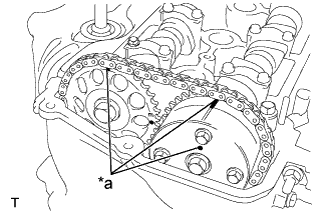 |
Check that the timing marks on the camshaft timing sprocket and the camshaft timing gear assembly are all facing upward as shown in the illustration.
| *a | Timing Mark |
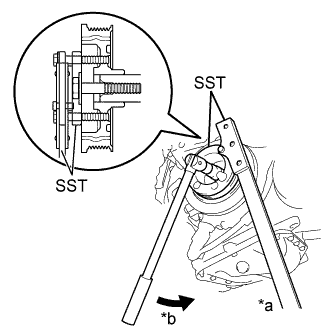 |
Using SST, loosen the bolt while holding the crankshaft damper sub-assembly.
| *a | Hold |
| *b | Turn |
Remove the SST and the bolt.
Remove the crankshaft damper sub-assembly from the crankshaft.
| 50. REMOVE CRANKSHAFT POSITION SENSOR |
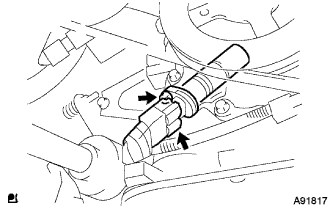 |
Disconnect the crankshaft position sensor connector.
Remove the bolt and remove the crankshaft position sensor.
| 51. REMOVE CAMSHAFT TIMING OIL CONTROL VALVE ASSEMBLY |
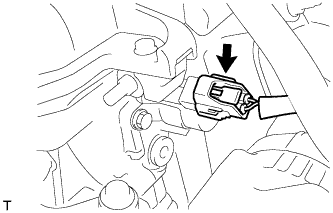 |
Disconnect the camshaft timing oil control valve assembly connector.
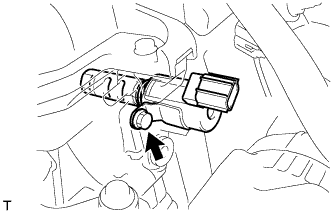 |
Remove the bolt and nut and remove the camshaft timing oil control valve assembly.
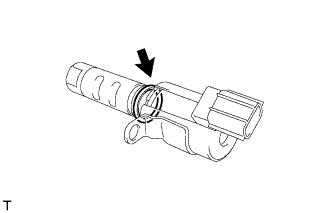 |
Remove the O-ring from the camshaft timing oil control valve assembly.
| 52. REMOVE WATER PUMP PULLEY |
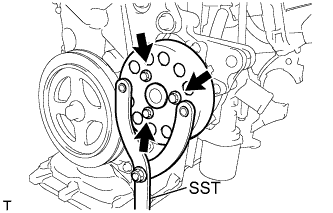 |
Using SST, hold the water pump pulley.
Remove the 3 bolts and remove the water pump pulley.
| 53. REMOVE ENGINE WATER PUMP ASSEMBLY |
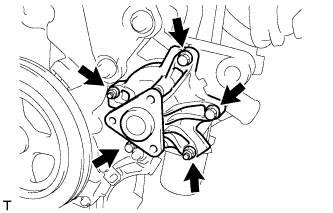 |
Remove the 3 bolts and 2 nuts and remove the engine water pump assembly and gasket.
| 54. REMOVE TRANSVERSE ENGINE ENGINE MOUNTING BRACKET |
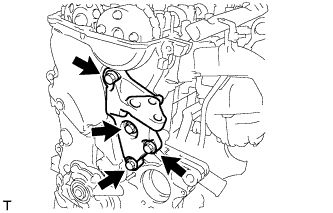 |
Remove the 4 bolts and the transverse engine engine mounting bracket from the oil pump assembly.
| 55. REMOVE OIL PUMP ASSEMBLY |
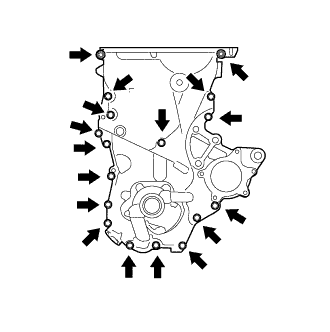 |
Remove the 16 bolts and the nut from the oil pump assembly.
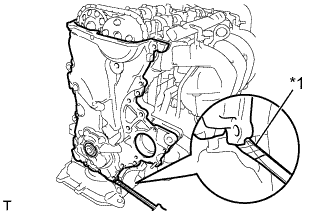 |
Using a screwdriver with its tip wrapped in protective tape, remove the oil pump assembly by prying between the cylinder head sub-assembly and cylinder block sub-assembly.
| *1 | Protective Tape |
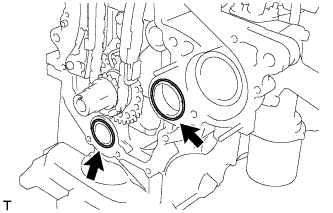 |
Remove the 2 O-rings from the cylinder block sub-assembly and the oil pan sub-assembly.
| 56. REMOVE OIL PUMP SEAL |
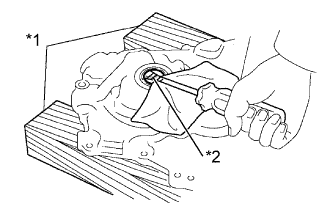 |
Using a screwdriver with its tip wrapped in protective tape, remove the oil seal.
| *1 | Wooden Block |
| *2 | Protective Tape |
| 57. REMOVE NO. 1 CHAIN TENSIONER ASSEMBLY |
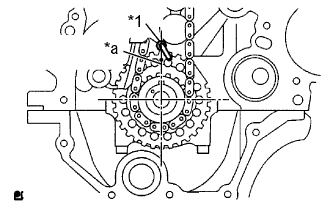 |
| *1 | Oil Jet |
| *a | Timing Mark (1dot) |
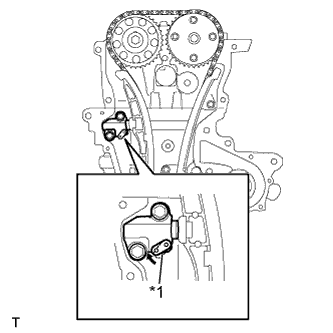 |
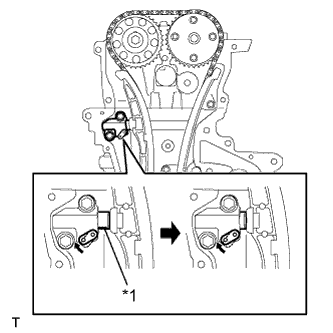
Pull up the stopper plate and hold it with its lock released.
| *1 | Stopper Plate |
 |
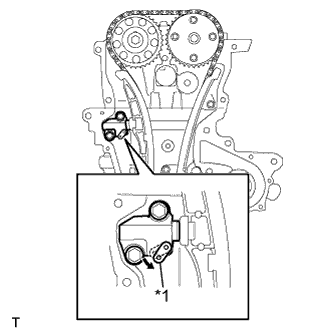
Unlock the plunger of the tensioner and push it in to the end.
| *1 | Plunger |
 |
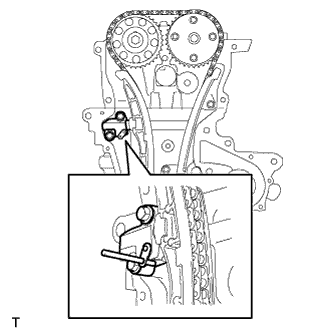
Pull down the stopper plate with the plunger pushed to the end and lock the plunger.
| *1 | Stopper Plate |
 |
Insert a 3 mm (0.12 in.) diameter bar into the hole in the stopper plate and lock the plunger.
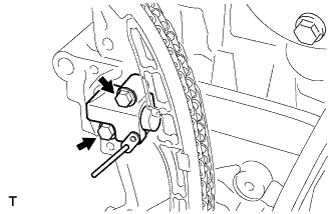 |
Remove the 2 bolts and remove the No. 1 chain tensioner assembly.
| 58. REMOVE CHAIN TENSIONER SLIPPER |
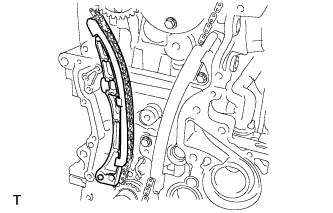 |
Remove the chain tensioner slipper.
| 59. REMOVE NO. 1 CHAIN VIBRATION DAMPER |
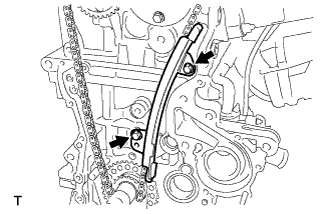 |
Remove the 2 bolts and remove the No. 1 chain vibration damper.
| 60. REMOVE CHAIN SUB-ASSEMBLY |
| 61. REMOVE CAMSHAFT |
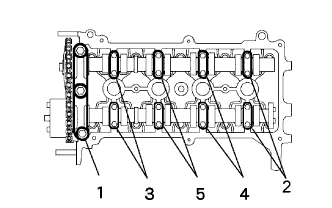 |
Using several steps, uniformly loosen and remove the 19 bearing cap bolts in the sequence shown in the illustration, and then remove No. 1 camshaft bearing cap and No. 2 camshaft bearing cap.
Remove the camshaft and No. 2 camshaft.
| 62. REMOVE CYLINDER HEAD SUB-ASSEMBLY |
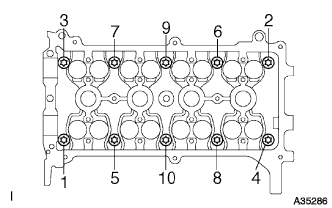 |
Using several steps, uniformly loosen and remove the 10 cylinder head bolts with an 8 mm bi-hexagon wrench in the sequence shown in the illustration. Remove the 10 plate washers.
| 63. REMOVE CYLINDER HEAD GASKET |
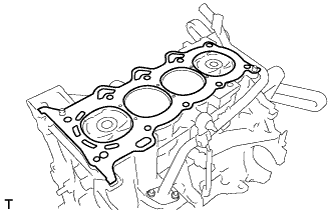 |
Remove the cylinder head gasket.