LOWER INSTRUMENT PANEL (for Sedan) > REMOVAL |
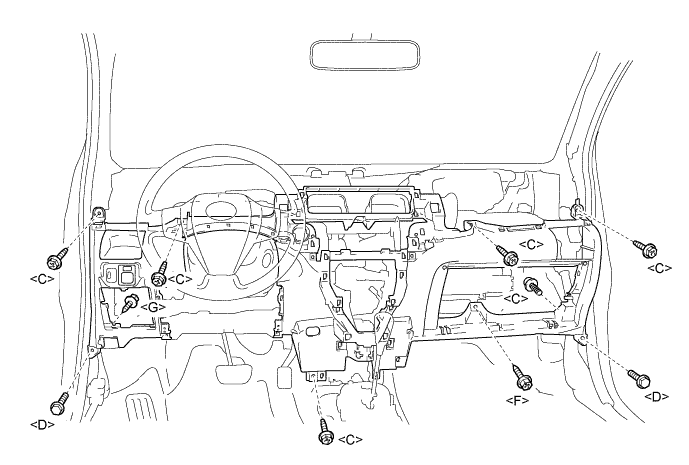
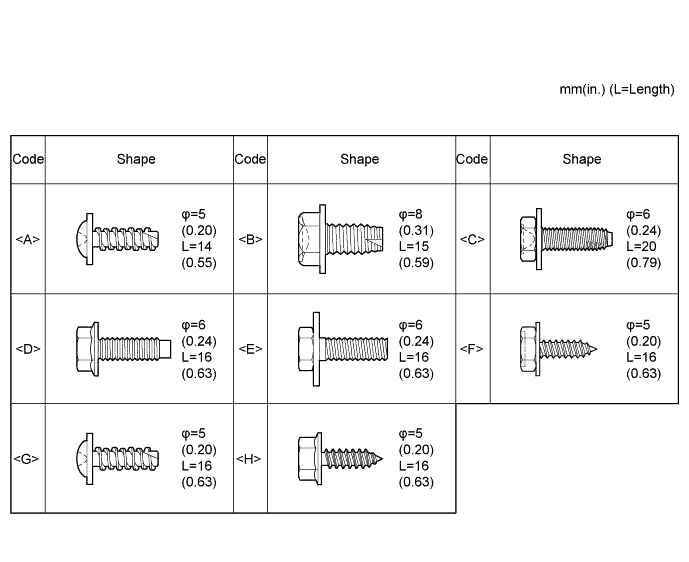
| 1. BOLTS, SCREWS AND NUTS TABLE |
| 2. REMOVE INSTRUMENT PANEL CUP HOLDER RH |
Open the instrument panel cup holder.
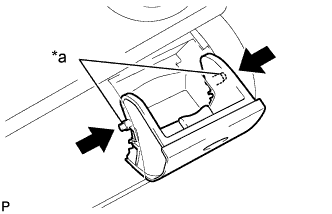 |
Flex both sides of the instrument panel cup holder and disengage the 2 stoppers.
| *a | Stopper |
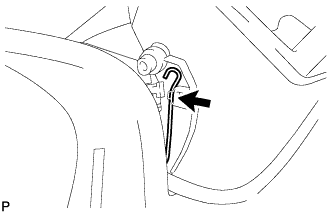 |
Disengage the spring.
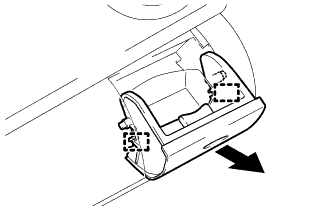 |
Remove the instrument panel cup holder by moving it toward either the inside or the outside of the vehicle and disengaging the 2 hinges one at a time.
| 3. REMOVE INSTRUMENT PANEL CUP HOLDER SPRING RH |
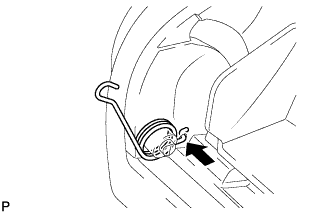 |
Remove the spring.
| 4. REMOVE INSTRUMENT PANEL CUP HOLDER LH |
Open the instrument panel cup holder.
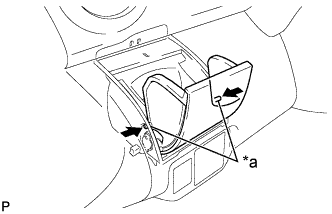 |
Flex both sides of the instrument panel cup holder and disengage the 2 stoppers.
| *a | Stopper |
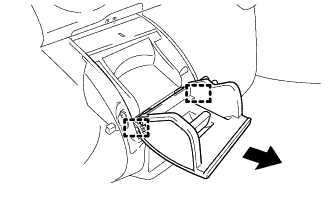 |
Remove the instrument panel cup holder by moving it toward either the inside or the outside of the vehicle and disengaging the 2 hinges one at a time.
| 5. REMOVE INSTRUMENT PANEL CUP HOLDER SPRING LH |
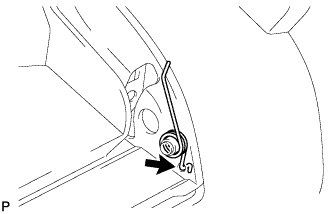 |
Remove the spring.
| 6. REMOVE UPPER INSTRUMENT PANEL SUB-ASSEMBLY |
| 7. REMOVE INSTRUMENT CLUSTER FINISH PANEL CENTER SUB-ASSEMBLY |
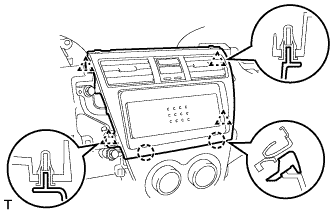 |
Disengage the 2 claws and 4 clips and remove the instrument cluster finish panel center.
| 8. REMOVE STEREO OPENING COVER |
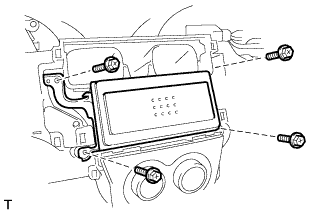 |
Remove the 4 screws and the stereo opening cover.
| 9. REMOVE AIR CONDITIONING PANEL ASSEMBLY |
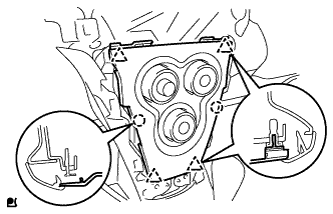 |
Disengage the 4 clips and 2 claws and remove the air conditioning panel.
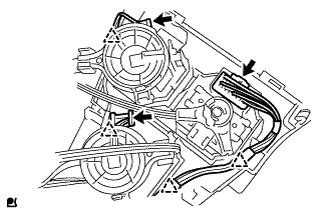 |
Disconnect the 3 connectors and 4 clamps.
| 10. DISCONNECT AIR MIX DAMPER CONTROL CABLE SUB-ASSEMBLY |
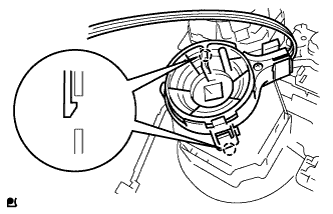 |
Disconnect the air mix damper control cable from the clamp.
Disengage the 2 claws and disconnect the air mix damper control cable.
| 11. DISCONNECT DEFROSTER DAMPER CONTROL CABLE SUB-ASSEMBLY |
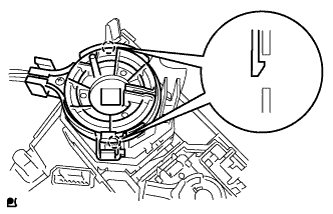 |
Disengage the 2 claws and disconnect the defroster damper control cable.
| 12. DISCONNECT AIR INLET DAMPER CONTROL CABLE SUB-ASSEMBLY |
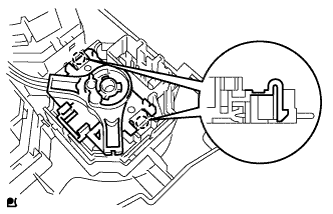 |
Disengage the 2 claws and disconnect the air inlet damper control cable.
| 13. REMOVE FRONT DOOR SCUFF PLATE RH |
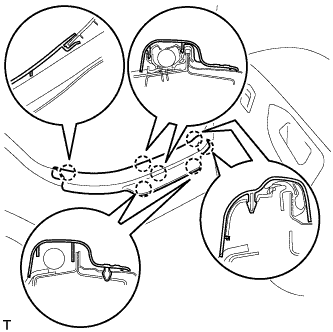 |
Disengage the 7 claws and remove the rear door scuff plate.
| 14. REMOVE FRONT DOOR SCUFF PLATE LH |
| 15. REMOVE COWL SIDE TRIM BOARD RH |
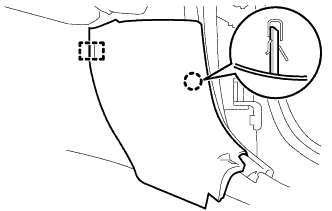 |
Disengage the claw and the stud bolt and remove the cowl side trim board.
| 16. REMOVE COWL SIDE TRIM BOARD LH |
| 17. REMOVE REAR CONSOLE BOX ASSEMBLY |
| 18. REMOVE INSTRUMENT PAD LOWER LH |
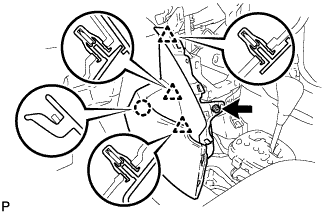 |
Remove the <H> screw.
Disengage the claw and 3 clips and remove the instrument pad lower.
| 19. REMOVE INSTRUMENT PAD LOWER RH |
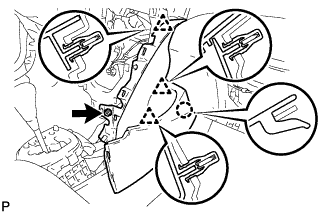 |
Remove the <H> screw.
Disengage the claw and 3 clips and remove the instrument pad lower.
| 20. REMOVE INSTRUMENT PANEL LOWER FINISH PANEL SUB-ASSEMBLY |
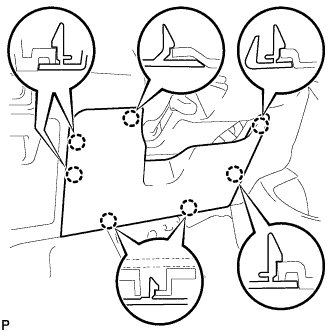 |
Disengage the 7 claws and open the instrument panel lower finish panel.
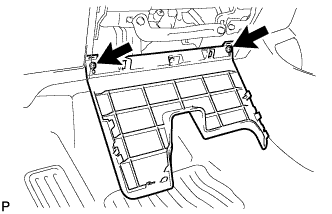 |
Remove the 2 <A> screws and the instrument panel lower finish panel.
| 21. REMOVE INSTRUMENT PANEL BOX |
Open the instrument panel box.
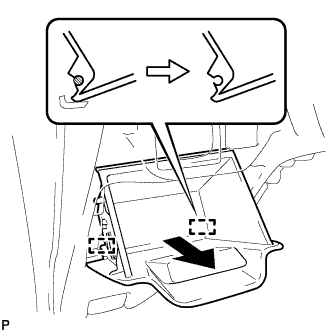 |
Pull the instrument panel box out horizontally with the instrument panel open and disengage the 2 hinges.
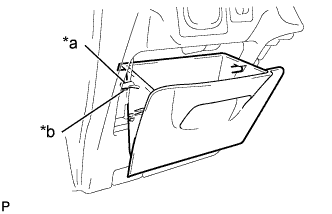 |
Remove the stopper of the instrument panel box from the cutout of the lower instrument panel and remove the instrument panel box.
| *a | Stopper |
| *b | Cutout |
| 22. DISCONNECT ANTENNA CORD SUB-ASSEMBLY |
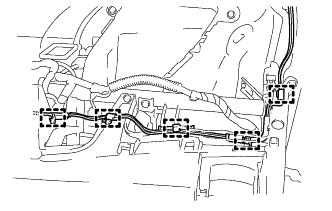 |
Disconnect the 5 antenna cord clamps.
| 23. SEPARATE HOOD LOCK CONTROL LEVER SUB-ASSEMBLY |
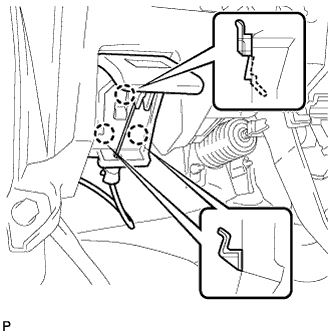 |
Disengage the 3 claws and separate the hood lock control lever.
| 24. REMOVE LOWER INSTRUMENT PANEL SUB-ASSEMBLY |
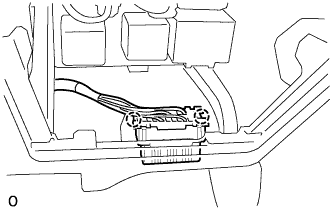 |
Disengage the 2 claws and disconnect the DLC3 connector.
Disconnect the clamps and connectors.
Remove the 6 <C> bolts, 2 <D> bolts, screw <F>, screw <G> and the lower instrument panel.