BLACK OUT TAPE (for Sedan) > REMOVAL |
| 1. REMOVE FRONT DOOR BELT MOULDING |
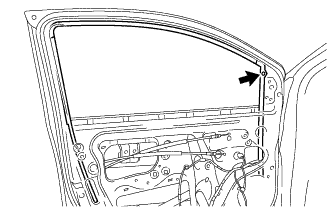
| 2. REMOVE FRONT DOOR GLASS RUN |
|
Remove the clip and the front door glass run.
| 3. REMOVE NO. 1 BLACK OUT TAPE |
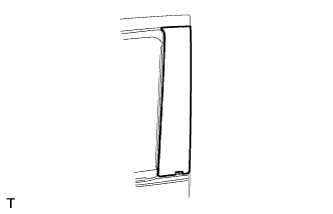 |
Using an infrared light, heat the No. 1 black out tape.
Lift the end portion with your fingernail and peel it parallel to the attachment surface.
| 4. REMOVE REAR DOOR ARMREST BASE UPPER PANEL |
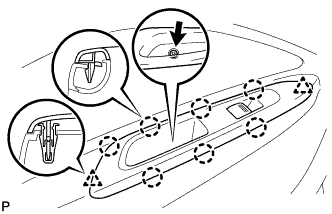 |
Remove the screw.
Disengage the 2 clips and 7 claws.
Disconnect the connector and remove the rear door armrest base upper panel.
| 5. REMOVE REAR DOOR TRIM BOARD SUB-ASSEMBLY |
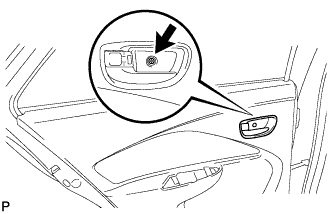 |
Remove the screw.
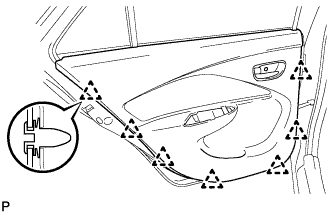 |
Disengage the 7 clips.
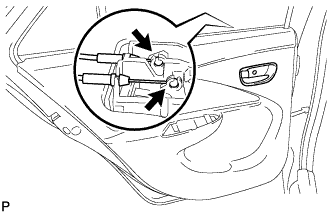 |
Disconnect the rear door lock remote control cable assembly and rear door inside locking cable assembly, and remove the rear door trim board sub-assembly.
| 6. REMOVE REAR DOOR BELT MOULDING |
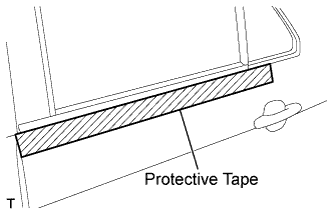 |
Apply protective tape to the door panel in the periphery of the rear door belt moulding.
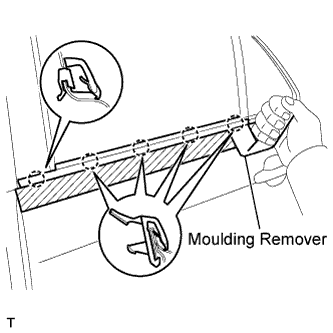 |
Using a moulding remover, disengage the 5 claws and remove the rear door belt moulding.
| 7. REMOVE REAR DOOR GLASS RUN |
Connect the power window regulator switch assembly.
Connect the cable to the negative (-) battery terminal.
Move the rear door glass sub-assembly in the fully opened position.
Disconnect the cable to the negative (-) battery terminal.
Disconnect the power window regulator switch assembly.
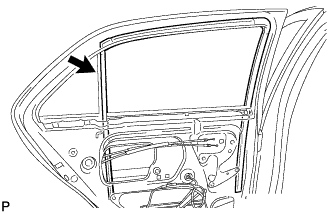 |
Remove the rear door glass run.
| 8. REMOVE NO. 2 BLACK OUT TAPE |
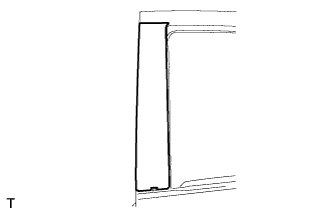 |
Using an infrared light, heat the No. 2 black out tape.
Lift the end portion with your fingernail and peel it parallel to the attachment surface.
| 9. REMOVE NO. 3 BLACK OUT TAPE |
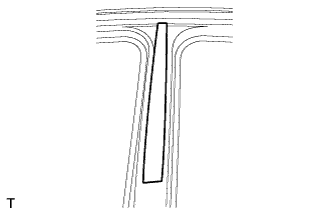 |
Using an infrared light, heat the No. 3 black out tape.
Lift the end portion with your fingernail and peel it parallel to the attachment surface.