POWER WINDOW REGULATOR MOTOR (for Sedan Front Side) > REMOVAL |
| 1. PRECAUTION |
| 2. DISCONNECT CABLE FROM NEGATIVE BATTERY TERMINAL |
| 3. REMOVE FRONT DOOR BELT MOULDING |
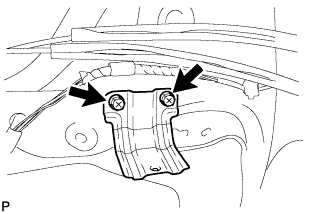
| 4. REMOVE FRONT DOOR TRIM BRACKET |
|
Remove the 2 screws and the front door trim bracket.
| 5. REMOVE FRONT DOOR SERVICE HOLE COVER |
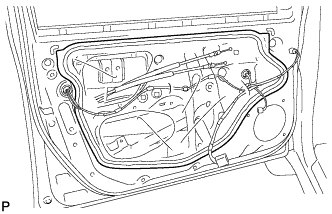 |
Disconnect the connectors and clamps, and remove the front door service hole cover.
| 6. REMOVE FRONT DOOR GLASS SUB-ASSEMBLY |
for Driver Side:
Temporarily install the power window regulator master switch assembly.
for Front Passenger Side:
Temporarily install the power window regulator switch assembly.
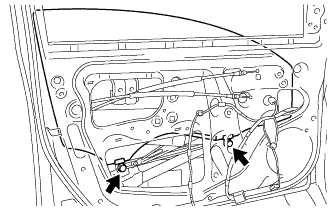 |
Move the front door glass sub-assembly until the 2 bolts can be seen through the service holes.
Remove the 2 bolts.
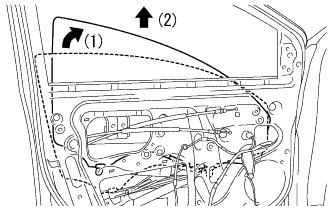 |
Remove the front door glass sub-assembly as indicated by the arrows in the order shown in the illustration.
for Driver Side:
Remove the power window regulator master switch.
for Front Passenger Side:
Remove the power window regulator switch.
| 7. REMOVE FRONT DOOR WINDOW REGULATOR SUB-ASSEMBLY |
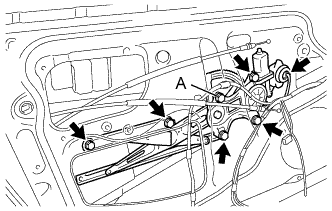 |
Disconnect the connector.
Loosen the bolt A.
Remove the 5 bolts and the front door window regulator sub-assembly.
| 8. REMOVE FRONT POWER WINDOW REGULATOR MOTOR ASSEMBLY |
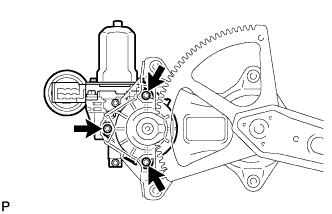 |
Using a T25 "TORX" socket wrench, remove the 3 screws and front power window regulator motor assembly.