 |
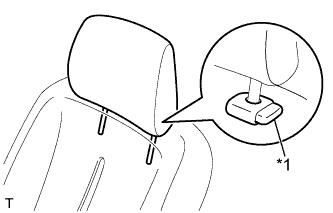
Push in the lock button of the front seat headrest support and remove the front seat headrest.
| *1 | Lock Button |
FRONT SEAT ASSEMBLY (for Sedan) > REMOVAL |
| 1. DISCONNECT CABLE FROM NEGATIVE BATTERY TERMINAL |
| 2. REMOVE FRONT SEAT HEADREST ASSEMBLY |
|
Push in the lock button of the front seat headrest support and remove the front seat headrest.
| *1 | Lock Button |
| 3. REMOVE FRONT SEAT ASSEMBLY (for LH Side) |
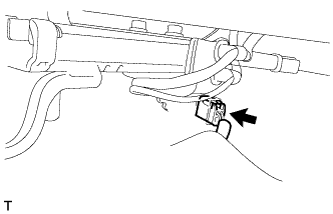 |
Disconnect the buckle switch connector.
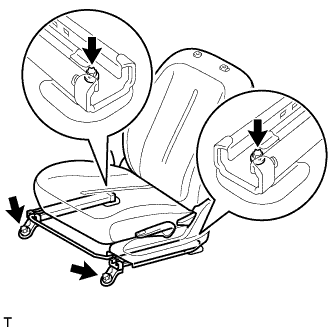 |
Move the front seat to its most rearward position.
Using an E10 "TORX" socket wrench, remove the 2 bolts from the front side.
Move the front seat to its most forward position.
Using an E10 "TORX" socket wrench, remove the 2 bolts from the rear side.
Remove the front seat.
| 4. REMOVE FRONT SEAT ASSEMBLY (for RH Side) |
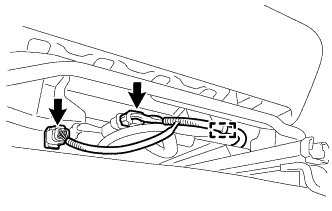 |
Using a clip remover, remove the clamp.
Disconnect the buckle switch connector.
Disconnect the occupant detection ECU connector.
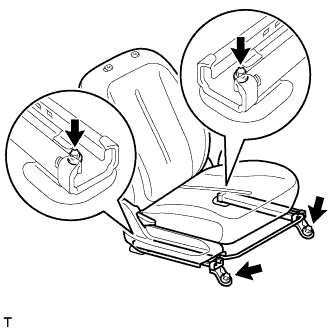 |
Move the front seat to its most rearward position.
Using an E10 "TORX" socket wrench, remove the 2 bolts from the front side.
Move the front seat to its most forward position.
Using an E10 "TORX" socket wrench, remove the 2 bolts from the rear side.
Remove the front seat.